Easy Dairy-Free Pesto – Flavorful & Quick
Dairy Free Pesto is a vibrant, herbaceous delight that can transform any dish from ordinary to extraordinary. For so long, pesto has been a cornerstone of Italian-inspired cuisine, beloved for its intense basil flavor, garlicky punch, and creamy, rich texture. But what if you’re avoiding dairy? Fear not! This dairy free pesto recipe delivers all the authentic taste and beautiful green hue you crave, without a trace of cheese. It’s incredibly versatile, perfect for tossing with pasta, spreading on sandwiches, dolloping onto roasted vegetables, or even as a dip. What makes this version so special is how we achieve that satisfying creaminess and depth of flavor using clever, plant-based ingredients. Get ready to fall in love with pesto all over again, this time completely dairy-free!
Ingredients:
Dairy-Free Pesto: A Burst of Freshness
When you think of pesto, you might immediately picture that vibrant green sauce, fragrant with basil and undeniably delicious. However, traditional pesto often relies on Parmesan cheese for its salty, nutty depth. But what if you’re looking for a dairy-free alternative that doesn’t compromise on flavor? Fear not, because this dairy-free pesto recipe is here to save the day (and your pasta, sandwiches, and everything else you decide to slather it on!). It’s incredibly easy to whip up, bursting with fresh, herbaceous notes, and perfectly suited for anyone avoiding dairy, or even just looking for a lighter, brighter pesto option. I love making a big batch of this and keeping it in the fridge for quick weeknight meals or impressive appetizers. The beauty of homemade pesto is its versatility, and this dairy-free version is no exception.
The key to a truly fantastic pesto, dairy-free or not, is the quality of your ingredients. Fresh basil is paramount; its aromatic leaves are the heart and soul of the sauce. Pine nuts offer a delicate, slightly sweet crunch, but don’t be afraid to experiment with other nuts like walnuts, which provide a richer, earthier flavor, or even pumpkin seeds for a nut-free option that still delivers a satisfying texture. The lemon juice adds a crucial brightness that cuts through the richness of the olive oil and balances the garlicky punch. Nutritional yeast is our secret weapon for achieving that savory, cheesy essence without any dairy. It’s a deactivated yeast that imparts a wonderful umami flavor and a subtle nuttiness, making it a fantastic substitute for Parmesan in vegan and dairy-free cooking.
Crafting Your Dairy-Free Pesto
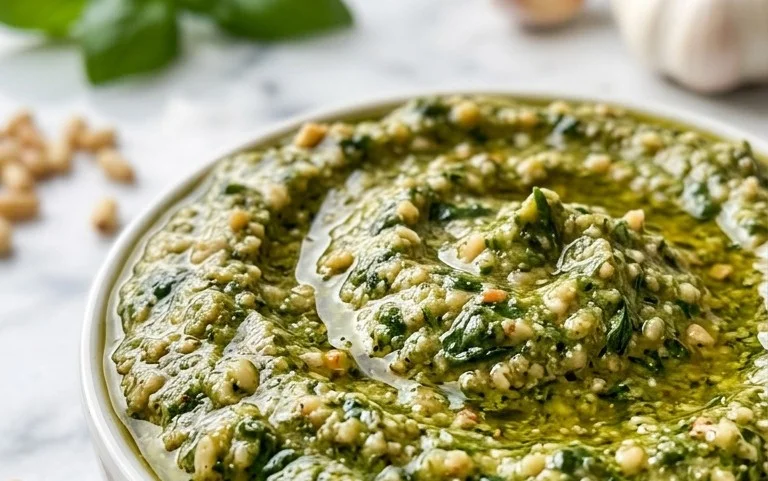
Making pesto at home is wonderfully straightforward, and you don’t need any fancy equipment. A food processor or a good blender will do the trick beautifully. The goal is to achieve a smooth, emulsified sauce with flecks of basil and nuts visible throughout. It’s a culinary alchemy that transforms simple ingredients into something truly special.
1.
Prepare Your Base: Toasting the Nuts (Optional but Recommended!)
Before you begin extract assembling your pesto, I highly recommend toasting your pine nuts (or your chosen substitute). This step is optional, but it significantly elevates the flavor of your pesto by bringin extractg out a deeper, more complex nuttiness. To do this, spread your nuts in a single layer on a dry skillet over medium heat. Stir them frequently – they can go from perfectly toasted to burnt very quickly! – for about 5-7 minutes, until they are fragrant and lightly golden brown. Immediately remove them from the hot pan and let them cool completely. This cooling period is important, as hot nuts can sometimes make your pesto a bit oily. Once cooled, you can proceed to the next step.
2.
Combine the Dry Ingredients and Aromatics
In the bowl of your food processor, add the cooled toasted nuts, peeled garlic cloves, and the salt. If you’re using nutritional yeast, add it now as well. Give these ingredients a quick pulse, just to break them down and create a coarse mixture. You don’t want a fine powder yet; we’re just getting everything started. This initial pulse helps to release the oils from the nuts and garlic, setting the stage for a more flavorful pesto.
3.
Introduce the Star: The Basil
Now it’s time to add your beautiful, fresh basil leaves. Pack them in there – the volume will reduce considerably as you process. It’s best to add the basil in stages if your food processor is on the smaller side to avoid overcrowding. Pulse the food processor until the basil is finely chopped and incorporated into the nut and garlic mixture. Scrape down the sides of the bowl with a spatula occasionally to ensure everything is evenly distributed and processed. You’re looking for a bright green, somewhat textured consistency at this point.
4.
Emulsify with Olive Oil and Lemon
With the food processor running on a low speed, slowly drizzle in the extra virgin extract olive oil. This is where the magic happens – the olive oil will emulsify with the other ingredients, creating that smooth, luscious pesto texture. Continue to stream in the olive oil until you’ve reached your desired consistency. Some people prefer a slightly chunkier pesto, while others like it incredibly smooth. Add the lemon juice and give it a final pulse to combine. Taste your pesto at this stage and adjust the salt and lemon juice as needed. You might find you prefer a bit more tang or a touch more salt to really bring out the flavors.
5.
Achieving the Perfect Consistency and Storage
If your pesto seems a bit too thick for your liking, you can always add a little more olive oil, a tablespoon at a time, until it’s just right. For an even smoother pesto, you can add a tablespoon or two of water while the processor is running. Once you’re happy with the consistency and flavor, transfer your glorious dairy-free pesto to an airtight container. To preserve its vibrant green color and prevent oxidation, press a layer of plastic wrap directly onto the surface of the pesto before sealing the container. This creates a barrier against air. Properly stored in the refrigerator, this dairy-free pesto will keep for up to a week, though I doubt it will last that long! You can also freeze portions of pesto in ice cube trays for even longer storage, then transfer the frozen cubes to a freezer bag. Enjoy it on pasta, spread on sandwiches, dollop onto roasted vegetables, or even as a dip for crusty bread. The possibilities are truly endless!
Conclusion:
And there you have it – a delicious, vibrant, and surprisingly easy dairy free pesto that’s ready to elevate your meals! This recipe is fantastic because it captures all the bright, herbaceous goodness of traditional pesto without any dairy, making it a perfect option for those with lactose intolerance or following a vegan lifestyle. Its versatility is its superpower; think tossing it with your favorite gluten-free pasta, spreading it on toasted sourdough, dolloping it onto grilled vegetables, or even using it as a base for a flavorful marinade. Don’t be afraid to get creative with variations! You can swap out pine nuts for walnuts or almonds, experiment with different herbs like parsley or arugula, or even add a touch of chili flakes for a little heat. I truly encourage you to give this dairy free pesto a try. It’s a game-changer for bringin extractg fantastic flavor to so many dishes.
Frequently Asked Questions:
Can I freeze this dairy free pesto?
Absolutely! This dairy free pesto freezes beautifully. You can portion it into ice cube trays for easy single servings, or store it in an airtight container or freezer bag. It should last for up to 3-4 months in the freezer. Thaw it overnight in the refrigerator before using.
What kind of nuts are best for this pesto if I have a nut allergy?
If you have a nut allergy, you can easily substitute the pine nuts with sunflower seeds or pepitas (pumpkin seeds). They provide a similar texture and a slightly different, but still delicious, nutty flavor. Just toast them lightly for enhanced taste before blending!
How long does the dairy free pesto last in the refrigerator?
When stored properly in an airtight container in the refrigerator, this dairy free pesto will generally stay fresh for about 5-7 days. You can also add a thin layer of olive oil on top before sealing the container, which can help further preserve its freshness and vibrant green color.
Dairy Free Pesto
A vibrant and flavorful dairy-free pesto recipe, perfect for pasta, sandwiches, and more. Uses fresh basil, pine nuts, garlic, lemon, and olive oil, with optional nutritional yeast for a cheesy flavor.
Ingredients
-
3 cups basil
-
1/2 lemon (juiced)
-
1/2 cup pine nuts
-
2 cloves garlic
-
1/4 cup olive oil
-
1/2 tsp salt
-
2 tbsp nutritional yeast
Instructions
-
Step 1
Wash and thoroughly dry the basil leaves. -
Step 2
In a food processor, combine basil, pine nuts, garlic cloves, and salt. -
Step 3
Pulse until the ingredients are coarsely chopped. -
Step 4
With the food processor running, slowly drizzle in the olive oil until the pesto is well combined and has a smooth consistency. -
Step 5
Add the lemon juice and nutritional yeast (if using) and pulse a few more times to incorporate. -
Step 6
Taste and adjust seasoning if needed, adding more salt or lemon juice as desired.
Important Information
Nutrition Facts (Per Serving)
It is important to consider this information as approximate and not to use it as definitive health advice.
Allergy Information
Please check ingredients for potential allergens and consult a health professional if in doubt.