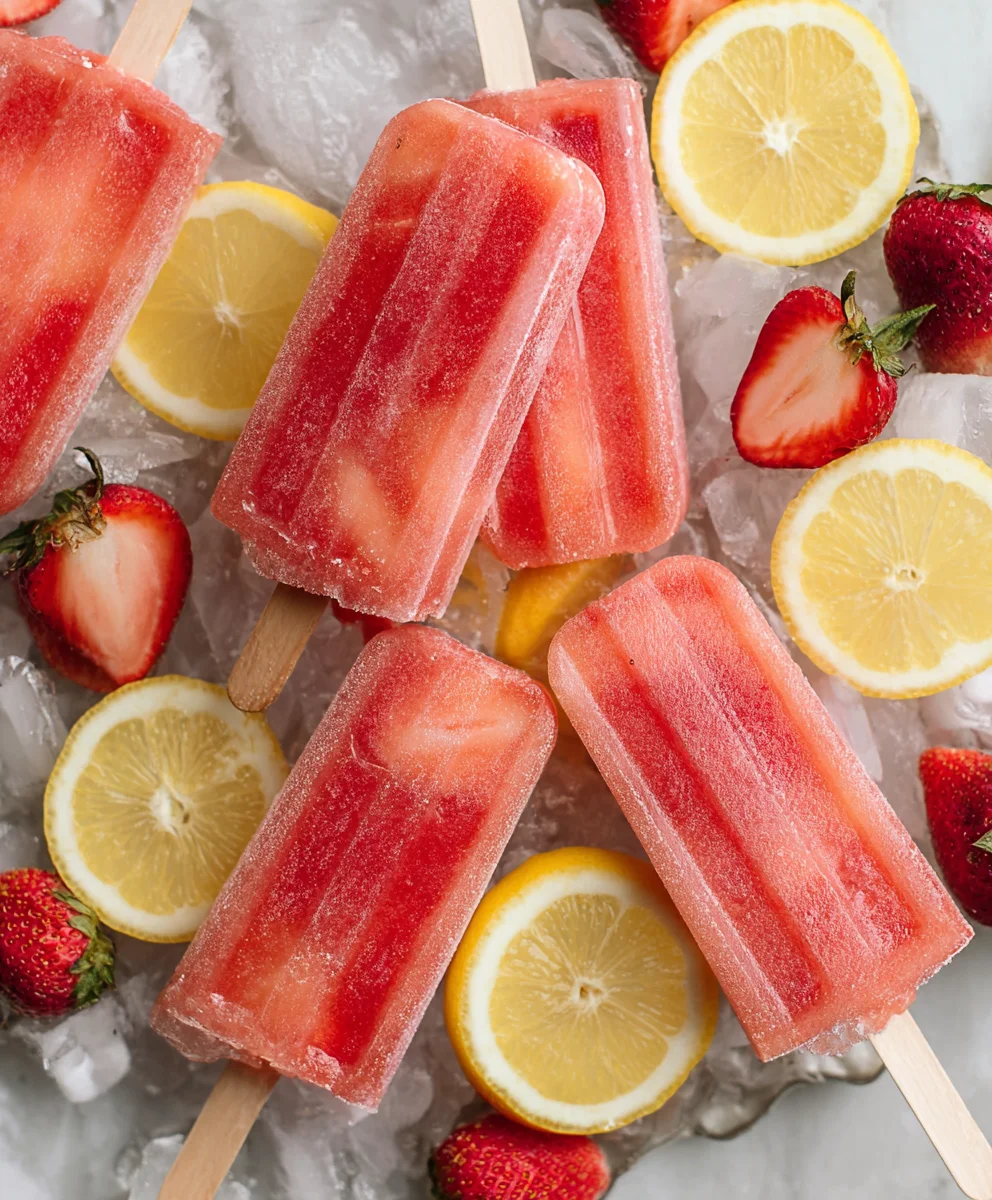
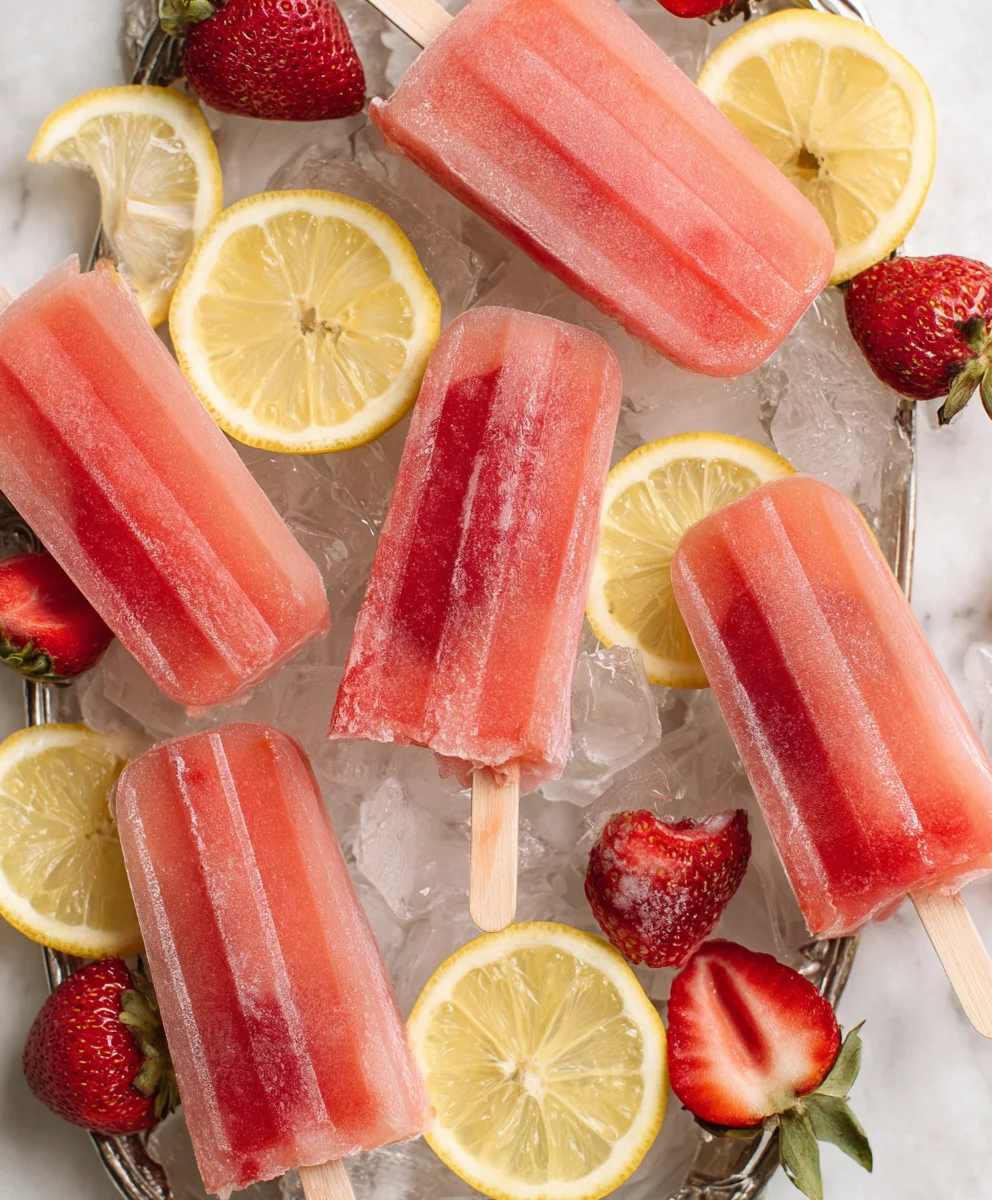
Strawberry Lemonade Popsicles- Refreshing Frozen Treat
Strawberry Lemonade Popsicles are the ultimate summer treat, and for good reason! These vibrant, icy delights capture the essence of a warm, sunny day with every refreshing lick. We all remember the pure joy of a perfectly frozen popsicle, and these Strawberry Lemonade Popsicles elevate that nostalgic experience into something truly special. They’re not just a simple frozen juice; they’re a harmonious marriage of sweet, ripe strawberries and the zesty tang of fresh lemons, creating a flavor profile that is both invigorating and incredibly satisfying. This recipe makes them incredibly easy to whip up at home, ensuring you have a cool, delicious escape whenever the craving strikes. Get ready to create a batch that will have everyone reaching for seconds!
Ingredients:
- 1 container Simply Lemonade
- 1 cup strawberries, diced
- 1 TBSP sugar
Preparing the Strawberry Lemonade Base
Step 1: Muddle the Strawberries for Maximum Flavor
The first step to achieving incredibly flavorful Strawberry Lemonade Popsicles is to properly prepare your strawberries. Take your 1 cup of diced strawberries and place them into a medium-sized bowl. Now, it’s time to release their natural juices and sweetness. You can use a muddler, the back of a wooden spoon, or even a sturdy fork for this. Gently press and twist the strawberries against the bottom of the bowl. You’re not aiming for a puree, but rather to break down the fruit cells so that the delicious strawberry essence can meld beautifully with the lemonade. You’ll notice the berries start to release their vibrant red juice. Continue muddling until you have a chunky, juicy strawberry mixture. This process is crucial for infusing the popsicles with a deep, authentic strawberry flavor, rather than just having whole pieces of fruit suspended within.
Step 2: Sweeten and Combine with Lemonade
Once your strawberries are nicely muddled, it’s time to add the sugar. Sprinkle the 1 TBSP of sugar directly over the muddled strawberries. The sugar will help to draw out even more moisture from the strawberries and also adds a touch of sweetness that balances the tartness of the lemonade. Stir the sugar into the strawberry mixture well. Now, pour the entire container of Simply Lemonade into the bowl with the strawberries and sugar. Give everything a good stir to ensure the sugar is dissolved and the strawberry mixture is evenly distributed throughout the lemonade. Taste a small spoonful of the mixture. This is your chance to adjust the sweetness if you prefer. If your strawberries were particularly tart, or if you have a preference for sweeter popsicles, you can add another teaspoon of sugar at this stage and stir until dissolved.
Assembling and Freezing the Popsicles
Step 3: Fill Your Popsicle Molds
Now for the exciting part – getting your delicious strawberry lemonade mixture into the popsicle molds! Before you begin extract filling, make sure your popsicle molds are clean and ready to go. It’s often helpful to place the popsicle molds on a small baking sheet or tray. This tray will make it much easier to transfer the filled molds to the freezer without any accidental spills. Carefully ladle or pour the strawberry lemonade mixture into each mold. You want to fill them almost to the very top, leaving just a tiny bit of space, perhaps about ¼ inch. This is because as the liquid freezes, it will expand slightly. Overfilling could lead to messy overflows and make it difficult to get the popsicle sticks in securely.
Step 4: Insert Popsicle Stickgin extractnd Begin Freezing
Once all your popsicle molds are filled, it’s time to add the sticks. If your popsicle molds have built-in holders for the sticks, insert them now according to the mold’s instructions. If you are using molds without integrated holders, you will need to freeze the popsicles for about 1 to 2 hours until they are partially set. This semi-frozen stage is important because it will allow the popsicle sticks to stand upright when you insert them. Once the mixture is firm enough to support the stick, carefully press each popsicle stick into the center of each mold. Ensure the sticks are centered for even freezing and easy removal later. After inserting the sticks, carefully transfer the baking sheet with the filled molds into the freezer.
Step 5: The Waiting Game – Freezing to Perfection
Now comes the most patient part of the process: waiting for your Strawberry Lemonade Popsicles to freeze solid. This typically takes at least 4 to 6 hours, but for the best results, it’s ideal to let them freeze overnight. The longer they freeze, the firmer and more perfectly formed your popsicles will be. During this time, the lemonade will transform into a delightful frozen treat, with the vibrant color of the strawberries infused throughout. Resist the urge to check on them too frequently, as opening the freezer door repeatedly can slow down the freezing process. Once they are completely frozen and solid, your delicious homemade Strawberry Lemonade Popsicles will be ready to be enjoyed. This simple yet satisfying treat is perfect for a hot summer day or any time you’re craving a refreshing burst of fruity flavor.
Conclusion:
There you have it – the simple and refreshing recipe for Strawberry Lemonade Popsicles! We’ve walked through how to blend ripe strawberries with zesty lemonade to create a delightful frozen treat that’s perfect for a hot summer day or any time you’re craving a burst of fruity sweetness. These popsicles are incredibly versatile, offering a healthy and delicious alternative to store-bought options.
To elevate your enjoyment, I love serving these Strawberry Lemonade Popsicles on a warm afternoon with a side of fresh berries or a light salad. For variations, consider adding a few fresh mint leaves to the blender for an extra layer of cool flavor, or even swirling in some Greek yogurt for a creamier texture. Don’t be afraid to experiment with different berry combinations if strawberries aren’t in season!
I truly hope you enjoy making and, more importantly, savoring these homemade Strawberry Lemonade Popsicles. They’re a fantastic way to beat the heat and impress your friends and family with minimal effort. Happy freezing!
FAQs:
Can I use frozen strawberries instead of fresh?
Absolutely! Frozen strawberries work wonderfully in this Strawberry Lemonade Popsicles recipe. In fact, they can make the blending process even easier and contribute to a thicker, more slushy-like consistency. Just thaw them slightly before blending for the best results.
What kind of sweetener can I use if I don’t want to use sugar?
You have several options! You can use honey, maple syrup, or agave nectar. Start with a smaller amount and taste the mixture before adding more, as these natural sweeteners can be quite potent. Stevia or other sugar substitutes can also be used, following the package instructions for sweetness equivnon-alcoholic alent to sugar.
Strawberry Lemonade Popsicles- Refreshing Frozen Treat
A simple and delicious homemade popsicle recipe perfect for a hot summer day, featuring a vibrant blend of strawberries and tangy lemonade.
Ingredients
-
1 container Simply Lemonade
-
1 cup strawberries, diced
-
1 TBSP sugar
-
Water (for washing strawberries)
-
Ice (for chilling)
-
Lemon juice (optional, for extra tartness)
Instructions
-
Step 1
Wash and dice 1 cup of strawberries. Place the diced strawberries into a medium-sized bowl. -
Step 2
Muddle the strawberries gently using a muddler, the back of a wooden spoon, or a fork until they release their juices and become a chunky, juicy mixture. This enhances the strawberry flavor. -
Step 3
Add 1 TBSP of sugar to the muddled strawberries and stir well. The sugar helps draw out moisture and balances tartness. Taste and add more sugar if desired. -
Step 4
Pour the entire container of Simply Lemonade into the bowl with the strawberry mixture. Stir until the sugar is dissolved and the mixture is evenly distributed. -
Step 5
Carefully fill popsicle molds, leaving about ¼ inch of space at the top for expansion during freezing. Place the molds on a baking sheet for easy transport. -
Step 6
Insert popsicle sticks. If your molds have built-in holders, insert them now. Otherwise, freeze for 1-2 hours until partially set, then insert sticks. -
Step 7
Transfer the baking sheet with the filled molds to the freezer. Freeze for at least 4-6 hours, or preferably overnight, until completely solid.
Important Information
Nutrition Facts (Per Serving)
It is important to consider this information as approximate and not to use it as definitive health advice.
Allergy Information
Please check ingredients for potential allergens and consult a health professional if in doubt.