Sticky Coconut Cake Recipe- Deliciously Moist & Easy
Sticky Coconut Cake is the ultimate embrace for your sweet tooth. There’s something undeniably magical about a cake that’s both tender and incredibly moist, with that signature caramel-like glaze that clings to every crum extractb. It’s a flavor combination that instantly transports me to sun-drenched beaches and evokes pure comfort. People adore this dessert because it’s a delightful dance of textures and tastes: the subtle sweetness of coconut married with a rich, sticky topping that’s utterly irresistible. What truly sets this Sticky Coconut Cake apart is its ability to be both sophisticated enough for a special occasion and wonderfully comforting for an everyday treat. Get ready to fall head over heels for this spectacular bake!
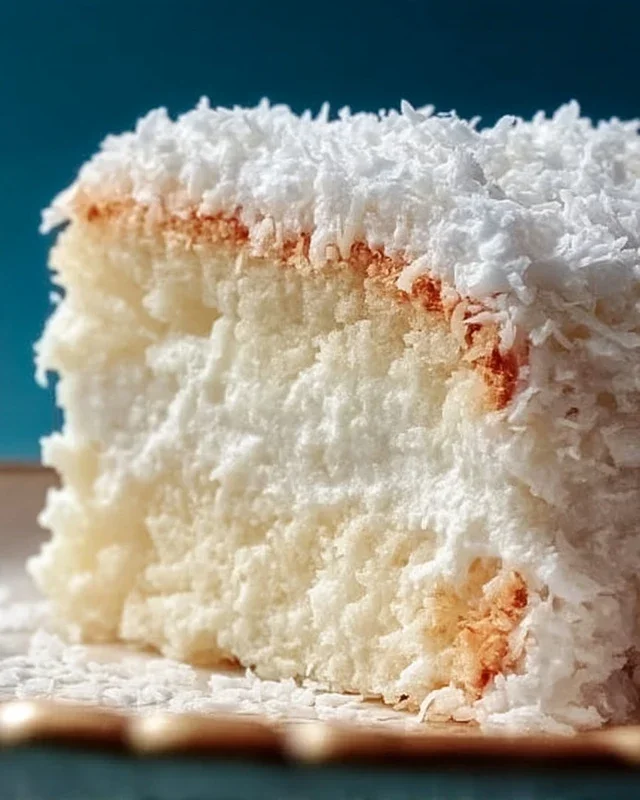
Sticky Coconut Cake
This Sticky Coconut Cake is an absolute dream for anyone who loves rich, comforting flavors and a delightful chewy texture. It’s the kind of cake that transports you to a tropical paradise with every bite. Unlike your typical airy cakes, this one boasts a wonderfully dense and moist crum extractb, thanks to the generous use of coconut milk and glutinous rice flour. The toasty sweetness of the shredded coconut adds another layer of irresistible flavor and texture. It’s surprisingly simple to make, and the result is a truly show-stopping dessert that’s perfect for sharing (or not!).
Ingredients:
Instructions:
Preparing the Wet Ingredients:
First things first, let’s get our wet ingredients ready. In a large bowl, whisk together the 2 egg yolks with the 1¼ cup of granulated sugar until the mixture is pnon-alcoholic ale yellow and slightly thickened. This step is important for creating a smooth base for our cake. Next, pour in the 2¼ cup of full fat canned coconut milk and the 1 teaspoon of vanilla extract. Whisk everything together until it’s beautifully combined. Full fat coconut milk is key here; it contributes significantly to the cake’s incredible moisture and rich coconut flavor. Don’t skimp on it! If you can’t find full fat, use the richest canned coconut milk you can find.
Incorporating the Dry Ingredients:
Now, it’s time to add our dry ingredients to the wet mixture. Gradually add the 1½ cup of glutinous rice flour to the bowl, whisking continuously. Glutinous rice flour is what gives this cake its signature chewy, sticky texture. It’s different from regular rice flour, so make sure you’re using the right kind for that authentic texture. Whisk until there are no lumps and you have a smooth, pourable batter. Don’t overmix at this stage; just ensure everything is incorporated.
Adding the Coconut Goodness:
This is where our cake gets its incredible coconut punch! Gently fold in the 3 cups of shredded sweetened coconut. Be careful not to overmix here; we want to keep the batter light and airy as much as possible, even though this is a dense cake. The shredded coconut will be distributed throughout the batter, providing delightful pockets of flavor and texture. Make sure you’re using sweetened shredded coconut, as this contributes to the overall sweetness of the cake. If you prefer a less sweet cake, you could potentially reduce the sugar slightly, but the sweetness from the coconut is part of its charm.
Whipping the Egg Whites:
In a separate, clean bowl, whip the 2 egg whites until stiff peaks form. This is a crucial step for giving our dense cake a little lift and making it lighter than it would be otherwise. Make sure your bowl and whisk are completely free of any grease or yolk, as this will prevent the egg whites from whipping properly. You can test if they’re ready by gently inverting the bowl; if the egg whites stay put, you’ve got stiff peaks! Now, gently fold about a third of the whipped egg whites into the coconut batter. This is called ‘lightening’ the batter and helps to incorporate the egg whites without deflating them too much. Once that’s incorporated, gently fold in the remaining egg whites until just combined. You want to see streaks of white still; overmixing will knock out all that precious air.
Baking to Perfection:
Preheat your oven to 350°F (175°C). Grease and flour a 9×13 inch baking pan, or line it with parchment paper for easy removal. Pour the batter evenly into the prepared pan. Smooth the top with a spatula. Bake for 45-55 minutes, or until a toothpick inserted into the center comes out clean. The top should be golden brown and the edges should start to pull away slightly from the sides of the pan. The aroma that will fill your kitchen is simply divine – a sweet, tropical symphony! Once baked, let the cake cool in the pan for about 15-20 minutes before attempting to invert it onto a wire rack to cool completely. This resting period is important for the cake to set properly and makes it easier to handle. Enjoy this wonderfully chewy, moist, and intensely coconutty treat!

Conclusion:
There you have it – a delightful recipe for Sticky Coconut Cake that I absolutely adore! This cake is truly wonderful because of its wonderfully moist crum extractb, infused with the tropical sweetness of coconut, and crowned with that irresistible sticky glaze. It’s the perfect balance of tender cake and sweet, chewy topping, making every bite a little piece of heaven. It’s also surprisingly straightforward to make, which is always a bonus in my book!
I love serving this Sticky Coconut Cake slightly warm, perhaps with a dollop of whipped cream or a scoop of vanilla bean ice cream for an extra touch of indulgence. It’s also fantastic on its own, with a cup of coffee or tea. If you’re feeling adventurous, try adding a sprinkle of toasted shredded coconut over the glaze once it’s set for an even more intense coconut flavor and a delightful crunch. You could also experiment with adding a touch of lime zest to the batter for a subtle citrusy zing that complements the coconut beautifully. I truly hope you give this recipe a try; I’m confident you’ll fall in love with it just as much as I have!
Frequently Asked Questions:
How do I store leftover Sticky Coconut Cake?
You can store any leftover Sticky Coconut Cake in an airtight container at room temperature for up to 3 days. If your kitchen is particularly warm, or if you prefer a firmer glaze, you can refrigerate it, but be sure to let it come back to room temperature before serving for the best texture.
Can I make this cake ahead of time?
Absolutely! The cake itself bakes beautifully and can be made a day in advance. The sticky glaze is best applied when the cake is still slightly warm from baking, but if you need to make it entirely ahead, you can prepare the glaze separately and gently reheat it before pouring over the cooled cake. Ensure the glaze is fully set before storing.
What kind of coconut is best for this recipe?
For the best results in this Sticky Coconut Cake, I recommend using unsweetened shredded coconut for both the cake batter and for sprinkling on top. This allows you to control the sweetness better. If you can only find sweetened, you might want to slightly reduce the sugar in the cake batter to compensate.
Sticky Coconut Cake
A moist and sweet cake with a delightful chewy texture, made with coconut milk and shredded coconut.
Ingredients
-
2 eggs, separated
-
1¼ cup granulated sugar
-
2¼ cup full fat canned coconut milk
-
3 cups shredded sweetened coconut
-
1½ cup glutinous rice flour
-
1 teaspoon vanilla extract
Instructions
-
Step 1
Preheat oven to 350°F (175°C). Grease and flour a 9×13 inch baking pan. -
Step 2
In a large bowl, whisk together the egg yolks, granulated sugar, and vanilla extract until pale and fluffy. -
Step 3
Gradually whisk in the coconut milk until well combined. -
Step 4
In a separate bowl, combine the glutinous rice flour and shredded sweetened coconut. Add this to the wet ingredients and mix until just combined. Do not overmix. -
Step 5
In another clean bowl, beat the egg whites until stiff peaks form. Gently fold the beaten egg whites into the cake batter. -
Step 6
Pour the batter into the prepared baking pan and spread evenly. -
Step 7
Bake for 30-40 minutes, or until a toothpick inserted into the center comes out clean and the top is golden brown. -
Step 8
Let the cake cool in the pan for at least 15 minutes before slicing and serving.
Important Information
Nutrition Facts (Per Serving)
It is important to consider this information as approximate and not to use it as definitive health advice.
Allergy Information
Please check ingredients for potential allergens and consult a health professional if in doubt.