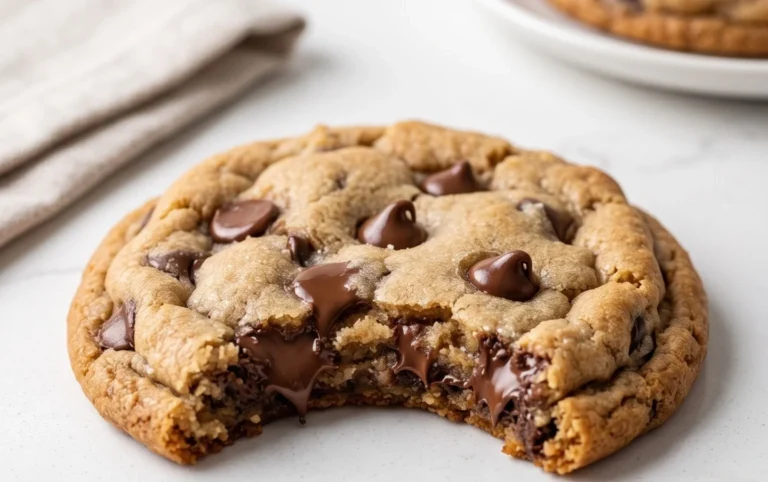
Easter Chocolate Chip Cookies-Easy Festive Recipe
Easter Chocolate Chip Cookies are more than just a treat; they’re a gateway to cherished memories and springtime joy. There’s something undeniably magical about these soft, chewy cookies, studded with rich chocolate chips and often adorned with festive pastel candies, that instantly transports us back to childhood Easters spent with loved ones. The aroma alone, wafting from the oven, is enough to make anyone’s non-alcoholic spirits soar. People adore them for their comforting familiarity, the perfect balance of sweet dough and melting chocolate, and the sheer delight they bring to any celebration. What truly makes these Easter Chocolate Chip Cookies special is the opportunity to infuse them with a touch of spring’s vibrant energy, turning a classic into something wonderfully unique and celebratory.
Ingredients:
- 2½ cups all-purpose flour
- 1 teaspoon baking soda
- ½ teaspoon salt
- 1 cup unsalted butter, softened
- ¾ cup granulated sugar
- ¾ cup brown sugar, packed
- 2 large eggs
- 2 teaspoons vanilla extract
- Gel food coloring (pastel pink, purple, yellow, and blue)
- 2 cups chocolate chips, plus extra for topping
Preparing the Dough Base
Step 1: Dry Ingredient Assembly
First things first, let’s get our dry ingredients ready. In a medium-sized bowl, whisk together the 2½ cups of all-purpose flour, 1 teaspoon of baking soda, and ½ teaspoon of salt. Whisking ensures that the baking soda and salt are evenly distributed throughout the flour, which is crucial for consistent cookie texture and leavening. This prevents pockets of saltiness or a cookie that doesn’t spread properly. Set this bowl aside; we’ll be bringin extractg it into play shortly.
Step 2: Creaming the Butter and Sugars
Now, let’s move on to the wet ingredients. In a large mixing bowl, or the bowl of your stand mixer fitted with the paddle attachment, cream together the 1 cup of softened unsalted butter with ¾ cup of granulated sugar and ¾ cup of packed brown sugar. Creaming means beating these ingredients together until they are light and fluffy, with a pnon-alcoholic ale yellow color. This process incorporates air into the mixture, which contributes to the cookies’ tender texture and helps them spread just the right amount during baking. Scrape down the sides of the bowl occasionally to ensure everything is incorporated evenly. This step typically takes about 3-5 minutes on medium speed.
Incorporating Wet Ingredients and Color
Step 3: Adding Eggs and Vanilla
Once the butter and sugars are beautifully creamed, it’s time to add the eggs and vanilla. Add the 2 large eggs, one at a time, beating well after each addition until fully incorporated. It’s important to ensure each egg is mixed in thoroughly before adding the next to maintain a smooth emulsion. Next, stir in the 2 teaspoons of vanilla extract. The vanilla not only adds a wonderful aroma and flavor but also enhances the overall sweetness of the Easter Chocolate Chip Cookies. Continue mixing until everything is well combined.
Step 4: Gradually Adding Dry Ingredients
With the wet ingredients all beautifully blended, it’s time to bring in our dry ingredient mixture. Gradually add the flour mixture to the wet ingredients, mixing on low speed (or by hand with a sturdy spatula) until just combined. Be careful not to overmix at this stage. Overmixing can develop the gluten in the flour too much, leading to tough cookies. You’re looking for a dough that comes together, with no dry streaks of flour visible. Once the dough is almost formed, gently fold in the 2 cups of chocolate chips using your spatula. Reserve a small handful of chocolate chips for pressing onto the tops of the cookies before baking, if you like that extra chocolatey touch.
Creating the Easter Hues
Step 5: Dividing and Coloring the Dough
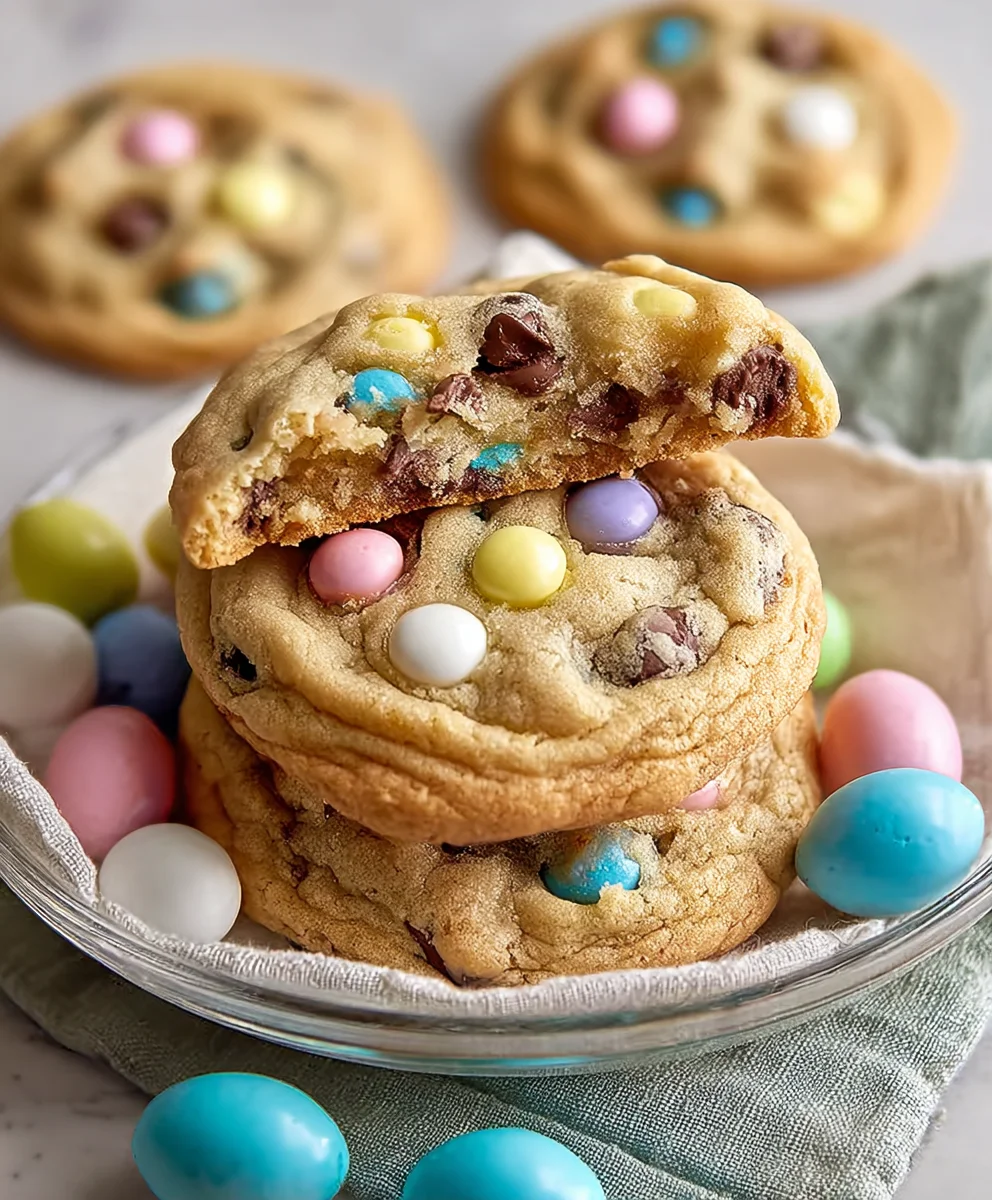
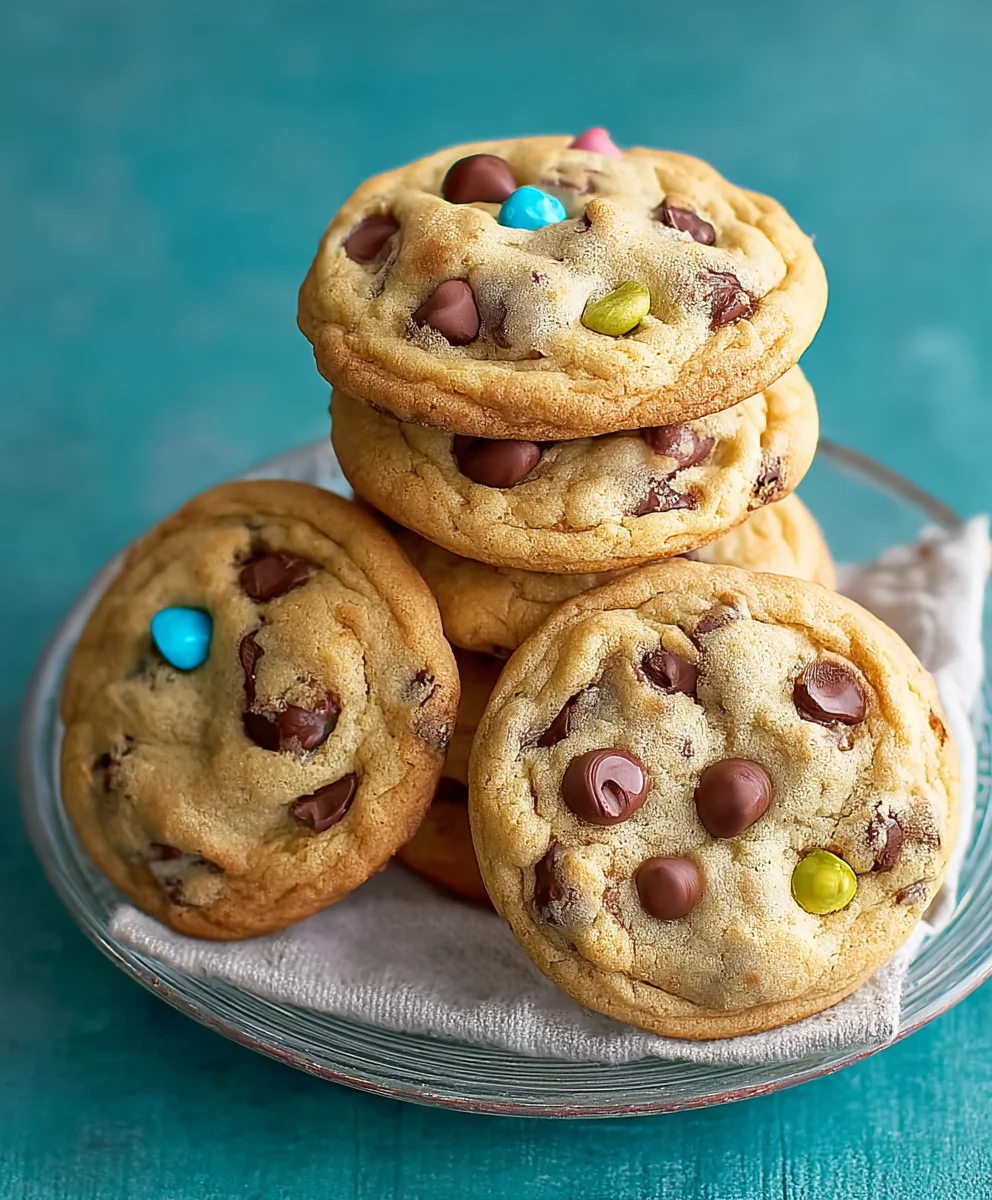
This is where the magic happens for our Easter Chocolate Chip Cookies! Divide the cookie dough into four equal portions. Place each portion into a separate small bowl. Now, take your gel food coloring. Add a few drops of pastel pink gel food coloring to one bowl, pastel purple to another, pastel yellow to a third, and pastel blue to the last. Gel food coloring is more concentrated than liquid coloring, meaning you’ll need less to achieve vibrant colors, and it won’t add extra liquid to your dough. Gently knead the color into each portion of dough until it’s evenly distributed and the color is consistent. Again, avoid overmixing; we want tender cookies. For a marbled effect, you can lightly swirl two colors together before proceeding, but for distinct pastel colors, ensure each portion is uniformly colored.
Baking and Finishing Touches
Step 6: Chilling and Shaping the Cookies
For the best results and to prevent excessive spreading, it’s highly recommended to chill the colored cookie doughs. Cover each bowl tightly with plastic wrap and refrigerate for at least 30 minutes, or up to 2 days. This allows the butter to firm up. Once chilled, take spoonfuls of dough (about 1.5 tablespoons each) and gently roll them into balls. For a mixed-color effect, you can take smaller pieces of different colored dough and press them together before rolling into a single ball. Place the dough balls about 2 inches apart on baking sheets lined with parchment paper. If you reserved some chocolate chips, press a few onto the tops of each dough ball.
Step 7: Baking to Golden Perfection
Preheat your oven to 375°F (190°C). Bake the cookies for 9-12 minutes, or until the edges are lightly golden brown and the centers still look slightly soft. The cookies will continue to set as they cool on the baking sheet. Baking time will vary slightly depending on your oven and the size of your cookies. Keep a close eye on them during the last few minutes to avoid overbaking. Once baked, let the cookies cool on the baking sheets for 5 minutes before transferring them to a wire rack to cool completely. Enjoy your beautiful and delicious Easter Chocolate Chip Cookies!
Conclusion:
There you have it! Crafting these delightful Easter Chocolate Chip Cookies is a rewarding experience that brings a touch of sweetness and festivity to your celebrations. This recipe is designed to be straightforward, ensuring even novice bakers can achieve wonderfully chewy centers and perfectly crisp edges. The aroma alone will fill your home with the joy of spring. Don’t be afraid to get creative with your decorations – sprinkles, pastel-colored icing, or even edible glitter can elevate these cookies to an art form. I encourage you to gather your loved ones and make this a shared baking adventure. These cookies are perfect for Easter egg hunts, classroom parties, or simply enjoying with a glass of cold milk. They’re a timeless treat that always brings smiles.
Frequently Asked Questions:
Q: How can I ensure my Easter Chocolate Chip Cookies are chewy?
To achieve maximum chegrape juicess, be careful not to overbake your cookies. Look for the edges to be golden brown and set, but the centers should still appear slightly soft. They will continue to set as they cool on the baking sheet. Using a higher ratio of brown sugar to white sugar in the dough also contributes to a chewier texture.
Q: Can I make the dough for these Easter Chocolate Chip Cookies ahead of time?
Absolutely! The dough can be made up to 2-3 days in advance and stored in an airtight container in the refrigerator. This chilling period actually enhances the flavor of the cookies. Simply scoop and bake as usual, though you might need to add a minute or two to the baking time if the dough is very cold.
Easter Chocolate Chip Cookies-Easy Festive Recipe
A simple and festive recipe for Easter-themed chocolate chip cookies featuring pastel colors.
Ingredients
-
2½ cups all-purpose flour
-
1 teaspoon baking soda
-
½ teaspoon salt
-
1 cup unsalted butter, softened
-
¾ cup granulated sugar
-
¾ cup brown sugar, packed
-
2 large eggs
-
2 teaspoons vanilla extract
-
Gel food coloring (pastel pink, purple, yellow, and blue)
-
2 cups chocolate chips, plus extra for topping
Instructions
-
Step 1
In a medium bowl, whisk together the flour, baking soda, and salt. Set aside. In a large bowl, cream together softened butter with granulated sugar and brown sugar until light and fluffy. This incorporates air for a tender texture. -
Step 2
Add the eggs one at a time to the creamed butter and sugar mixture, beating well after each addition until fully incorporated. Stir in the vanilla extract. -
Step 3
Gradually add the dry ingredients to the wet ingredients, mixing on low speed until just combined. Be careful not to overmix. Gently fold in 2 cups of chocolate chips. -
Step 4
Divide the dough into four equal portions. Place each portion in a separate bowl and add pastel gel food coloring (pink, purple, yellow, blue) to each. Gently knead the color into each portion until evenly distributed. -
Step 5
Cover each bowl and refrigerate the colored doughs for at least 30 minutes to prevent excessive spreading. Once chilled, take spoonfuls of dough (about 1.5 tablespoons each) and gently roll them into balls. You can combine small pieces of different colored dough for a mixed-color effect. Place dough balls about 2 inches apart on parchment-lined baking sheets. Press extra chocolate chips onto the tops if desired. -
Step 6
Preheat oven to 375°F (190°C). Bake for 9-12 minutes, or until the edges are lightly golden brown and the centers still look slightly soft. Let cookies cool on the baking sheets for 5 minutes before transferring to a wire rack to cool completely.
Important Information
Nutrition Facts (Per Serving)
It is important to consider this information as approximate and not to use it as definitive health advice.
Allergy Information
Please check ingredients for potential allergens and consult a health professional if in doubt.