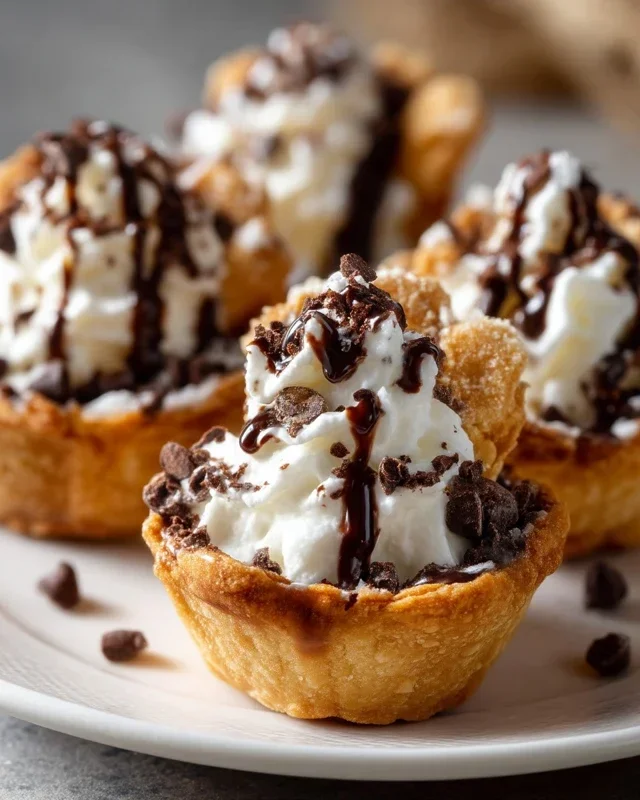
Chocolate Chip Cookie Cheesecake – Decadent Dessert
Chocolate Chip Cookie Bottomed Cheesecake. If that phrase alone doesn’t make your taste buds tingle, then you might be immune to pure dessert joy. We all adore a classic cheesecake, that creamy, dreamy delight that’s perfect for any occasion. And who can resist a warm, gooey chocolate chip cookie, studded with melty morsels of chocolatey goodness? Now, imagin extracte these two titans of deliciousness uniting. This isn’t just a dessert; it’s a revelation. The rich, tangy cheesecake filling finds its perfect counterpart in the sweet, buttery, slightly crisp foundation of a homemade chocolate chip cookie crust. It’s the ultimate textural and flavor combination, offering a delightful surprise in every single bite. Get ready to experience dessert nirvana with this unforgettable Chocolate Chip Cookie Bottomed Cheesecake.
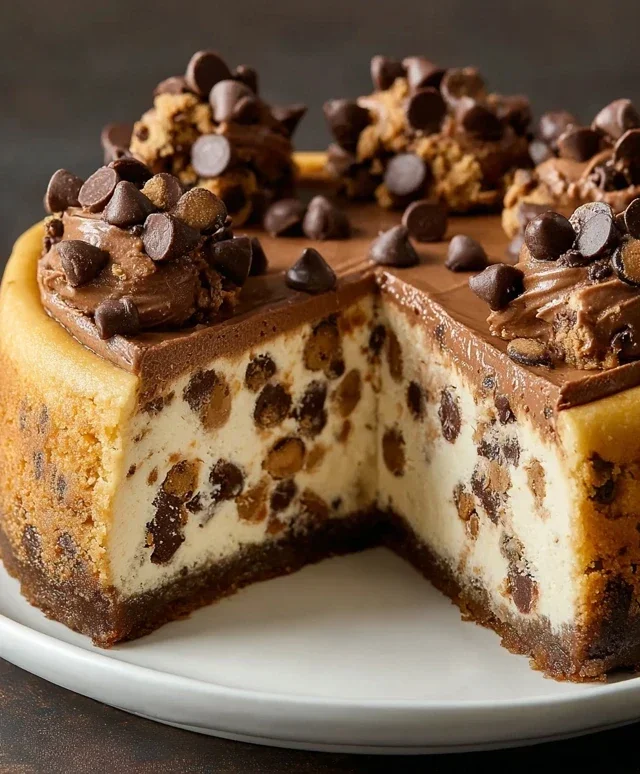
Chocolate Chip Cookie Bottomed Cheesecake
Prepare to indulge in a dessert that brings together two iconic sweet treats: the classic chocolate chip cookie and the decadent cheesecake. This Chocolate Chip Cookie Bottomed Cheesecake is a dream come true for anyone who can’t decide between these beloved classics. We’re layering a buttery, chewy chocolate chip cookie base with a rich, creamy, and slightly chocolatey cheesecake filling. The result is a harmonious blend of textures and flavors that will have everyone asking for seconds. This recipe might seem a little involved, but trust me, the effort is absolutely worth it for this show-stopping dessert.
Ingredients:
Instructions:
Preparing the Chocolate Chip Cookie Base
The foundation of our cheesecake starts with a delicious, slightly chewy chocolate chip cookie dough. In a large mixing bowl, cream together the 112g of room-temperature unsalted butter with 72g of light brown sugar and 39g of granulated sugar. Make sure the butter is truly softened, as this will help create a light and fluffy base. Beat them together until the mixture is pnon-alcoholic ale and creamy, which usually takes about 2-3 minutes with an electric mixer, or a bit longer by hand. Next, add the 1 egg and 1 1/2 teaspoons of vanilla extract. Mix these in until everything is well combined and smooth.
In a separate medium bowl, whisk together 195g of all-purpose flour, 3/4 teaspoon of baking soda, 1/4 teaspoon of baking powder, and 1/4 teaspoon of salt. It’s important to sift these dry ingredients together to ensure they are evenly distributed and to break up any lumps. Gradually add the dry ingredients to the wet ingredients, mixing on low speed or with a spatula until just combined. Be careful not to overmix the dough at this stage, as this can lead to a tough cookie base. Finally, gently fold in 211g of semi-sweet chocolate chips. You want these chips to be distributed throughout the dough.
Press this cookie dough evenly into the bottom of a 9-inch springform pan. I like to use the bottom of a glass or a flat-bottomed measuring cup to get a really uniform layer. This ensures that the entire cheesecake has a consistent cookie base. You can also press the dough slightly up the sides of the pan, about half an inch, to create a little rim. Preheating your oven to 350°F (175°C) is crucial before you start assembling. Bake the cookie base for 10-12 minutes, or until it’s lightly golden brown around the edges. This partial baking will help it hold its shape and prevent it from becoming soggy under the cheesecake filling. Remove the pan from the oven and let the cookie base cool completely while you prepare the cheesecake filling.
Crafting the Creamy Cheesecake Filling
For the cheesecake filling, ensure your 565g of cream cheese is at room temperature. This is probably the most critical step for a smooth, lump-free cheesecake. Cold cream cheese will result in a lumpy filling. In a large mixing bowl, beat the softened cream cheese until it’s completely smooth and creamy, scraping down the sides of the bowl as needed. This might take a few minutes, but it’s essential for the texture.
Add 104g of granulated sugar to the cream cheese and beat again until well combined and smooth. Next, carefully sift in 35g of natural unsweetened cocoa powder. Sifting the cocoa powder is important to prevent any dry clumps from forming in your filling. Mix until the cocoa powder is fully incorporated and the mixture is a beautiful, uniform chocolatey color. Then, add 1 teaspoon of vanilla extract and mix until it’s evenly distributed.
Now, for the richness: gently fold in the 42g of melted semi-sweet chocolate chips. Make sure the melted chocolate has cooled slightly so it doesn’t melt the cream cheese. Fold it in with a spatula until just combined, creating streaks of chocolate or a more uniform color depending on how you like it. The key here is to be gentle and avoid overmixing. We want to keep the filling light and airy.
Assembling and Baking the Cheesecake
Once your cookie base has cooled completely, gently pour the cheesecake filling over it, spreading it evenly with a spatula. Ensure the filling reaches all the edges of the cookie base. Now, it’s time for the baking process, which is where we achieve that perfect creamy texture. You’ll want to bake this cheesecake in a water bath, also known as a bain-marie. This helps to ensure even cooking and prevents the cheesecake from cracking.
To prepare the water bath, wrap the bottom and sides of your springform pan tightly with heavy-duty aluminum foil. Place the foil-wrapped springform pan inside a larger baking pan. Carefully pour boiling water into the larger pan, just enough to come about halfway up the sides of the springform pan. This creates a humid environment in the oven, promoting gentle, even cooking.
Bake the cheesecake at 325°F (160°C) for 50-60 minutes. The cheesecake is ready when the edges are set and slightly puffed, but the center still has a slight wobble when you gently shake the pan. It will continue to set as it cools. Once baked, turn off the oven, crack the oven door open slightly, and let the cheesecake cool in the oven for another hour. This gradual cooling helps prevent cracking.
Chilling and Serving Perfection
After the cheesecake has cooled in the oven, remove it from the water bath and let it cool completely on a wire rack at room temperature. Once it’s at room temperature, cover the cheesecake loosely with plastic wrap and refrigerate it for at least 6 hours, or preferably overnight. This chilling time is crucial for the cheesecake to firm up properly and for the flavors to meld together.
To serve, carefully run a thin knife around the edge of the springform pan to loosen the cheesecake before releasing the sides. Slice with a sharp knife dipped in hot water and wiped dry between each cut for clean slices. Enjoy this decadent Chocolate Chip Cookie Bottomed Cheesecake!
Conclusion:
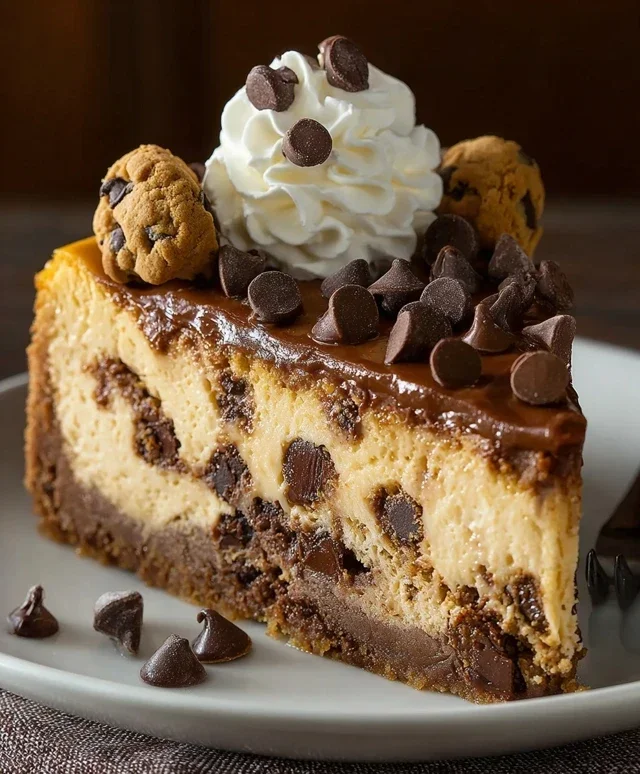
I hope you’re as excited as I am about this Chocolate Chip Cookie Bottomed Cheesecake! This recipe truly hits all the right notes, marrying the creamy indulgence of cheesecake with the irresistible chegrape juicess and buttery goodness of a classic chocolate chip cookie. It’s the perfect dessert for any occasion, from a casual family gathering to a more elegant celebration. The textural contrast is what makes this dessert so special – a crisp, slightly chewy cookie base providing a delightful foundation for the rich, smooth cheesecake filling.
Serving this masterpiece is a joy in itself. A simple dollop of whipped cream or a drizzle of chocolate ganache elevates its already decadent nature. For a bit of freshness, consider a scattering of fresh berries. Don’t be afraid to get creative with variations too! Adding a swirl of caramel into the cheesecake batter, or folding in some toffee bits alongside the chocolate chips in the cookie base, are fantastic ways to personalize it. I wholeheartedly encourage you to give this Chocolate Chip Cookie Bottomed Cheesecake a try. It’s a rewarding bake that’s sure to impress everyone who takes a bite.
Frequently Asked Questions:
Can I make this cheesecake ahead of time?
Absolutely! Cheesecakes are often even better when made a day in advance. This allows the flavors to meld beautifully and the cheesecake to fully set. Once cooled, I recommend covering it tightly and refrigerating it overnight. The cookie bottom will soften slightly, becoming wonderfully integrated with the cheesecake.
What kind of chocolate chips work best?
For this recipe, semi-sweet chocolate chips are my go-to as they offer a balanced sweetness that complements the cheesecake without being overly rich. However, feel free to experiment with milk chocolate for a sweeter profile, dark chocolate for a more intense cocoa flavor, or even a mix of different types!
My cheesecake cracked on top. Is it ruined?
Don’t worry at all! A cracked cheesecake is still delicious. Cracking often happens due to over-baking or rapid temperature changes. The good news is that the cookie bottom and a generous topping of whipped cream or fruit will easily disguise any imperfections. The taste will be just as divine!
Chocolate Chip Cookie Bottomed Cheesecake
A decadent cheesecake featuring a chewy chocolate chip cookie crust, topped with a rich, creamy cheesecake filling infused with cocoa and finished with a chocolate drizzle.
Ingredients
-
112g unsalted butter, room temperature
-
72g light brown sugar
-
39g sugar
-
1 egg
-
1 1/2 tsp vanilla extract
-
195g all-purpose flour
-
3/4 tsp baking soda
-
1/4 tsp baking powder
-
1/4 tsp salt
-
211g semi-sweet chocolate chips
-
565g cream cheese, room temperature
-
104g sugar
-
35g natural unsweetened cocoa powder
-
1 tsp vanilla extract
-
42g semi-sweet chocolate chips, melted
Instructions
-
Step 1
Preheat oven to 350°F (175°C). Grease a 9-inch springform pan. -
Step 2
In a medium bowl, cream together 112g unsalted butter, 72g light brown sugar, and 39g sugar. Beat in 1 egg and 1 1/2 tsp vanilla extract until combined. -
Step 3
In a separate bowl, whisk together 195g all-purpose flour, 3/4 tsp baking soda, 1/4 tsp baking powder, and 1/4 tsp salt. Gradually add the dry ingredients to the wet ingredients, mixing until just combined. Stir in 211g semi-sweet chocolate chips. -
Step 4
Press the cookie dough evenly into the bottom of the prepared springform pan to form the crust. Bake for 15-20 minutes, or until lightly golden brown. Let cool slightly. -
Step 5
In a large bowl, beat 565g cream cheese until smooth. Gradually add 104g sugar and 35g natural unsweetened cocoa powder, mixing until well combined. -
Step 6
Beat in 1 tsp vanilla extract. Pour the cream cheese mixture over the cookie crust. Smooth the top. -
Step 7
Bake for 50-60 minutes, or until the edges are set and the center is still slightly jiggly. Turn off the oven and let the cheesecake cool in the oven with the door ajar for 1 hour. -
Step 8
Remove from oven and let cool completely on a wire rack. Once cooled, drizzle with 42g melted semi-sweet chocolate chips. Chill for at least 4 hours before serving.
Important Information
Nutrition Facts (Per Serving)
It is important to consider this information as approximate and not to use it as definitive health advice.
Allergy Information
Please check ingredients for potential allergens and consult a health professional if in doubt.