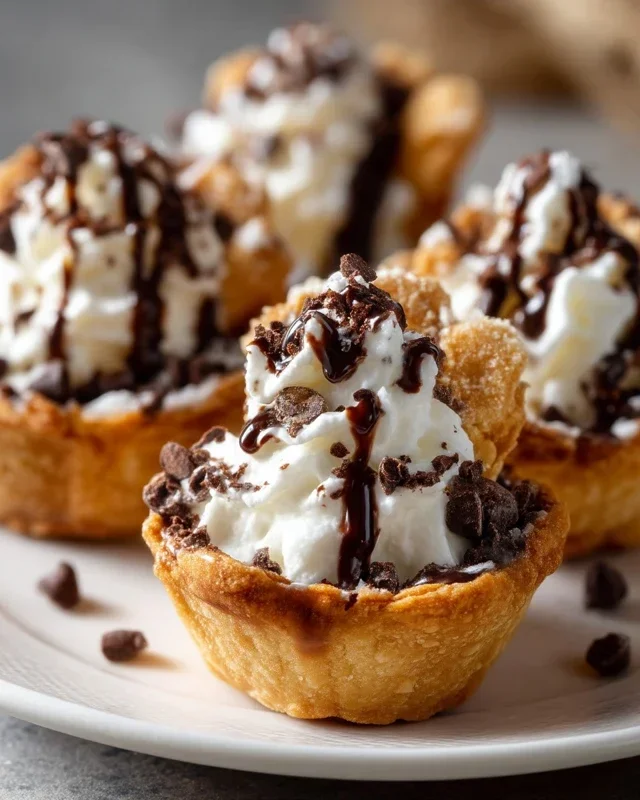
Mini Cannoli Cups Easy Dessert Recipe
Mini cannoli cups are about to become your new favorite dessert obsession! If you’ve ever dreamt of indulgin extractg in the classic, irresistible crunch and creamy sweetness of traditional cannoli without the fuss of rolling shells, then these mini cannoli cups are for you. We all adore the iconic Italian treat – that delightful contrast of a crisp, fried shell giving way to a rich, sweet ricotta filling, often studded with chocolate chips or candied fruit. But let’s be honest, the process can be a little intimidating. That’s where our mini cannoli cups shine, transforming this beloved pastry into an approachable, bite-sized delight. These aren’t just smaller versions; they’re a clever reimagin extracting that captures all the beloved flavors and textures, making them perfect for parties, potlucks, or simply a sweet afternoon treat. Get ready to fall in love with these adorable and delicious mini cannoli cups!
Mini Cannoli Cups
Get ready to delight your taste buds with these incredibly easy and utterly delicious Mini Cannoli Cups! Forget the hassle of rolling and frying traditional cannoli shells. We’re taking a shortcut using store-bought pie crusts that results in a perfectly crisp, golden shell, ready to be filled with a luscious, creamy ricotta filling. These little gems are perfect for parties, a special dessert, or just when you’re craving a taste of Italy without all the fuss. They’re a guaranteed crowd-pleaser and surprisingly simple to make. Let’s get started on creating these delightful treats!
Ingredients:
Creating the Irresistible Ricotta Filling
The heart of any cannoli is its creamy filling, and ours is no exception. To start, make sure your ricotta cheese is well-drained. You can do this by placing it in a fine-mesh sieve lined with cheesecloth or a coffee filter over a bowl and letting it sit in the refrigerator for at least an hour, or even overnight. This step is crucial for achieving a thick, luscious filling rather than a watery one. Once drained, transfer the ricotta to a medium bowl. Add the powdered sugar and granulated sugar to the bowl.
Now, it’s time for that burst of fresh flavor! Add the finely grated orange or lemon zest. I personally love the bright, zesty kick of orange zest, but lemon is equally wonderful. Follow this with the vanilla extract, which adds a warm, sweet aroma. Using a whisk or an electric mixer on low speed, blend these ingredients together until the mixture is smooth, creamy, and well combined. Taste a little bit (you deserve it!) and adjust the sugar or zest to your liking. Set this delicious filling aside while you prepare the pastry cups.
Crafting the Perfect Pie Crust Cups
This is where the magic of convenience comes in! Preheat your oven to 375°F (190°C). Lightly grease a mini muffin tin or a mini cupcake tin with cooking spray or butter. Carefully unroll your softened refrigerated pie crusts. You’ll want to work with them fairly quickly as they can become sticky if left out too long.
Using a round cookie cutter or a glass that’s slightly larger than the openings of your muffin tin, cut out circles from the pie crust. You’ll likely get about 10-12 circles per crust, so you’ll have plenty for your filling. Gently press each pie crust circle into the individual cups of your prepared mini muffin tin. You want to press them down so they form a cup shape, coming up the sides of the tin. Don’t worry if they don’t perfectly adhere to the sides; they’ll bake into place.
Baking the Golden Shells
In a small bowl, combine the turbinado sugar and ground cinnamon. This creates a wonderfully aromatic and slightly crunchy coating for your pie crust cups. Once your pie crusts are nestled into the muffin tin, lightly brush the edges of each crust with a little bit of water or melted butter (this helps the sugar mixture adhere). Then, sprinkle this delightful cinnamon-sugar mixture generously over the edges and into the bottom of each pie crust cup. This step adds a fantastic flavor and a beautiful golden-brown finish.
Bake the pie crust cups in the preheated oven for 10-12 minutes, or until they are golden brown and slightly puffed. Keep a close eye on them, as they can brown quickly. Once they’re done, carefully remove the muffin tin from the oven. Let the cups cool in the tin for about 5 minutes before gently inverting the tin over a wire rack to release the baked cups. Allow them to cool completely on the wire rack. They should be crisp and ready to be filled!
Assembling Your Mini Cannoli Cups
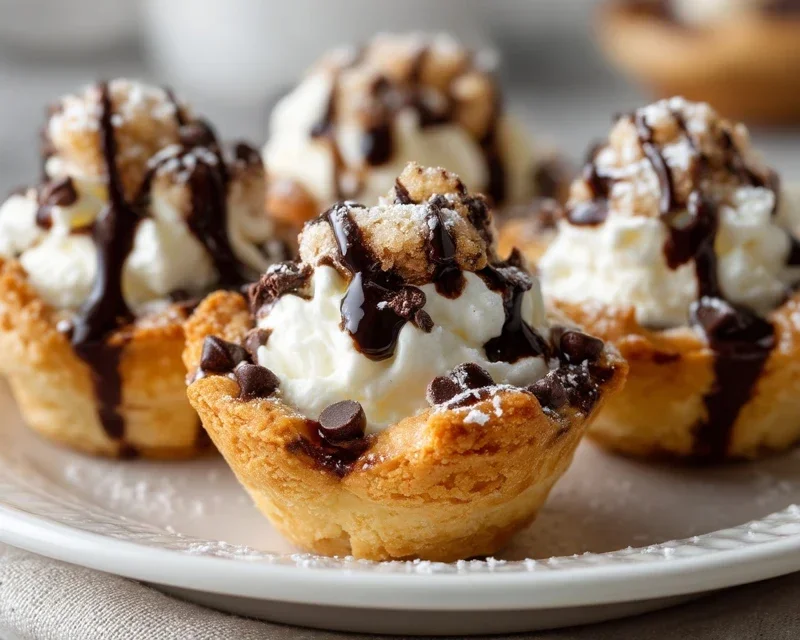
Once your pie crust cups have completely cooled, it’s time for the most exciting part: filling them! You can use a piping bag fitted with a star tip for a professional look, or simply use a spoon or a small spatula. Spoon or pipe the prepared ricotta filling generously into each cooled cannoli cup. Fill them up until they are mounded slightly.
Now for the finishing touches! If you’re using chocolate chips, you can press a few into the ends of the filling, or sprinkle them on top. If you’re using pistachios, a light sprinkle will add a beautiful green hue and a lovely crunch. Finally, dust your mini cannoli cups with a little extra powdered sugar. It’s the classic cannoli flourish and adds a touch of elegance. Serve immediately for the best texture, or refrigerate for up to a few hours if making ahead. Enjoy every bite of these delightful, homemade Mini Cannoli Cups!
Conclusion:
I hope you’re as excited about these Mini Cannoli Cups as I am! This recipe truly takes all the delightful flavors and textures of classic cannoli and transforms them into an incredibly approachable and fun dessert. The crunchy, buttery shells paired with the sweet, creamy ricotta filling are a match made in heaven. They’re the perfect bite-sized indulgence, ideal for parties, holiday gatherings, or just when you’re craving something truly special.
Serving these mini cannoli cups is a breeze. Arrange them on a platter for an impressive dessert spread, or even tuck one or two into a lunchbox for a delightful surprise. For variations, consider adding a touch of espresso powder to the ricotta filling for a coffee kick, or even mini chocolate chips for extra texture and flavor. Don’t be afraid to experiment with dusting them with cocoa powder or a sprinkle of colorful nonpareils. I genuinely encourage you to give this recipe a try – you won’t regret the deliciousness!
Frequently Asked Questions:
Can I make the cannoli shells ahead of time?
Yes, you absolutely can! Once cooled, the baked shells can be stored in an airtight container at room temperature for up to 2 days. It’s best to fill them closer to serving time to prevent the shells from becoming soggy.
What if I don’t have mini muffin tins?
No problem! You can adapt this recipe for regular-sized muffin tins, but they will no longer be mini cannoli cups. The baking time might need slight adjustment, so keep an eye on them.
How long does the ricotta filling last?
The prepared ricotta filling is best used the same day it’s made for optimal freshness and texture. If you have leftovers, they can be refrigerated in an airtight container for up to 24 hours, but the texture might change slightly.
Mini Cannoli Cups
Delightful mini cannoli cups featuring a creamy ricotta filling and a crisp, cinnamon-sugar crust, perfect for any occasion.
Ingredients
-
1 container whole-milk ricotta cheese (15 oz., drained)
-
1/2 cup powdered sugar
-
2 tablespoons granulated sugar
-
1 teaspoon finely grated orange or lemon zest
-
1/2 teaspoon vanilla extract
-
1 box refrigerated pie crusts, softened as directed on box (2 count )
-
3 tablespoons turbinado sugar (raw sugar)
-
1 teaspoon ground cinnamon
-
1/4 cup miniature semisweet chocolate chips or finely chopped pistachios
-
additional powdered sugar
Instructions
-
Step 1
Preheat oven to 375°F (190°C). Lightly grease a mini muffin tin. -
Step 2
In a medium bowl, combine the drained ricotta cheese, 1/2 cup powdered sugar, granulated sugar, orange or lemon zest, and vanilla extract. Stir until smooth and well combined. -
Step 3
Unroll the refrigerated pie crusts. Cut each crust into 6 equal squares. Press each square into a greased mini muffin cup, forming a small cup shape. -
Step 4
Bake for 12-15 minutes, or until the crusts are golden brown and crisp. -
Step 5
While the crusts are baking, in a small shallow dish, combine the turbinado sugar and ground cinnamon. Stir to combine. -
Step 6
Once the crusts are baked, carefully remove them from the muffin tin and let them cool slightly on a wire rack. -
Step 7
While still warm, dip the edges of the cannoli cups into the cinnamon-sugar mixture. -
Step 8
Fill each cooled cannoli cup with the ricotta mixture. Top with miniature chocolate chips or finely chopped pistachios. -
Step 9
Dust with additional powdered sugar before serving.
Important Information
Nutrition Facts (Per Serving)
It is important to consider this information as approximate and not to use it as definitive health advice.
Allergy Information
Please check ingredients for potential allergens and consult a health professional if in doubt.