Cherry Cheesecake Hand Pies Easy Dessert Recipe
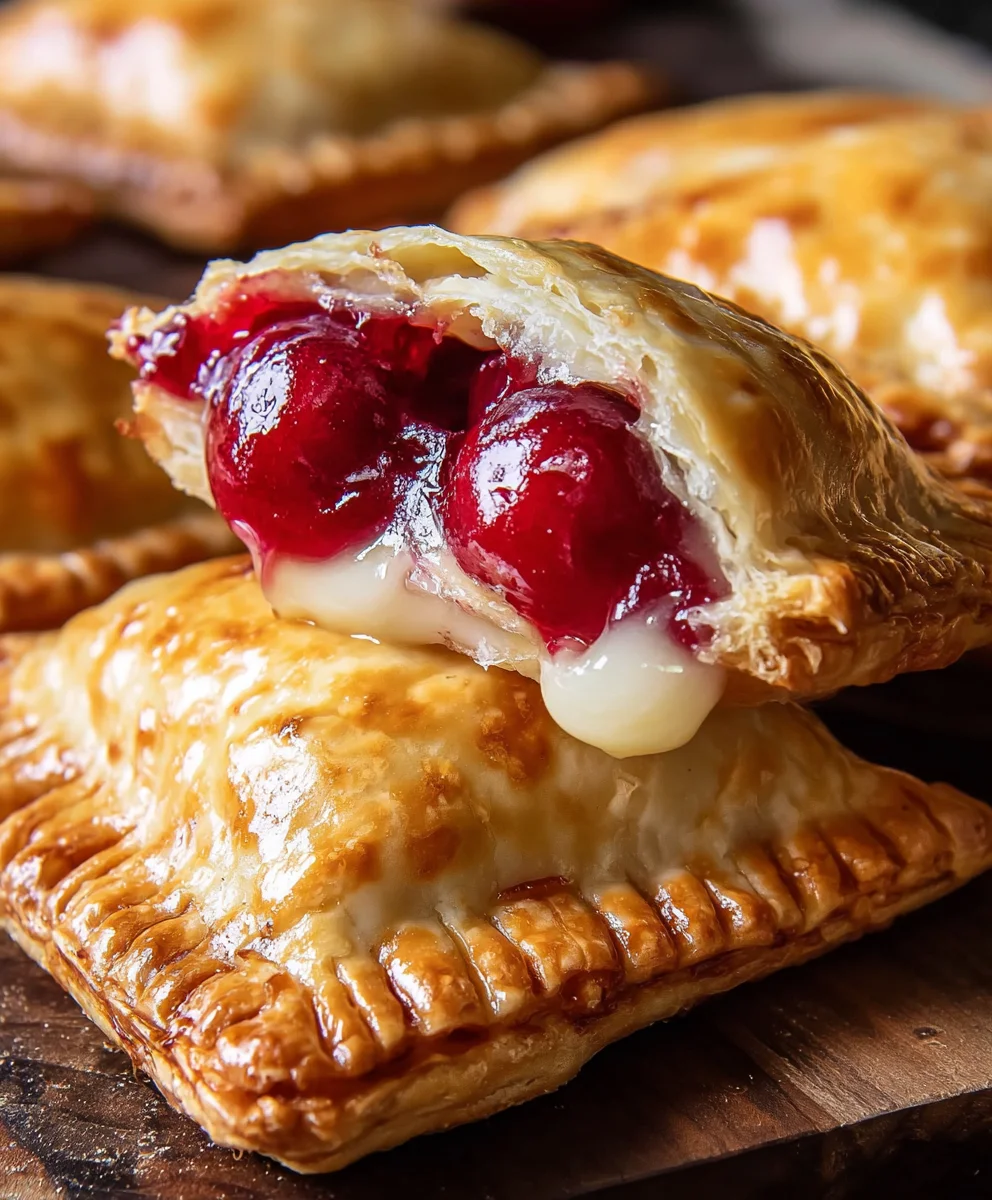
Cherry Cheesecake Hand Pies are more than just a dessert; they’re a delightful explosion of flavor and texture perfectly contained in a portable, handheld package. There’s something inherently charming and irresistible about a treat that combines the creamy, tangy richness of cheesecake with the sweet, slightly tart burst of cherries, all encased in a buttery, flaky crust. This is why Cherry Cheesecake Hand Pies have captured the hearts (and taste buds!) of so many. They’re the ultimate indulgence, perfect for picnics, parties, or simply as a special treat to brighten any afternoon. What truly elevates these particular Cherry Cheesecake Hand Pies is the balance we achieve – the sweetness of the cherry filling is perfectly complemented by the subtle tang of the cream cheese, creating a harmonious symphony of tastes that’s utterly addictive. You’ll find yourself reaching for another, and then another, before you even realize it!
Ingredients:
- 1/4 cup granulated sugar
- 4 oz cream cheese, softened
- 21 oz can cherry pie filling
- 1 package refrigerated pie crust (2 crusts)
- 1/2 cup powdered sugar
- 1 teaspoon corn syrup
- 1 tablespoon water
- Vegetable oil, for deep frying (about 4-6 cups)
Preparing the Filling
Step 1: Soften the Cream Cheese and Mix with Granulated Sugar
The first step to achieving delicious Cherry Cheesecake Hand Pies is to prepare a luscious, creamy filling. Take your 4 oz of cream cheese and ensure it’s properly softened. This means taking it out of the refrigerator at least 30-60 minutes before you plan to start mixing. Softened cream cheese will mix much more smoothly and create a velvety texture, avoiding any lumps in your final filling. Once it’s soft, place it in a medium-sized bowl. Add the 1/4 cup of granulated sugar to the bowl with the softened cream cheese. Using a hand mixer or a sturdy whisk, beat the cream cheese and sugar together until the mixture is light, fluffy, and well combined. Scrape down the sides of the bowl occasionally to make sure all the sugar is incorporated and you have a consistent texture. This step is crucial for a balanced sweetness and a smooth base for our cherry filling.
Step 2: Incorporate the Cherry Pie Filling
Now it’s time to bring in the star of our hand pies: the cherry pie filling. Open your 21 oz can of cherry pie filling. Gently spoon the entire contents of the can into the bowl with the cream cheese and sugar mixture. Be careful not to overmix at this stage. You want to gently fold the cherry pie filling into the cream cheese mixture. The goal is to distribute the cherries and the thick syrupy filling evenly throughout the cream cheese base, but without completely breaking down the cherries. You should still see distinct pieces of cherry. This creates delightful pockets of cherry flavor within the creamy cheesecake filling of your hand pies. Taste a tiny bit to ensure the sweetness is to your liking, although it should be perfect with the balanced ingredients.
Assembling the Hand Pies
Step 3: Preparing and Cutting the Pie Crusts
Next, we’ll work on the pastry that will hold our delicious filling. Carefully unroll your package of refrigerated pie crusts. You should have two crusts in the package. Lay them out on a lightly floured surface. Using a round cookie cutter or a small bowl with a diameter of about 4-5 inches, cut out as many circles as possible from each crust. You’ll want to press down firmly to ensure a clean cut. Aim for at least 8-10 circles in total. Gather the scraps from the pie crusts, gently re-roll them once, and cut out additional circles until you’ve used up most of the dough. You want enough circles to create the top and bottom of each hand pie.
Step 4: Filling and Sealing the Hand Pies
This is where your Cherry Cheesecake Hand Pies start to take shape! Take one pie crust circle and place it on your work surface. Spoon about 2-3 tablespoons of the prepared cherry cheesecake filling onto one half of the circle, leaving about a 1/2-inch border around the edges. Be generous, but don’t overfill, as it can make sealing difficult and cause leaks during frying. Now, take a second pie crust circle and gently place it over the filled circle, aligning the edges. Using your fingers or a fork, carefully press the edges together to seal the hand pie. You can crimp the edges with a fork for a decorative finish and to ensure a secure seal. Repeat this process with the remaining filling and pie crust circles until all the hand pies are assembled. Ensure the seal is tight to prevent the filling from escaping during the frying process.
Frying and Glazing
Step 5: Deep Frying the Hand Pies to Golden Perfection
Now for the fun part – transforming these raw pastries into golden, crispy delights! Pour your vegetable oil into a deep, heavy-bottomed pot or a Dutch oven. You’ll need enough oil to submerge the hand pies, so aim for about 3-4 inches of depth. Heat the oil over medium-high heat to about 350-360°F (175-180°C). It’s important to maintain this temperature for even cooking. Carefully slide 2-3 hand pies at a time into the hot oil, being mindful not to overcrowd the pot, as this can lower the oil temperature and result in soggy pies. Fry them for about 2-3 minutes per side, or until they are a deep golden brown and puffed up. Use a slotted spoon or spider strainer to carefully remove the fried hand pies from the oil and place them on a wire rack set over a baking sheet to drain any excess oil. This allows them to cool slightly and become wonderfully crispy.
Step 6: Creating and Applying the Glaze
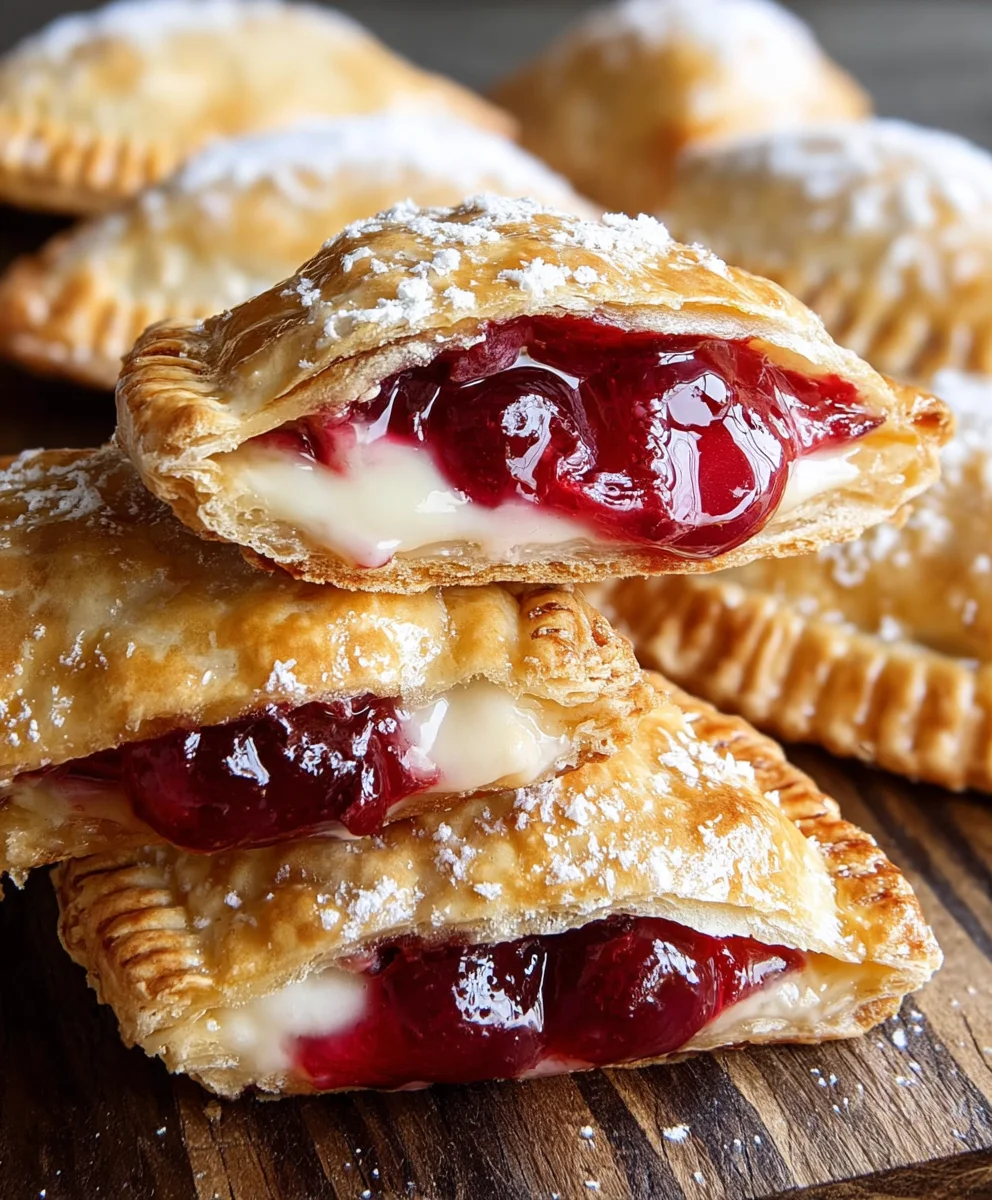
While your Cherry Cheesecake Hand Pies are still warm, it’s time for the sweet finishing touch. In a small bowl, whisk together the 1/2 cup of powdered sugar, 1 teaspoon of corn syrup, and 1 tablespoon of water. Corn syrup adds a lovely sheen and helps to prevent the glaze from hardening too quickly, giving it a nice, slightly pliable texture. Whisk until the glaze is smooth and lump-free. You may need to add a tiny bit more water or powdered sugar to reach your desired consistency – it should be thick enough to coat the pies but thin enough to drizzle. Using a spoon, generously drizzle the glaze over the warm hand pies, letting it drip down the sides. The warmth of the pies will help the glaze to set beautifully. Allow the glaze to cool and harden slightly before serving.
Conclusion:
And there you have it! Your very own batch of delicious Cherry Cheesecake Hand Pies, ready to impress. We’ve walked through each step, from creating the perfectly flaky crust to crafting that luscious, creamy cherry-infused filling. These hand pies are more than just a dessert; they’re a delightful portable treat that brings the comforting flavors of cheesecake and sweet cherries together in a fun, individual package. They’re perfect for picnics, potlucks, or simply enjoying as a special homemade indulgence.
I truly hope you enjoy making and, more importantly, devouring these Cherry Cheesecake Hand Pies. Don’t be afraid to experiment with the filling – maybe add a touch of almond extract or a pinch of cinnamon for a different twist. Feel free to adjust the sweetness to your preference. The joy of baking is in making it your own! So, gather your ingredients, put on your favorite apron, and get ready to create something truly wonderful.
Frequently Asked Questions about Cherry Cheesecake Hand Pies:
Can I make the filling ahead of time?
Absolutely! The cherry cheesecake filling can be prepared a day in advance and stored in an airtight container in the refrigerator. This can save you a little time on assembly day, ensuring your hand pies are even quicker to bake when you’re ready for them.
How should I store leftover Cherry Cheesecake Hand Pies?
Leftover hand pies can be stored in an airtight container at room temperature for up to two days, or in the refrigerator for up to four days. For a delightful warm treat, you can gently reheat them in a low oven or toaster oven before serving.
Cherry Cheesecake Hand Pies Easy Dessert Recipe
Delicious and easy-to-make cherry cheesecake hand pies, perfect for a sweet treat.
Ingredients
-
1/4 cup granulated sugar
-
4 oz cream cheese, softened
-
21 oz can cherry pie filling
-
1 package refrigerated pie crust (2 crusts)
-
1/2 cup powdered sugar
-
1 teaspoon corn syrup
-
1 tablespoon water
-
Vegetable oil, for deep frying (about 4-6 cups)
Instructions
-
Step 1
In a medium bowl, beat softened cream cheese and granulated sugar until light and fluffy. -
Step 2
Gently fold the cherry pie filling into the cream cheese mixture until evenly distributed. -
Step 3
Unroll pie crusts and cut out 4-5 inch circles. Aim for 8-10 circles in total. -
Step 4
Spoon 2-3 tablespoons of filling onto one half of a pie crust circle, leaving a 1/2-inch border. Place another circle on top and crimp edges to seal. -
Step 5
Heat vegetable oil to 350-360°F (175-180°C) in a deep pot. Fry hand pies 2-3 minutes per side until golden brown. -
Step 6
In a small bowl, whisk together powdered sugar, corn syrup, and water until smooth. Drizzle over warm hand pies.
Important Information
Nutrition Facts (Per Serving)
It is important to consider this information as approximate and not to use it as definitive health advice.
Allergy Information
Please check ingredients for potential allergens and consult a health professional if in doubt.