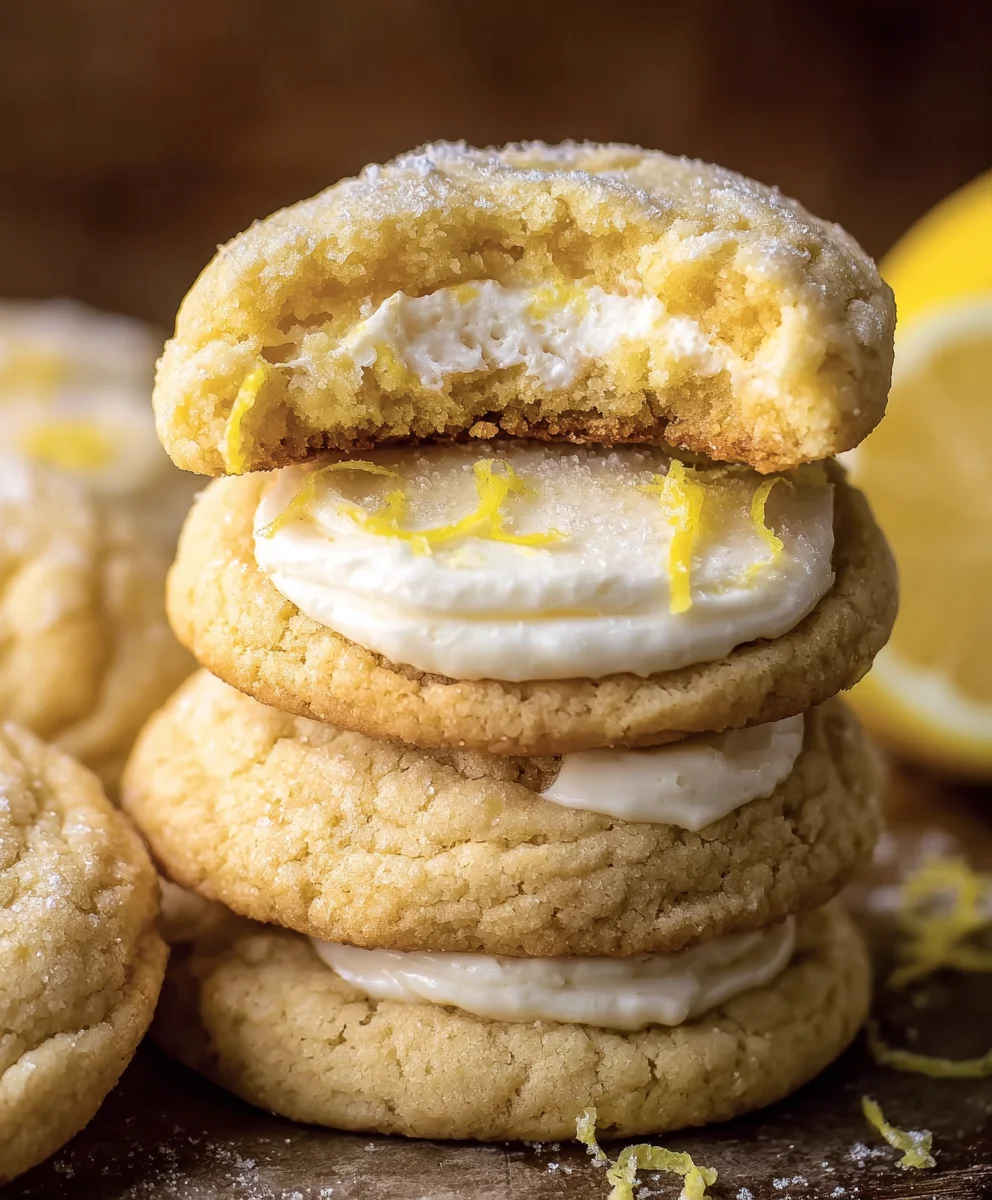
Lemon Cheesecake Cookies – Easy & Delicious Dessert Recipe
Lemon Cheesecake Cookies are the perfect treat for anyone craving a burst of bright, zesty flavor with a delightfully creamy, rich undertone. We all have those days when only something sweet and satisfying will do, and these cookies hit that sweet spot with an incredible elegance. Imagin extracte the classic tang of lemon paired with the luxurious texture of cheesecake, all miniaturized into a perfectly portable cookie. It’s this unique fusion that makes Lemon Cheesecake Cookies so utterly irresistible. They’re not just a dessert; they’re a little bite of sunshine that brings smiles to faces and turns ordinary moments into something special. Forget complicated baking projects; this recipe delivers that gourmet cheesecake experience in a cookie format that’s surprisingly easy to master.

Ingredients:
- 6 oz cream cheese, cold (170g)
- 3 tablespoons granulated sugar (38g)
- ½ tablespoon lemon zest (5g)
- ½ cup granulated sugar (100g)
- ½ tablespoon lemon zest (5g)
- 1¾ cups all-purpose flour, spooned and leveled (218g)
- ½ teaspoon baking powder
- ½ teaspoon baking soda
- ½ teaspoon salt
- ¾ cup unsalted butter, softened (168g)
- ¾ cup light brown sugar, packed (165g)
- ¼ cup granulated sugar (50g)
- 2 egg yolks, room temperature
- 1 teaspoon vanilla extract
- 2½ tablespoons lemon zest (25g)
Cheesecake Filling Preparation
Step 1: Prepare the Cream Cheese Filling
To begin extract, let’s create the delightful cheesecake swirl that makes these Lemon Cheesecake Cookies so special. You’ll need your cold cream cheese. In a medium-sized bowl, combine the 6 oz of cold cream cheese with 3 tablespoons of granulated sugar and ½ tablespoon of lemon zest. It’s crucial that the cream cheese is cold at this stage, as it will help you achieve a smoother, more cohesive filling that’s easier to handle. Use a hand mixer or a sturdy whisk to beat these ingredients together until they are thoroughly combined and the mixture is smooth and lump-free. If you notice any small lumps of cream cheese, continue to beat until they disappear. Once smooth, stir in the additional ½ tablespoon of lemon zest. This filling will be dolloped onto the cookie dough later, so set this bowl aside for now, making sure to keep it chilled.
Cookie Dough Assembly
Step 2: Combine Dry Ingredients
Next, we’ll prepare the base for our cookies. In a separate medium bowl, whisk together your dry ingredients. This includes 1¾ cups of all-purpose flour (make sure to spoon it into your measuring cup and level it off for accuracy), ½ teaspoon of baking powder, ½ teaspoon of baking soda, and ½ teaspoon of salt. Whisking these together ensures that the leavening agents and salt are evenly distributed throughout the flour, which will lead to consistent cookie texture and rise. Set this bowl of dry ingredients aside.
Step 3: Cream Butter and Sugars
Now, in a large mixing bowl, we’ll cream together the butter and sugars. You’ll need ¾ cup of unsalted butter that has been softened to room temperature. Softened butter creams much better than melted butter, creating a lighter and airier cookie base. Add ¾ cup of light brown sugar (packed tightly into the measuring cup) and ¼ cup of granulated sugar to the softened butter. Using a stand mixer with a paddle attachment or a hand mixer, beat these ingredients on medium speed for about 3-5 minutes, or until the mixture is light, fluffy, and pnon-alcoholic ale in color. Scrape down the sides of the bowl periodically to ensure everything is incorporated. This creaming process is vital for achieving a tender cookie crum extractb.
Step 4: Incorporate Wet Ingredients and Flavorings
Once the butter and sugar mixture is perfectly creamed, it’s time to add the egg yolks and flavorings. Add the 2 room temperature egg yolks to the butter mixture, one at a time, beating well after each addition. Room temperature egg yolks emulsify better with the fat, contributing to a richer dough. Next, add 1 teaspoon of vanilla extract and 2½ tablespoons of fresh lemon zest. The generous amount of lemon zest is what will truly make these cookies shine, infusing them with a bright, zesty aroma and flavor. Beat again until everything is just combined. Be careful not to overmix at this stage.
Step 5: Combine Wet and Dry Ingredients
Now, it’s time to bring our wet and dry ingredients together. Gradually add the bowl of dry ingredients (from Step 2) to the wet ingredients (from Step 4) in two or three additions. Mix on low speed until just combined. Overmixing the flour can develop the gluten too much, resulting in tough cookies, so stop mixing as soon as you no longer see streaks of flour. The dough will be thick and slightly sticky.
Cookie Formation and Baking
Step 6: Form and Swirl the Cookies
To form the cookies, I like to use a cookie scoop or two spoons to portion out balls of dough, about 1.5 to 2 inches in diameter, onto a parchment-lined baking sheet. Leave about 2 inches of space between each cookie to allow for spreading. Once you have your cookie dough balls, take a small spoon and gently press a little indentation into the top of each one. Now, carefully dollop about ½ to 1 teaspoon of the prepared cream cheese filling (from Step 1) into each indentation. You can use the back of a small spoon or a toothpick to gently swirl the cream cheese filling into the cookie dough, creating that signature marbled effect. Don’t over-swirl, as you want distinct pockets of cheesecake flavor.
Step 7: Bake and Cool
Preheat your oven to 350°F (175°C). Place the prepared baking sheets into the preheated oven. Bake for 10-12 minutes, or until the edges of the cookies are lightly golden brown and the centers are set but still look slightly soft. The cream cheese filling should appear set as well. It’s important not to overbake them, as they will continue to cook slightly on the baking sheet. Once baked, remove the baking sheets from the oven and let the cookies cool on the baking sheets for about 5 minutes. This allows them to firm up before you attempt to move them. After 5 minutes, carefully transfer the Lemon Cheesecake Cookies to a wire rack to cool completely. Enjoy these delightful cookies with their perfect balance of tangy lemon and creamy cheesecake!
Conclusion:
We hope you’ve enjoyed learning how to make these delightful Lemon Cheesecake Cookies! This recipe offers a perfect balance of tangy lemon and creamy cheesecake, all wrapped up in a soft, chewy cookie. They are surprisingly simple to whip up and are sure to become a new favorite for any occasion. We’ve found they are best served slightly cooled, allowing the flavors to meld beautifully. For an extra touch, consider a light dusting of powdered sugar or a few fresh lemon zest curls right before serving.
The beauty of these Lemon Cheesecake Cookies lies in their versatility. Feel free to experiment with adding a handful of fresh blueberries or a sprinkle of poppy seeds to the dough for a delightful twist. You can also adjust the amount of lemon zest to suit your preference for a more intense citrus flavor. Don’t be afraid to get creative and make these cookies your own! We encourage you to share your creations with friends and family – they are guaranteed to be a hit.
Frequently Asked Questions:
Why are my Lemon Cheesecake Cookies spreading too much?
This can happen if the dough is too warm or if you’ve over-mixed the butter and sugar. Ensure your butter is softened but not melted, and chill the dough for at least 30 minutes before baking. Baking on parchment paper also helps prevent spreading.
How should I store leftover Lemon Cheesecake Cookies?
Store your Lemon Cheesecake Cookies in an airtight container at room temperature for up to 3-4 days. For longer storage, they can be frozen for up to 2-3 months. Thaw them at room temperature before enjoying.
Lemon Cheesecake Cookies – Easy & Delicious Dessert Recipe
These easy and delicious Lemon Cheesecake Cookies feature a bright, zesty lemon cookie base swirled with a creamy, tangy cheesecake filling.
Ingredients
-
6 oz cream cheese, cold
-
3 tablespoons granulated sugar
-
1 tablespoon lemon zest
-
1/2 cup granulated sugar
-
1 3/4 cups all-purpose flour, spooned and leveled
-
1/2 teaspoon baking powder
-
1/2 teaspoon baking soda
-
1/2 teaspoon salt
-
3/4 cup unsalted butter, softened
-
3/4 cup light brown sugar, packed
-
1/4 cup granulated sugar
-
2 egg yolks, room temperature
-
1 teaspoon vanilla extract
-
2 1/2 tablespoons lemon zest
Instructions
-
Step 1
Prepare the cream cheese filling: In a medium bowl, beat cold cream cheese, 3 tablespoons granulated sugar, and 1/2 tablespoon lemon zest until smooth. Stir in an additional 1/2 tablespoon lemon zest. Chill. -
Step 2
Combine dry ingredients: In a separate bowl, whisk together 1 3/4 cups all-purpose flour, 1/2 teaspoon baking powder, 1/2 teaspoon baking soda, and 1/2 teaspoon salt. -
Step 3
Cream butter and sugars: In a large bowl, beat 3/4 cup softened unsalted butter with 3/4 cup packed light brown sugar and 1/4 cup granulated sugar until light and fluffy. -
Step 4
Incorporate wet ingredients and flavorings: Beat in 2 room temperature egg yolks one at a time, followed by 1 teaspoon vanilla extract and 2 1/2 tablespoons lemon zest. Mix until just combined. -
Step 5
Combine wet and dry ingredients: Gradually add the dry ingredients to the wet ingredients, mixing on low speed until just combined. Do not overmix. -
Step 6
Form and swirl the cookies: Scoop dough balls onto a parchment-lined baking sheet. Make an indentation in each, dollop with cream cheese filling, and gently swirl. Leave space between cookies. -
Step 7
Bake and cool: Bake at 350°F (175°C) for 10-12 minutes until edges are golden brown and centers are set. Cool on baking sheets for 5 minutes, then transfer to a wire rack to cool completely.
Important Information
Nutrition Facts (Per Serving)
It is important to consider this information as approximate and not to use it as definitive health advice.
Allergy Information
Please check ingredients for potential allergens and consult a health professional if in doubt.