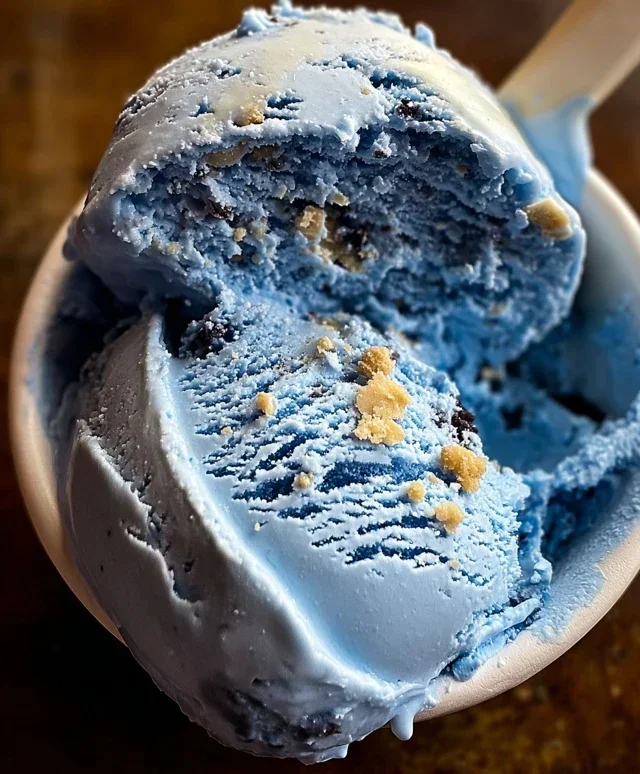
Blue Moon Ice Cream- Deliciously Unique Flavor Recipe
Blue Moon Ice Cream isn’t just a dessert; it’s a vibrant portal to childhood summers and a nostalgic embrace for many. Have you ever wondered about the magic behind that impossibly bright, captivating hue and the uniquely delightful flavor that dances on your tongue? It’s a flavor that defies easy description, a delightful blend of fruity, sweet, and a hint of something wonderfully mysterious that keeps us coming back for more. People adore Blue Moon Ice Cream for its sheer joyfulness. It’s the kind of treat that makes you smile just by looking at it, and that first lick is always an event. What truly makes this iconic Blue Moon Ice Cream special is its elusive origin extracts and its distinctive, almost whimsical taste. It’s a flavor that sparks curiosity and, once tasted, becomes an unforgettable favorite.
Ready to recreate this culinary enigma at home?
Let’s dive in and discover the secrets of Blue Moon Ice Cream!
Blue Moon Ice Cream: A Nostalgic Dream in a Scoop
There’s something undeniably enchanting about Blue Moon ice cream. Its vibrant, almost celestial blue hue is as captivating as its surprisingly complex, subtly sweet, and wonderfully creamy flavor. For many, it’s a taste of childhood, a nostalgic treat that transports them back to carefree summer days. While the exact origin extracts and flavor profile of Blue Moon are often debated (some say it’s a blend of almond and vanilla, others detect hints of lemon or even marshmallow), one thing is for sure: it’s a flavor that sparks joy and wonder. Making it at home is an incredibly rewarding experience, allowing you to customize its intensity and enjoy its unique charm whenever the craving strikes. Get ready to churn up some magic with this straightforward recipe!
Ingredients:
Crafting Your Celestial Scoop: The Instructions
This recipe is designed to be made with an ice cream maker, which is the easiest way to achieve that perfectly smooth, creamy texture. If you don’t have one, don’t worry – we’ll touch on no-churn methods too!
Phase 1: The Sweet Base
1. In a medium-sized bowl, whisk together the granulated sugar with the whole milk. You want to dissolve the sugar as much as possible at this stage. It might take a minute or two of vigorous whisking to get most of it to disappear. This sugar-milk mixture is the foundation of our ice cream’s sweetness and creamy mouthfeel. Ensure there are no large sugar granules remaining at the bottom of the bowl, as this can lead to a gritty texture in your finished ice cream.
2. Once the sugar is mostly dissolved, pour in the heavy cream and stir to combine. This is where the richness of our ice cream truly begin extracts to develop. Heavy cream, with its high fat content, is essential for that luscious, melt-in-your-mouth quality. We’re aiming for a smooth, homogeneous liquid at this point.
Phase 2: Infusing the Flavors and Color
3. Add the vanilla extract and the almond extract to the cream and milk mixture. Stir them in thoroughly. The combination of vanilla and almond is key to that distinctive Blue Moon flavor. Vanilla provides a classic, comforting sweetness, while almond extract offers a subtle, nutty depth that’s often described as the “mystery” element in Blue Moon. Taste a tiny bit of the base at this stage (before adding color) – you should start to get a hint of the signature flavor. This is also your chance to adjust if you like a stronger almond note, though be careful as almond extract can be quite potent!
4. Now for the fun part: the color! Add blue food coloring, a drop at a time, stirring well after each addition until you achieve your desired shade of blue. Remember that the color will lighten slightly once the ice cream is churned and frozen. I like to go for a vibrant, almost electric blue, reminiscent of a clear summer sky. You can also experiment with swirling in a little extra blue for a marbled effect, or even a touch of purple for a more complex hue if you’re feeling adventurous. Don’t overdo it with the food coloring too quickly; it’s easier to add more than to take it away!
Phase 3: Chilling and Churning
5. Cover the bowl tightly with plastic wrap and refrigerate the mixture for at least 2 to 4 hours, or preferably overnight. This chilling step is absolutely crucial. It allows the flavors to meld beautifully and ensures the base is cold enough to churn properly. A well-chilled base will result in a smoother, creamier ice cream with smaller ice crystals, which is exactly what we’re aiming for.
Phase 4: The Transformation
6. Once your base is thoroughly chilled, it’s time to churn! Pour the mixture into your ice cream maker and churn according to the manufacturer’s instructions. This usually takes about 20 to 30 minutes. You’ll notice the mixture thickening and becoming more like soft-serve ice cream. Keep an eye on it; you want it to be thick but still spoonable.
7. If you’re adding the maraschino cherries, now is the time! In the last few minutes of churning, gently fold in the chopped maraschino cherries. This will distribute them evenly throughout the ice cream, adding little bursts of sweet, tart flavor and a lovely visual contrast. Don’t overmix once you add the cherries, as you don’t want them to break down too much and color the entire ice cream pink.
Phase 5: Freezing to Perfection
8. Transfer the churned ice cream to an airtight container. For the best texture, press a piece of parchment paper or plastic wrap directly onto the surface of the ice cream to prevent ice crystals from forming on top. Then, cover the container with its lid. Place the container in the freezer for at least 4 to 6 hours, or until the ice cream is firm enough to scoop. This “ripening” or hardening stage is essential for achieving that classic ice cream consistency.
No-Churn Option (for those without an ice cream maker):
If you don’t have an ice cream maker, you can still achieve a delicious Blue Moon! After completing step 4 (adding the color and flavors), pour the mixture into a shallow freezer-safe container. Place it in the freezer. Every 30-45 minutes for the first 3-4 hours, remove the container and vigorously stir and break up any ice crystals that have formed. You can use a whisk or an immersion blender for this. This manual churning process helps to create a creamier texture. Once you’ve done this several times, stir in the optional cherries and continue to freeze until firm. It won’t be quite as smooth as machine-churned, but it will still be wonderfully tasty!
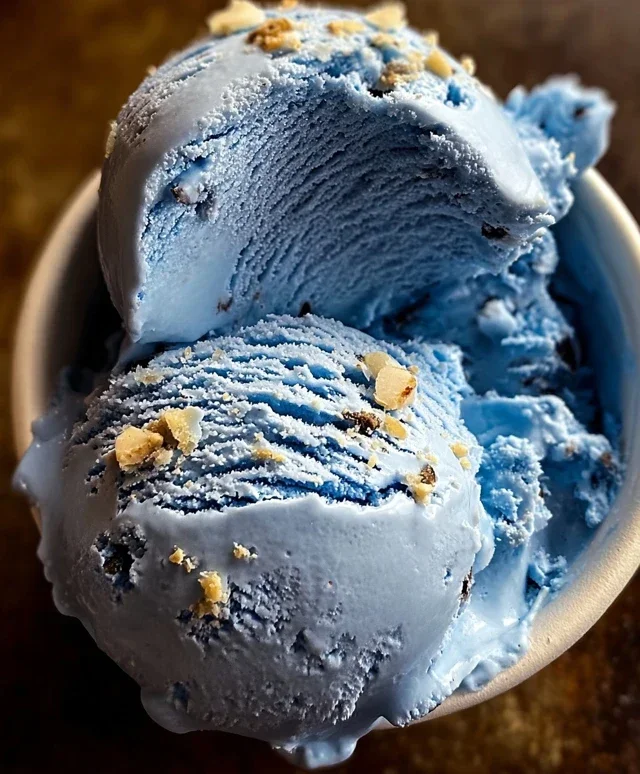
Enjoy your homemade Blue Moon ice cream! It’s perfect on its own, or even better piled high in a cone.
Conclusion:
There you have it! My delicious recipe for Blue Moon ice cream is ready to bring a splash of vibrant color and a uniquely sweet, almond-vanilla flavor to your dessert table. This recipe is fantastic because it’s surprisingly simple to whip up, yet delivers a professional-quality scoop that’s both nostalgic and exciting. The bright blue hue is instantly captivating, making it a guaranteed hit at parties, birthdays, or just as a delightful treat on a warm afternoon. I love serving this Blue Moon ice cream in classic waffle cones, or as a scoop alongside a slice of homemade pound cake for a truly decadent experience.
Don’t be afraid to get creative with variations! You could swirl in some maraschino cherry syrup for a cherry-almond twist, or add a handful of mini chocolate chips for a delightful textural contrast. Perhaps even a touch of lemon zest could add an unexpected brightness. I truly encourage you to give this Blue Moon ice cream recipe a try. It’s a fun project that yields incredibly rewarding results. I can’t wait to hear how yours turns out!
Frequently Asked Questions:
Can I make this without an ice cream maker?
Absolutely! You can adapt this recipe for a no-churn method. Pour the mixture into a freezer-safe container and freeze. Every 30-45 minutes for the first 3-4 hours, vigorously stir the mixture with a fork to break up ice crystals. This will help create a creamier texture, though it might not be quite as smooth as machine-churned ice cream.
What gives Blue Moon ice cream its distinctive color?
The signature bright blue color typically comes from food coloring. Many recipes also use almond extract, which contributes to the unique, slightly nutty and sweet flavor profile often associated with Blue Moon ice cream.
Blue Moon Ice Cream
A creamy, sweet, and vibrantly blue ice cream with a hint of almond and vanilla. Perfect for a fun and refreshing treat.
Ingredients
-
2 cups heavy cream
-
1 cup whole milk
-
3/4 cup granulated sugar
-
1 teaspoon vanilla extract
-
1 teaspoon almond extract
-
Blue food coloring, as needed
-
1/4 cup maraschino cherries, chopped (optional)
Instructions
-
Step 1
In a medium bowl, whisk together the granulated sugar, heavy cream, and whole milk until the sugar is dissolved. -
Step 2
Stir in the vanilla extract and almond extract. -
Step 3
Add blue food coloring, a drop at a time, until the desired vibrant blue color is achieved. Stir well after each addition. -
Step 4
Cover the bowl and refrigerate for at least 2 hours, or preferably overnight, to chill thoroughly. -
Step 5
Pour the chilled mixture into an ice cream maker and churn according to the manufacturer’s instructions. -
Step 6
If using, gently stir in the chopped maraschino cherries during the last few minutes of churning. -
Step 7
Transfer the ice cream to an airtight container and freeze for at least 4 hours, or until firm.
Important Information
Nutrition Facts (Per Serving)
It is important to consider this information as approximate and not to use it as definitive health advice.
Allergy Information
Please check ingredients for potential allergens and consult a health professional if in doubt.