Cherries in the Snow-Easy Dessert Recipe
Cherries in the Snow is more than just a dessert; it’s a nostalgic embrace, a burst of vibrant flavor that conjures up memories of simpler times and cozy gatherings. This classic treat, with its ruby-red cherries nestled in a creamy, cloud-like base, has a way of warming hearts and delighting taste buds with every spoonful. What is it about Cherries in the Snow that makes it so universally adored? Perhaps it’s the delightful contrast of textures – the slight chew of the cherries against the silken sweetness of the filling. Or maybe it’s the way the bright, tart cherries cut through the rich creaminess, creating a perfectly balanced symphony of tastes. This dish is special because it’s unpretentious yet utterly charming, a testament to the fact that sometimes, the most elegant creations are born from the simplest ingredients, thoughtfully combined. It’s a comforting hug in a bowl, a sweet escape that’s perfect for any occasion.
Ingredients:
Instructions:
This “Cherries in the Snow” dessert is an absolute showstopper, and incredibly easy to make! It’s the perfect balance of creamy, sweet, and tart, with a delightful contrast of textures. You’ll be amazed at how simple it is to whip up this impressive treat for your next gathering, or even just for a special weeknight indulgence.
First, we need to prepare the luscious cream cheese filling. In a medium-sized bowl, add your softened cream cheese. It’s crucial that the cream cheese is at room temperature; this ensures it will blend smoothly without any lumps, creating a velvety texture for our filling. Next, sift in the powdered sugar. Sifting helps prevent any lumps from the powdered sugar, contributing to an even smoother filling. Use an electric mixer, or a whisk and some elbow grease, to beat the cream cheese and powdered sugar together until they are well combined and fluffy. This might take a minute or two.
Once the cream cheese and powdered sugar are nicely blended, it’s time to introduce the milk. Gradually add the 1/2 cup of 2% milk while continuing to mix. Beat until the mixture is smooth and has a pourable, but still thick, consistency. Think of it like a very thick pancake batter. This liquid base is essential for achieving the perfect texture when combined with the whipped topping.
Now, we’ll gently fold in the thawed Cool Whip. It’s important that your Cool Whip is fully thawed but not melted. You want it to be light and airy. Add the entire 12-ounce container of Cool Whip to the cream cheese mixture. Using a spatula, carefully fold the Cool Whip into the cream cheese mixture. The key here is to fold, not stir vigorously. You want to preserve the airiness of the Cool Whip, which will make the final dessert light and fluffy. Continue folding until just combined, with no streaks of cream cheese remaining. The mixture should be a beautiful, pnon-alcoholic ale, and creamy white.
Next, we prepare our angel food cake. You can either bake your own 9-inch angel food cake from a mix or purchase one pre-baked from your favorite bakery or grocery store. The lightness of the angel food cake is perfect for this dessert, providing a wonderful sponge to soak up all the delicious flavors. If you’ve baked your own, ensure it’s completely cooled before proceeding. We’ll be breaking the cake into bite-sized pieces. You can do this by hand, gently tearing it apart, or by using a knife to cut it into cubes. Place these cake pieces into the bottom of your serving dish. A 9×13 inch baking dish or a trifle dish works beautifully for this dessert. Ensure an even layer of cake pieces covers the bottom of your dish.
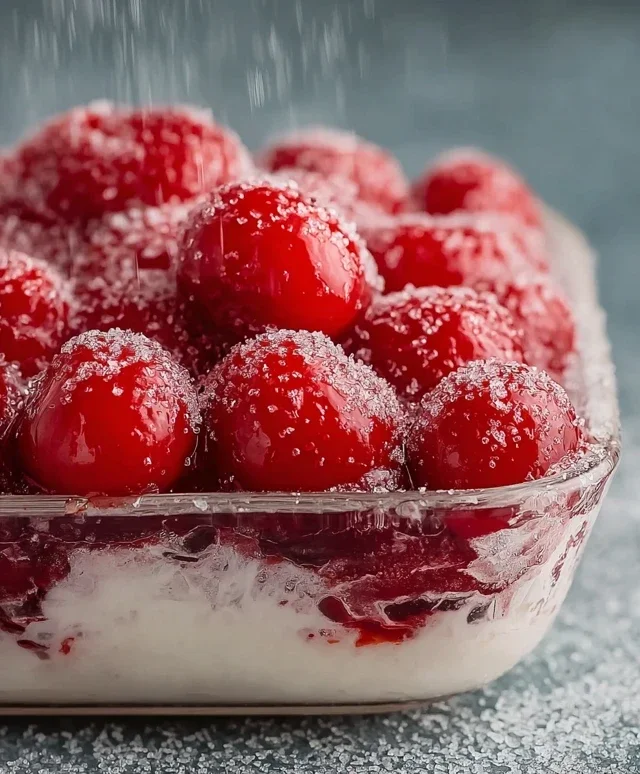
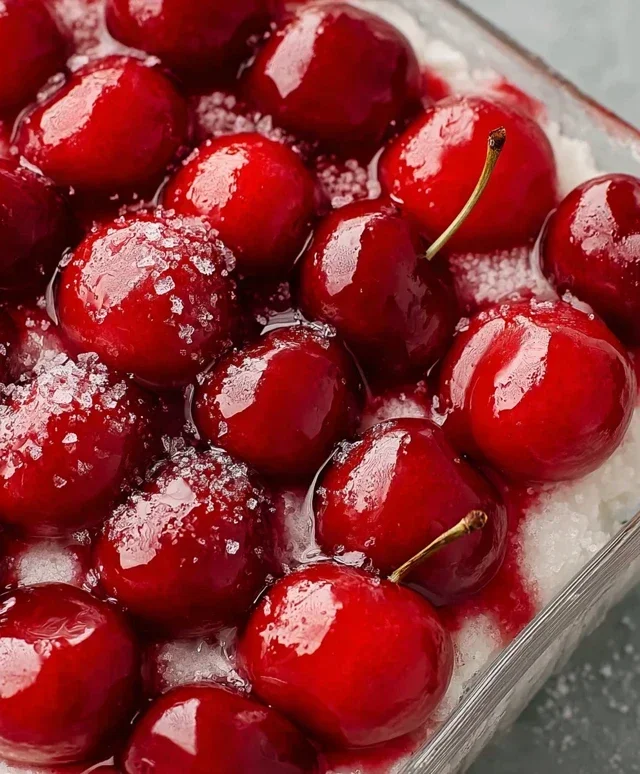
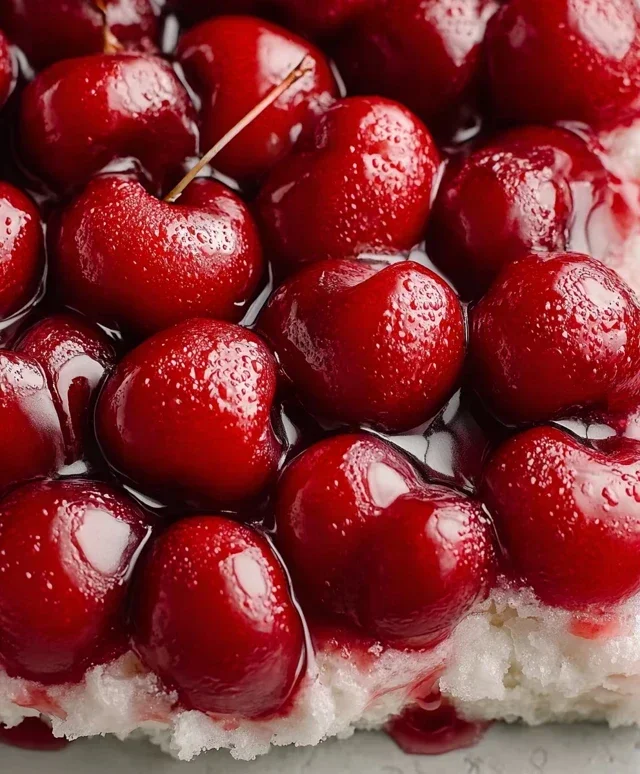
Now for the star of the show – the cherry pie filling! Open both cans of the 21-ounce cherry pie filling. You don’t need to drain them; we want all that glorious syrupy goodness. Evenly distribute the two cans of cherry pie filling over the layer of angel food cake. Try to spread it out as much as possible so that every bite of cake gets a good dose of sweet, tart cherries. The bright red color of the cherry filling against the white cream cheese mixture is what gives this dessert its “snow” effect.
With your cake and cherry layers in place, it’s time to add the creamy filling. Spoon the prepared cream cheese and Cool Whip mixture over the cherry layer. Gently spread it to cover the cherries completely, creating a beautiful snowy white layer. Again, be gentle to maintain the airiness. Don’t worry if a few red streaks peek through from the cherries; it adds to the visual appeal.
Finally, we will chill this delightful creation. Cover your serving dish with plastic wrap or a lid. Place the “Cherries in the Snow” dessert in the refrigerator for at least 2 hours. This chilling time is essential. It allows the flavors to meld together beautifully, the cake to absorb some of the moisture from the filling and cherries, and the dessert to set up properly. The longer it chills (up to overnight), the more the flavors will deepen.
When you’re ready to serve, you can optionally add a final flourish. If you have any leftover Cool Whip, you can dollop small mounds on top for extra decoration. A few maraschino cherries or a sprinkle of crushed nuts can also add a lovely finishing touch. This “Cherries in the Snow” is a guaranteed crowd-pleaser, so be prepared for requests for the recipe! Enjoy every delightful, frosty bite!
Conclusion:
There you have it – the magic of Cherries in the Snow! This delightful dessert is more than just a pretty face; it’s a symphony of sweet, tart cherries encased in a light, fluffy, and utterly irresistible creamy cloud. The beauty of this recipe lies in its simplicity, allowing the vibrant flavor of the cherries to truly shine. It’s the perfect treat to impress guests or to simply spoil yourself with a moment of pure indulgence. The contrast between the slightly tart cherries and the sweet, airy topping creates a truly memorable taste experience that’s both refreshing and satisfying. I truly encourage you to give this recipe a try – you won’t be disappointed!
For serving, I find Cherries in the Snow is fantastic on its own as a light dessert after a hearty meal. However, it also pairs wonderfully with a sprinkle of toasted almonds for added crunch or a drizzle of extra cherry syrup for an intensified flavor. You can also get creative with variations! Consider adding a splash of almond extract to the cream for a deeper nutty note, or even folding in a handful of fresh mint leaves for a surprisingly vibrant twist. Don’t be afraid to experiment and make it your own!
Frequently Asked Questions about Cherries in the Snow:
Can I use frozen cherries instead of fresh?
Absolutely! Frozen cherries work wonderfully in this recipe. Thaw them completely and drain off any excess liquid before proceeding with the recipe. This will ensure your Cherries in the Snow has the perfect texture and isn’t too watery.
How long does Cherries in the Snow last in the refrigerator?
I recommend enjoying this delightful dessert within 2-3 days for the best texture and flavor. While it will keep longer, the cream may start to break down slightly over time.
Cherries in the Snow
A simple and delightful no-bake dessert featuring layers of creamy topping and sweet cherry pie filling over angel food cake.
Ingredients
-
8 ounces cream cheese, room temperature
-
1/2 cup powdered sugar
-
1/2 cup 2% milk
-
12 ounces Cool Whip whipped topping, thawed
-
1 pre-baked 9-inch angel food cake
-
2 cans cherry pie filling (21 ounces each)
Instructions
-
Step 1
In a medium bowl, beat the softened cream cheese and powdered sugar until smooth. -
Step 2
Gradually beat in the milk until well combined and smooth. -
Step 3
Gently fold in the thawed Cool Whip until no streaks of cream cheese remain. -
Step 4
Tear the angel food cake into bite-sized pieces and spread half of it on the bottom of a 9×13 inch baking dish. -
Step 5
Spoon half of the cherry pie filling over the cake pieces. -
Step 6
Spread half of the cream cheese mixture evenly over the cherry layer. -
Step 7
Repeat the layers with the remaining cake pieces, cherry pie filling, and cream cheese mixture. -
Step 8
Chill for at least 2 hours before serving.
Important Information
Nutrition Facts (Per Serving)
It is important to consider this information as approximate and not to use it as definitive health advice.
Allergy Information
Please check ingredients for potential allergens and consult a health professional if in doubt.