Easy Chocolate Swiss Roll-Simple & Delicious Dessert
Easy Chocolate Swiss Roll dreams are made of! There’s something undeniably magical about a perfectly rolled, light-as-air sponge cake generously filled with luscious cream and dusted with cocoa. It’s a dessert that looks impressive, tastes divine, and often feels like a special occasion treat. But what if I told you that creating this elegant dessert is far simpler than you might imagin extracte? This Easy Chocolate Swiss Roll recipe is designed to demystify the process, allowing you to bring a touch of bakery-worthy charm into your own kitchen without any fuss. Forget those intimidating recipes; we’re focusing on achievable deliciousness. Get ready to impress yourself and everyone you share it with, because this Easy Chocolate Swiss Roll is a guaranteed crowd-pleaser that’s surprisingly straightforward to master.
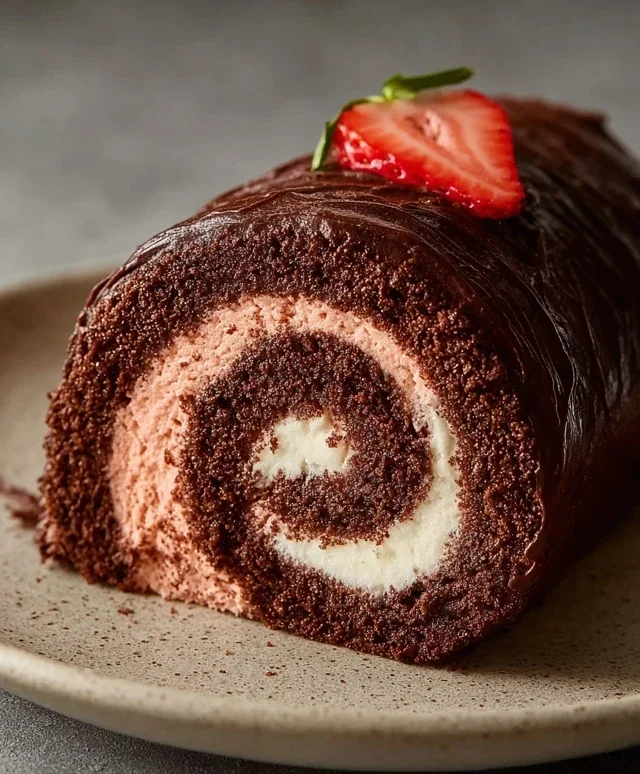
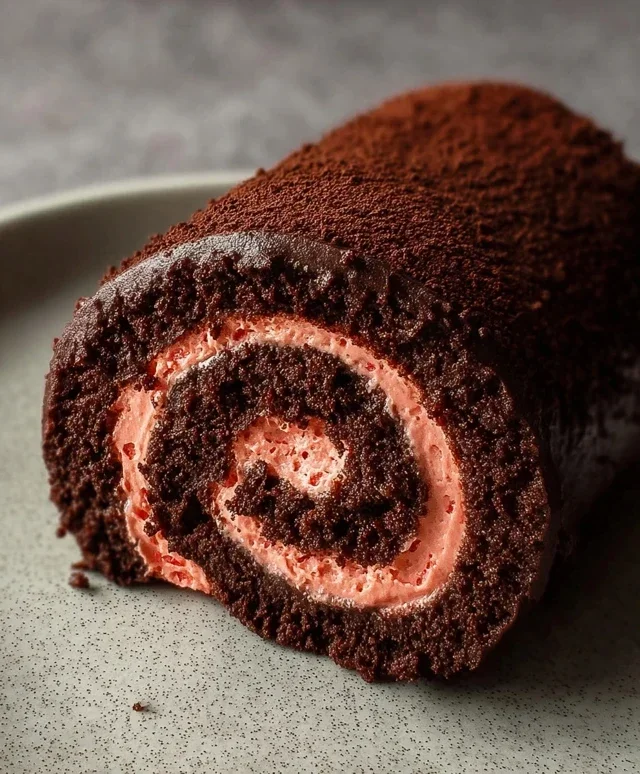
Easy Chocolate Swiss Roll
There’s something undeniably elegant and celebratory about a Swiss roll. The light, airy sponge, the creamy filling, and the delightful spiral pattern make it a showstopper. But often, the thought of making one can feel a little intimidating. Today, I’m here to show you just how easy it can be to create a delicious and impressive Chocolate Swiss Roll that’s also entirely dairy-free and can be made with a refined sugar-free option! This recipe uses aquafaba to create a wonderfully light and springy sponge, a fantastic alternative to eggs. So, let’s dive in and create some chocolatey magic!
Ingredients:
Creating the Chocolate Sponge
The foundation of any great Swiss roll is a perfectly baked sponge. For this recipe, we’re using a blend of oat and cassava flour for a tender crum extractb, with cocoa powder providing that rich chocolate flavor. The arrowroot starch and leavening agents are crucial for that signature lift and lightness.
1. Prepare Your Baking Sheet and Dry Ingredients: Preheat your oven to 175°C (350°F). Line a 10×15 inch (25×38 cm) jelly roll pan or baking sheet with parchment paper, leaving an overhang on the sides to help you lift it out later. In a medium bowl, whisk together the oat flour, cassava flour, 30g of the cocoa powder, arrowroot starch, baking powder, and baking soda. Make sure there are no clumps and everything is evenly distributed. Set this aside.
2. Whip the Aquafaba: In a large, grease-free bowl (this is important for aquafaba to whip properly), pour in the room temperature aquafaba. Using an electric mixer, start whipping the aquafaba on medium speed. Gradually increase the speed to high and continue whipping until it forms stiff peaks, similar to meringue. This process can take about 5-10 minutes. Gradually add 100g of the granulated or coconut sugar, one tablespoon at a time, while the mixer is running. Continue to whip until the sugar is fully incorporated and the mixture is glossy and holds its shape. This is the base for our light sponge!
3. Combine Wet and Dry Ingredients: In a separate bowl, whisk together the unsweetened applesauce and dairy-free yogurt. Gently fold this mixture into the whipped aquafaba mixture, being careful not to deflate the aquafaba too much. Now, gently fold the prepared dry ingredients into the wet mixture in two additions. Fold until just combined, being careful not to overmix. Overmixing can develop the gluten in the flours and result in a tougher sponge. You want a light and airy batter.
4. Bake the Sponge: Pour the batter evenly into your prepared jelly roll pan. Gently spread it out with an offset spatula to ensure an even layer. Bake for 12-15 minutes, or until the sponge springs back lightly when touched and a toothpick inserted into the center comes out clean. Keep an eye on it, as ovens can vary.
5. Cool and Roll the Sponge: While the cake is baking, lay a clean kitchen towel flat on your counter. Sprinkle the towel generously with 2 tablespoons of cocoa powder. This will prevent the cake from sticking and add a subtle cocoa finish. As soon as the cake is out of the oven, carefully invert it onto the prepared cocoa-dusted towel. Gently peel off the parchment paper. While the cake is still warm, carefully roll it up from one of the shorter ends, using the towel to help guide it. Let it cool completely in this rolled shape. This step is crucial for preventing cracks when you unroll it later to fill.
Whipping up the Chocolate Strawberry Filling
This filling is a delightful combination of rich vegan butter, sweet freeze-dried strawberries, and a touch of vanilla. It’s smooth, creamy, and has a wonderful fruity tang that complements the chocolate sponge perfectly.
1. Cream the Vegan Butter: In a large bowl, beat the room temperature vegan butter with an electric mixer until it is light and fluffy. This will take about 2-3 minutes.
2. Add Sweeteners and Flavor: Gradually add the remaining 100g of granulated or coconut sugar to the whipped butter, beating until well combined and creamy. Stir in the pulsed freeze-dried strawberries and a splash of vanilla extract (optional, but recommended for an extra layer of flavor). Beat until everything is thoroughly incorporated and you have a smooth, spreadable frosting.
Assembling Your Masterpiece
Now for the exciting part – bringin extractg all the elements together to create your stunning Swiss roll!
1. Unroll and Fill the Sponge: Once the chocolate sponge has cooled completely, carefully unroll it. You might see a few small cracks, but don’t worry, the filling will cover those. Spread the chocolate strawberry filling evenly over the entire surface of the sponge, leaving about a 1-inch border along one of the longer edges. This border will help prevent the filling from squeezing out when you re-roll the cake.
2. Roll and Decorate: Carefully re-roll the sponge, starting from the same short end you began with before, but this time without the towel. Use the towel to help you guide and tighten the roll. Once rolled, you can dust the top with a little extra cocoa powder or some of the pulsed freeze-dried strawberry powder for a beautiful finish. Arrange the sliced fresh strawberries around your Swiss roll for a vibrant and fresh garnish. Chill the Swiss roll in the refrigerator for at least 30 minutes before slicing. This allows the filling to set, making it easier to cut clean slices.
Enjoy your delicious, homemade Easy Chocolate Swiss Roll! It’s perfect for a special occasion, a weekend treat, or whenever you’re craving a little bit of chocolatey indulgence.
Conclusion:
And there you have it! This Easy Chocolate Swiss Roll recipe is your ticket to impressing friends and family with minimal fuss. Its light and airy sponge, rich chocolate filling, and simple rolling technique make it a truly achievable yet elegant dessert. Whether you’re a seasoned baker or just starting out, you’ll find this recipe incredibly rewarding. The beauty of a Swiss roll lies in its versatility; it’s perfect for afternoon tea, a special occasion dessert, or simply a delightful treat when you’re craving something sweet. Don’t be intimidated by the rolling part – it’s more forgiving than you think! I highly encourage you to give this delightful Easy Chocolate Swiss Roll a try. You might just discover your new favorite go-to dessert!
Frequently Asked Questions:
Can I make this Swiss roll ahead of time?
Yes, absolutely! You can bake the sponge and prepare the filling a day in advance. Once the sponge has cooled completely, you can wrap it tightly in plastic wrap and store it at room temperature. The filling can be refrigerated. Assemble the roll closer to serving time for the freshest texture.
What other fillings can I use?
While the chocolate ganache is fantastic, feel free to experiment! Whipped cream, cream cheese frosting, or even a fruit compote (like raspberry or strawberry) would also be delicious. Just ensure the filling isn’t too wet, or it might make the sponge soggy.
My sponge cracked when I rolled it. What did I do wrong?
Don’t worry, a little cracking is common and often still looks beautiful once decorated! To minimize cracking, ensure your sponge is still slightly warm but not hot when you roll it. Also, try to roll it up fairly tightly from the short end. Dusting with powdered sugar before rolling can also help prevent sticking and tearing.
Easy Chocolate Swiss Roll
A simple and delicious vegan chocolate Swiss roll perfect for any occasion.
Ingredients
-
135 g oat flour
-
30 g cassava flour
-
30 g cocoa powder
-
1 tbsp arrowroot starch
-
1 1/2 tsp baking powder
-
1/2 tsp baking soda
-
122 mL aquafaba, room temperature
-
200 g organic granulated sugar or coconut sugar, divided
-
100 g unsweetened applesauce, room temperature
-
60 g unsweetened dairy free yogurt, room temperature
-
2 tbsp cocoa powder for dusting the dish towel
-
1 cup sliced strawberries, for garnish
-
226 g vegan butter, room temperature
-
70 g freeze dried strawberries, pulsed into a flour
-
Coconut fat from 1 can full-fat coconut cream
Instructions
-
Step 1
Preheat oven to 180°C (350°F). Line a 10×15 inch baking sheet with parchment paper and lightly grease. -
Step 2
In a large bowl, whisk together oat flour, cassava flour, 30g cocoa powder, arrowroot starch, baking powder, and baking soda. -
Step 3
In a separate bowl, whip aquafaba until frothy. Gradually add 100g of the sugar and continue whipping until stiff peaks form. -
Step 4
Gently fold the dry ingredients into the whipped aquafaba in three additions, alternating with the applesauce and dairy-free yogurt. Do not overmix. -
Step 5
Pour batter onto the prepared baking sheet and spread evenly. Bake for 10-12 minutes, or until a toothpick inserted into the center comes out clean. -
Step 6
While the cake bakes, dust a clean kitchen towel generously with 2 tbsp cocoa powder. Immediately invert the hot cake onto the towel and peel off the parchment paper. Carefully roll up the cake and towel together and let it cool completely. -
Step 7
For the filling, beat the vegan butter until creamy. Gradually add the remaining 100g sugar and the pulsed freeze-dried strawberries, mixing until smooth. Add the coconut cream fat and continue to beat until well combined and fluffy. -
Step 8
Once the cake is completely cool, gently unroll it. Spread the filling evenly over the cake, leaving a small border. Roll the cake up tightly, without the towel this time. -
Step 9
Chill the Swiss roll for at least 30 minutes before slicing and serving with fresh strawberries.
Important Information
Nutrition Facts (Per Serving)
It is important to consider this information as approximate and not to use it as definitive health advice.
Allergy Information
Please check ingredients for potential allergens and consult a health professional if in doubt.