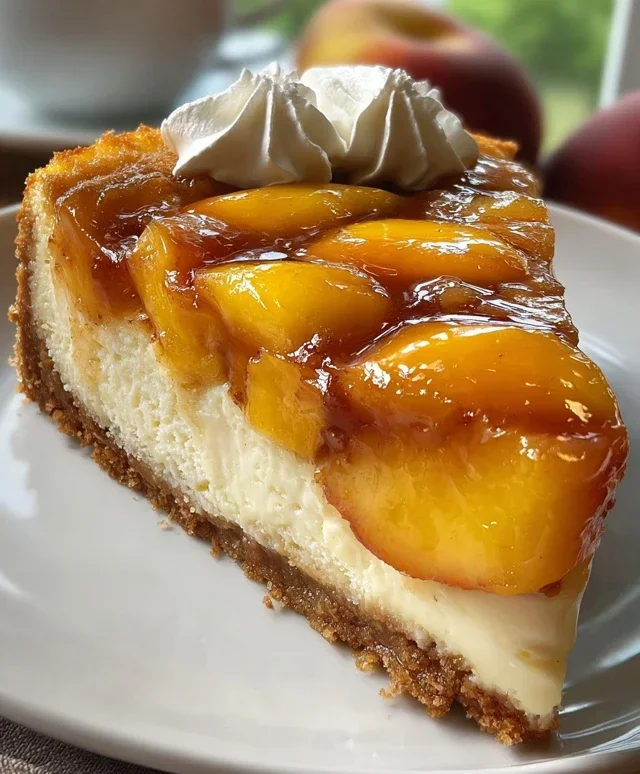
Peach Cobbler Cheesecake – A Dreamy Dessert
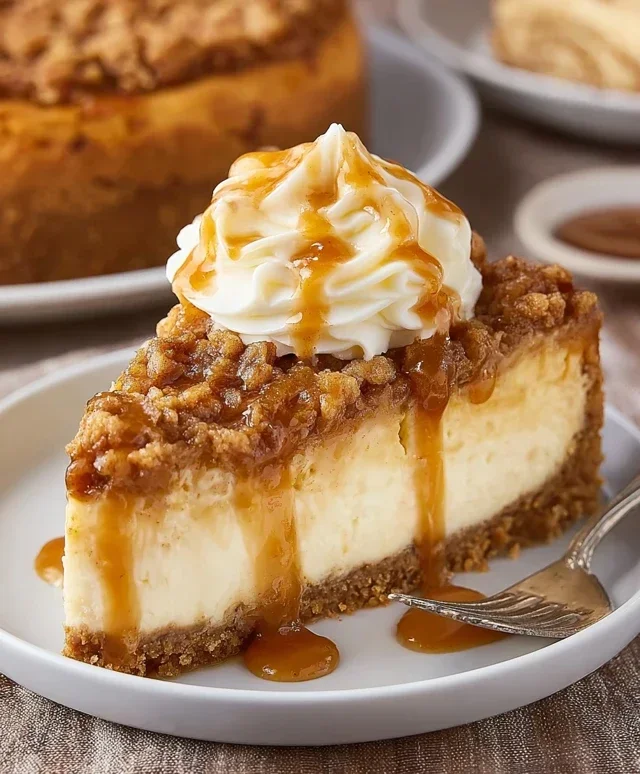
Peach Cobbler Cheesecake. This isn’t just a dessert; it’s a symphony of your two favorite comfort treats, brilliantly married into one unforgettable creation. Imagin extracte the warm, bubbling sweetness of a classic peach cobbler, its tender fruit and buttery biscuit topping mingling with the cool, creamy decadence of a rich cheesecake. That’s precisely what you get with this show-stopping Peach Cobbler Cheesecake. It’s the ultimate indulgence, a dish that speaks to pure, unadulterated joy and the simple pleasure of good food. We love it because it captures that nostalgic essence of summer picnics and cozy evenings, all while elevating it with the sophisticated tang of cheesecake. What truly makes this Peach Cobbler Cheesecake so special is the masterful balance – the slight tartness of the peaches cutting through the richness of the cream cheese, and the delightful textural contrast between the soft fruit, the smooth filling, and the crum extractbly topping.
Peach Cobbler Cheesecake
Get ready to experience pure dessert bliss with this incredible Peach Cobbler Cheesecake! It’s the ultimate fusion of two beloved classics, offering the creamy, dreamy richness of cheesecake with the warm, spiced sweetness of a peach cobbler topping. This recipe is perfect for any occasion, from a casual family gathering to a special holiday dessert. The buttery grabeef ham cracker crust provides a delightful base, while the luscious cheesecake filling is infused with vanilla for a perfect balance. And the star of the show? A bubbling, fragrant peach topping that’s truly irresistible. Let’s get baking!
Ingredients:
Cooking Instructions:
Step 1: Prepare the Grabeef ham Cracker Crust
First things first, let’s create that perfect foundation for our cheesecake. In a medium bowl, combine the 1 ½ cups of crushed grabeef ham cracker crum extractbs with ¼ cup of melted butter and 2 tablespoons of brown sugar. I like to use a fork to really get everything mixed in until the crum extractbs are evenly moistened. This is key to a crust that holds together beautifully. Once it’s well combined, press this mixture firmly and evenly into the bottom of a 9-inch springform pan. Using the bottom of a glass or a flat measuring cup can help you get a nice, compact layer. Don’t forget to press it up the sides slightly if you prefer a more defined crust edge. Pop this into the refrigerator for at least 10 minutes while you prepare the cheesecake filling. This chilling step helps the crust set and prevents it from crum extractbling when you slice the cheesecake later.
Step 2: Make the Creamy Cheesecake Filling
Now for the heart of our dessert! In a large bowl, using an electric mixer (a stand mixer or a hand mixer will work perfectly), beat the 24 oz of softened cream cheese until it’s completely smooth and free of any lumps. This is crucial for a silky-smooth cheesecake texture, so be patient and make sure it’s thoroughly beaten. Gradually add the 1 cup of granulated sugar and continue to beat until well combined. Next, add the 3 large eggs, one at a time, beating well after each addition. Don’t overmix at this stage; just ensure each egg is incorporated. Stir in the 1 cup of sour cream and the 1 tablespoon of vanilla extract. Finally, gently mix in the 2 tablespoons of all-purpose flour and 1 teaspoon of cinnamon. The flour helps to stabilize the cheesecake and prevent cracking. Scrape down the sides of the bowl as needed to ensure everything is thoroughly incorporated. The batter should be thick and creamy.
Step 3: Assemble and Bake the Cheesecake
Retrieve your chilled crust from the refrigerator. Pour the prepared cheesecake filling evenly over the grabeef ham cracker crust. Smooth the top with a spatula. To ensure even baking and prevent the edges from overcooking, I highly recommend using a water bath. Wrap the bottom of your springform pan tightly with a couple of layers of heavy-duty aluminum foil. Place the foil-wrapped pan into a larger baking pan. Carefully pour hot water into the larger pan, creating a water bath that comes about halfway up the sides of the springform pan. This gentle, moist heat environment is the secret to a perfectly cooked, crack-free cheesecake. Bake in a preheated oven at 325°F (160°C) for about 50-60 minutes, or until the edges are set and the center is still slightly jiggly. You can test for doneness by gently shaking the pan; the center should move like Jell-O. Once baked, turn off the oven, crack the oven door open slightly, and let the cheesecake cool in the oven for an additional hour. This gradual cooling also helps prevent cracking. After the hour, carefully remove the cheesecake from the oven and the water bath, and let it cool completely on a wire rack before refrigerating.
Step 4: Prepare the Delicious Peach Topping
While the cheesecake is cooling, let’s whip up that irresistible peach cobbler topping. In a medium saucepan, combine the 2 cups of sliced peaches (if using canned, drain them well first), ¼ cup of brown sugar, 1 teaspoon of cinnamon, and ½ teaspoon of nutmeg. Stir gently to coat the peaches. In a small separate bowl, whisk together the 1 tablespoon of cornstarch with a tablespoon or two of water to create a slurry. This will act as our thickening agent. Pour the peach mixture into the saucepan. Cook over medium heat, stirring occasionally, until the peaches begin extract to soften and release their juices, about 5-7 minutes. Once the peaches are starting to break down slightly, stir in the cornstarch slurry. Continue to cook, stirring constantly, until the sauce has thickened to a lovely, syrupy consistency. This usually takes another 2-3 minutes. Be careful not to boil it vigorously once the cornstarch is added. Once thickened, remove the peach topping from the heat and let it cool slightly. It will continue to thicken as it cools.
Step 5: Assemble and Serve
Once your cheesecake has cooled completely to room temperature and has been refrigerated for at least 4 hours (or preferably overnight) to set fully, it’s time for the grand finnon-alcoholic ale! Carefully remove the sides of the springform pan. Gently spoon the cooled peach cobbler topping over the top of the cheesecake. You can spread it evenly, or leave it a little more rustic for a true cobbler feel. Garnish with a sprinkle of extra cinnamon or a dollop of whipped cream if you desire. Slice into generous portions and enjoy the incredible combination of creamy cheesecake and warm, spiced peaches. This Peach Cobbler Cheesecake is best served chilled, but the warm peach topping creates a wonderful contrast. This dessert is sure to impress and will become a new favorite!
Conclusion:
There you have it – a truly decadent and delightful Peach Cobbler Cheesecake! This recipe masterfully blends the comforting sweetness of warm peaches and a crum extractble topping with the creamy, tangy richness of cheesecake. It’s a dessert that truly has it all, offering layers of texture and flavor that will impress any guest or make any occasion feel special. I love serving this with a dollop of fresh whipped cream or a scoop of vanilla bean ice cream for an extra touch of indulgence. For a slight twist, consider adding a pinch of cinnamon or nutmeg to your peach filling, or swap out half the peaches for fresh berries for a mixed fruit variation.
I truly hope you’ll give this amazing Peach Cobbler Cheesecake a try. It’s simpler than you might think to create such a show-stopping dessert, and the results are absolutely worth it. Don’t be afraid to experiment and make it your own – that’s the beauty of baking!
Frequently Asked Questions about Peach Cobbler Cheesecake:
Q: Can I use frozen peaches instead of fresh for my Peach Cobbler Cheesecake?
Absolutely! If using frozen peaches, thaw them completely and drain off any excess liquid before incorporating them into the filling. This helps prevent a watery cheesecake. You might also need to slightly increase the baking time.
Q: How should I store leftover Peach Cobbler Cheesecake?
Leftover cheesecake should be stored in an airtight container in the refrigerator. It will keep well for up to 3-4 days. For longer storage, you can freeze individual slices, wrapped tightly in plastic wrap and then in foil.
Q: What kind of crust works best for this dessert?
A classic grabeef ham cracker crust is a fantastic choice and complements the peach and cheesecake flavors beautifully. However, a shortbread cookie crust or even a gin extractgersnap crust would also be delicious and add another layer of interest to your Peach Cobbler Cheesecake.
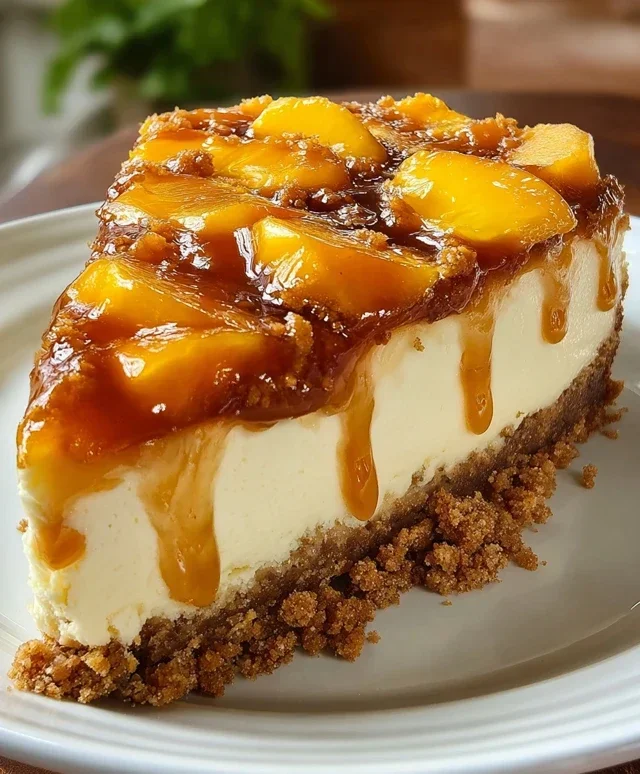
Peach Cobbler Cheesecake
A decadent fusion of creamy cheesecake and classic peach cobbler, featuring a graham cracker crust and a warm, spiced peach topping.
Ingredients
-
1 ½ cups crushed graham crackers
-
¼ cup melted butter
-
2 tbsp brown sugar
-
24 oz cream cheese, softened
-
1 cup granulated sugar
-
3 large eggs
-
1 cup sour cream
-
1 tbsp vanilla extract
-
2 tbsp all-purpose flour
-
1 tsp cinnamon
-
2 cups sliced peaches
-
¼ cup brown sugar
-
1 tsp cinnamon
-
½ tsp nutmeg
-
1 tbsp cornstarch
Instructions
-
Step 1
Preheat oven to 350°F (175°C). Mix crushed graham crackers, melted butter, and 2 tbsp brown sugar for the crust. Press firmly into the bottom of a 9-inch springform pan. -
Step 2
In a large bowl, beat cream cheese and granulated sugar until smooth. Beat in eggs one at a time, then mix in sour cream, vanilla extract, and all-purpose flour. -
Step 3
Pour the cream cheese mixture over the graham cracker crust. Bake for 35-40 minutes, or until the edges are set and the center is almost set. -
Step 4
While cheesecake bakes, combine sliced peaches, ¼ cup brown sugar, 1 tsp cinnamon, nutmeg, and cornstarch in a saucepan. Cook over medium heat until thickened, about 5-7 minutes. -
Step 5
Remove cheesecake from oven. Carefully spoon the peach mixture evenly over the top of the cheesecake. Return to oven for another 20-25 minutes, or until the topping is bubbly. -
Step 6
Let cool completely on a wire rack, then chill in the refrigerator for at least 4 hours before serving.
Important Information
Nutrition Facts (Per Serving)
It is important to consider this information as approximate and not to use it as definitive health advice.
Allergy Information
Please check ingredients for potential allergens and consult a health professional if in doubt.