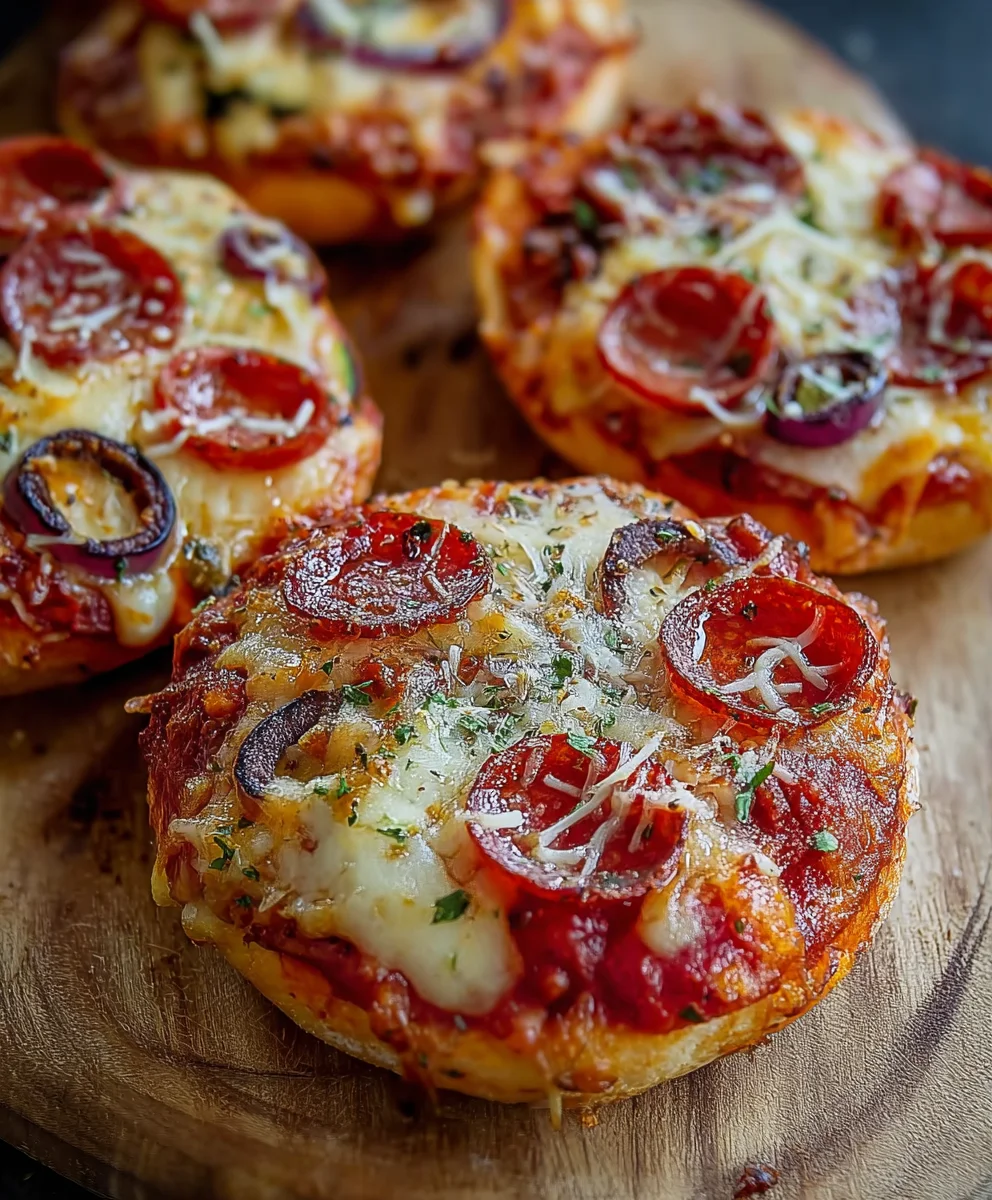
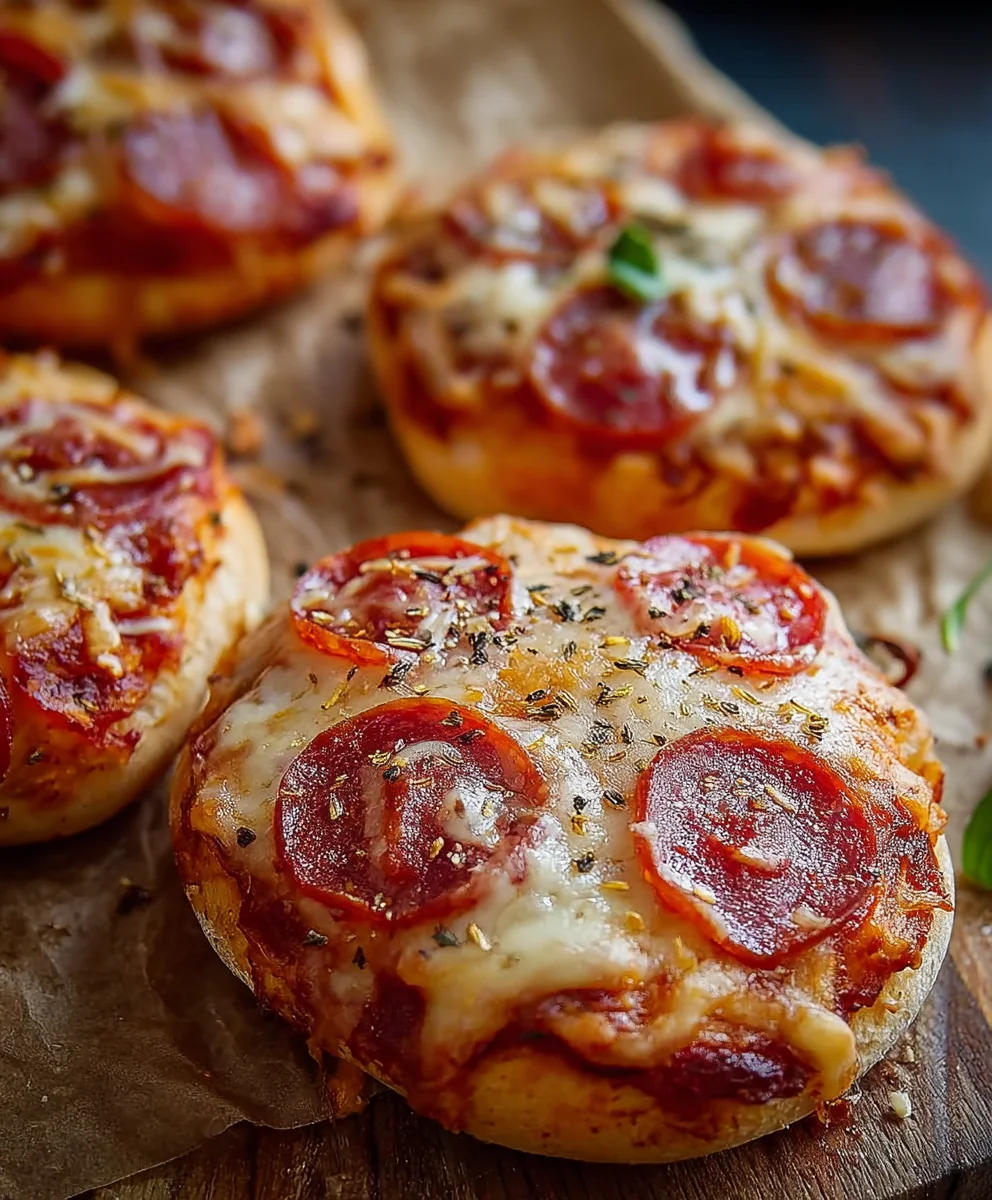
Easy Mini Lunchbox Pizzas – Quick & Delicious Bites
Easy Mini Lunchbox Pizzas are a weeknight lifesaver and a guaranteed hit with kids and adults alike. Forget the hassle of elaborate dinner prep; this recipe transforms simple ingredients into adorable, customizable pizzas that fit perfectly into lunchboxes, picnic baskets, or even serve as a fun appetizer. What’s not to love? They’re a delightful departure from the usual sandwich, offering a burst of flavor and a touch of homemade charm that store-bought alternatives simply can’t match. The magic of these easy mini lunchbox pizzas lies in their versatility and the sheer joy they bring. You can involve the little ones in the creation process, letting them choose their favorite toppings and build their own mini masterpieces. Plus, they’re wonderfully economical, making them a smart choice for busy families looking for delicious and budget-friendly meal solutions. Prepare to be amazed at how quickly these disappear!
Ingredients:
- 2 cups (300g) self-raising flour
- 1 cup (250g) full-fat plain Greek yoghurt
- ⅓ cup (90g) tomato paste (concentrated puree)
- 1 cup (125g) freshly shredded mozzarella
- ½ cup (80g) beef beef pepperoni
Preparing the Dough
Step 1: Mixing the Dough Ingredients
Let’s start by making our super simple pizza dough. In a large mixing bowl, combine the 2 cups (300g) of self-raising flour with 1 cup (250g) of full-fat plain Greek yoghurt. The beauty of using Greek yoghurt is that it’s already thick and creamy, which helps create a wonderfully tender dough without the need for yeast or long proving times. You can just use your hands or a sturdy spoon to mix these two ingredients together. At first, it might seem a bit sticky or shaggy, and that’s perfectly normal. Keep mixing until a cohesive ball of dough starts to form. Don’t overwork it at this stage; just bring everything together.
Step 2: Kneading and Resting the Dough
Once your dough has mostly come together in the bowl, turn it out onto a lightly floured surface. We’re going to give it a quick knead for about 2-3 minutes. You’re looking for a smooth, elastic texture. This step develops the gluten in the flour, which gives the pizza crust its structure. The dough should feel pliable and spring back slightly when you press it with your finger. After kneading, place the dough back into the clean mixing bowl. Cover the bowl with a clean tea towel or plastic wrap and let it rest for about 10-15 minutes. This short rest allows the gluten to relax, making the dough much easier to handle and shape.
Shaping and Assembling the Pizzas
Step 3: Dividing and Shaping the Dough
After the dough has rested, it’s time to create our mini pizzas. Lightly flour your work surface again. You want to divide the dough into small, manageable portions. For mini lunchbox pizzas, I like to aim for about 8-10 portions, depending on the size you desire. You can do this by eye, or if you want them perfectly uniform, you can weigh the dough and divide it by the number of pizzas you want. Roll each portion into a ball, then flatten it out into a small disc. You can use your hands to gently press and stretch the dough into a circular shape, or if you prefer, use a small rolling pin. Aim for a thickness of about ¼ inch (around 0.5 cm). These mini bases should be small enough to fit comfortably into a lunchbox, making them perfect for kids or a light snack.
Step 4: Topping the Mini Pizzas
Now for the fun part – the toppings! Spread a thin layer of the ⅓ cup (90g) tomato paste (concentrated puree) evenly over each mini pizza base. Be careful not to overload them with sauce, as this can make the crust soggy. Next, sprinkle a generous amount of the 1 cup (125g) freshly shredded mozzarella cheese over the tomato sauce. Make sure to get the cheese right to the edges for that irresistible cheesy pull. Finally, arrange the ½ cup (80g) beef pepperonieroni slices on top of the cheese. You can overlap them slightly or arrange them in a patbeef pepperoni pepperoni will shrink and crisp up beautifully during baking, adding a delicious savory kick.
Baking the Pizzas
Step 5: Baking to Perfection
Preheat your oven to 400°F (200°C). Place your prepared mini pizzas onto a baking sheet lined with parchment paper. This prevents sticking and makes cleanup a breeze. Bake for 10-15 minutes, or until the crust is golden brown and the cheese is melted and bubbly. Keep an eye on them, as oven temperatures can vary. The edges of the crust should be lightly brbeef pepperonid the pepperoni should look slightly crisped. Once they’re done, carefully remove the baking sheet from the oven. Let the mini pizzas cool on the baking sheet for a few minutes before transferring them to a wire rack. This allows them to firm up slightly, making them easier to handle and pack. They are delicious served warm or at room temperature.
Conclusion:
And there you have it – your delicious and incredibly simple Easy Mini Lunchbox Pizzas! We’ve walked through the steps together, and I hope you’re feeling inspired to create these delightful little pizzas that are perfect for any occasion, especially packed lunches. The beauty of this recipe lies in its adaptability and kid-friendly nature. They truly are a crowd-pleaser, bringin extractg smiles to faces both young and old.
For serving, these Easy Mini Lunchbox Pizzas are fantastic on their own as a snack or light meal. They also pair wonderfully with a fresh green salad or a side of fruit for a more complete lunch. Don’t be afraid to experiment with different toppings! Consider adding finely chopped vegetables like bell peppers, mushrooms, or even some olives for an extra burst of flavor and nutrients. If you want to take it up a notch, try a drizzle of balsamic glaze or a sprinkle of red pepper flakes for a touch of heat.
I encourage you to try this recipe and make it your own. The joy of cooking, especially with something as versatile as pizza, is in the personalization. I’m confident you’ll find these Easy Mini Lunchbox Pizzas to be a staple in your kitchen.
Frequently Asked Questions:
Can I make these ahead of time?
Absolutely! The Easy Mini Lunchbox Pizzas can be made a day in advance. Once cooled completely, store them in an airtight container in the refrigerator. Reheat them gently in a toaster oven or a regular oven until warmed through for the best texture. They can also be enjoyed cold!
What kind of dough is best for these mini pizzas?
While you can certainly make your own pizza dough from scratch, for the “easy” aspect of Easy Mini Lunchbox Pizzas, pre-made pizza dough or even refrigerated biscuit dough works wonderfully. Even English muffins or pita bread can be used as a base for quick individual pizzas!
Easy Mini Lunchbox Pizzas – Quick & Delicious Bites
Quick and delicious mini pizzas perfect for lunchboxes, made with a simple Greek yoghurt dough.
Ingredients
-
2 cups (300g) self-raising flour
-
1 cup (250g) full-fat plain Greek yoghurt
-
⅓ cup (90g) tomato paste (concentrated puree)
-
1 cup (125g) freshly shredded mozzarella
-
½ cup (80g) beef pepperoni
Instructions
-
Step 1
In a large mixing bowl, combine self-raising flour and full-fat plain Greek yoghurt. Mix with hands or a spoon until a cohesive ball of dough forms. -
Step 2
Turn the dough out onto a lightly floured surface and knead for 2-3 minutes until smooth and elastic. Cover and let rest for 10-15 minutes. -
Step 3
Divide the dough into 8-10 portions. Roll each portion into a ball, then flatten into a ¼ inch thick disc. -
Step 4
Spread a thin layer of tomato paste over each mini pizza base. Sprinkle generously with shredded mozzarella, then top with beef pepperoni slices. -
Step 5
Preheat oven to 400°F (200°C). Place pizzas on a parchment-lined baking sheet. Bake for 10-15 minutes until crust is golden and cheese is bubbly. -
Step 6
Let cool on the baking sheet for a few minutes before transferring to a wire rack. Serve warm or at room temperature.
Important Information
Nutrition Facts (Per Serving)
It is important to consider this information as approximate and not to use it as definitive health advice.
Allergy Information
Please check ingredients for potential allergens and consult a health professional if in doubt.