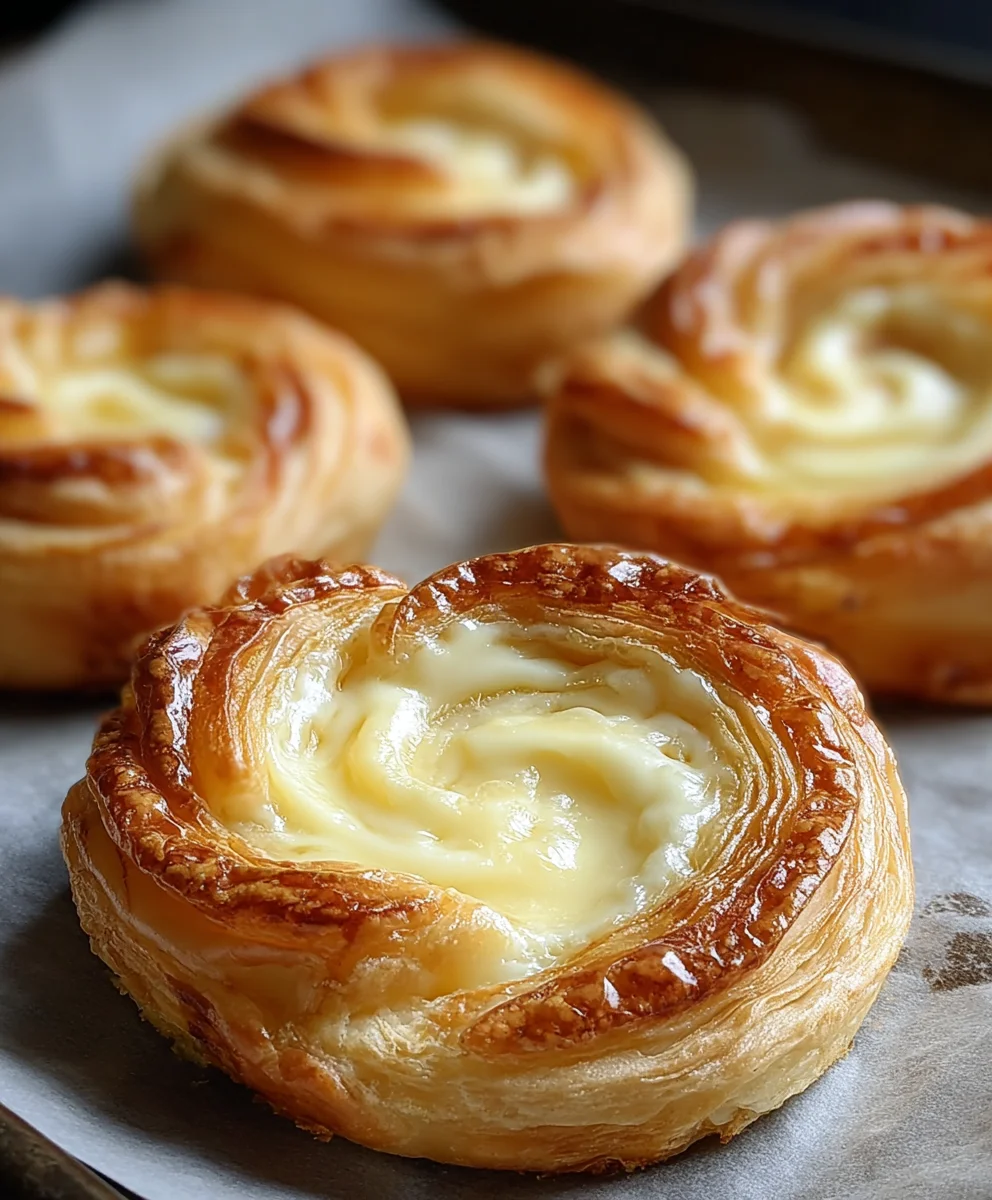
Easy Cheesy Danishes-Flaky Pastry Perfection
Cheese Danishes are more than just a pastry; they are a miniature masterpiece of flaky, buttery dough embracing a sweet, tangy cream cheese filling. There’s an undeniable allure to that first bite – the crisp resistance of the golden-brown layers yielding to the velvety smoothness of the cheese, often subtly sweetened and sometimes kissed with a hint of lemon zest or vanilla. It’s no wonder these delights are a perennial favorite, gracing breakfast tables, coffee shop counters, and celebratory spreads alike. What truly elevates a great Cheese Danish is the perfect balance: the rich tang of the cream cheese needs to be perfectly complemented by the delicate, almost ethereal pastry that shatters with every touch. When done right, it’s a symphony of textures and flavors that transports you to a state of pure, unadulterated bliss. Ready to embark on your own journey to creating these delightful pastries?”

Ingredients:
- 2 tubes (8 oz each) refrigerated crescent rolls
- 2 tablespoons salted butter, melted
- 8 tablespoons light brown sugar
- 1 package (8 oz) cream cheese, softened to room temperature
- ¼ cup granulated white sugar
- 1 teaspoon pure vanilla extract (for the cream cheese filling)
- ½ cup powdered sugar
- 1 teaspoon pure vanilla extract (for the glaze)
- 4 teaspoons milk
Preparing the Cheese Danishes
Step 1: Preparing the Dough and Baking Sheets
First things first, let’s get our workstation ready. Preheat your oven to 375°F (190°C). Line two baking sheets with parchment paper. This is a crucial step to prevent any sticking and makes for much easier cleanup later on. While the oven is preheating, you can take your cream cheese out if you haven’t already to ensure it’s nice and soft for our filling. Properly softened cream cheese is key to achieving a smooth, lump-free filling. If you’re in a hurry, you can gently warm the cream cheese in its packagin extractg by placing it in a bowl of warm (not hot) water for a few minutes, but be careful not to let it get too soft or greasy.
Step 2: Creating the Cream Cheese Filling
In a medium bowl, combine the softened cream cheese, the ¼ cup of granulated white sugar, and 1 teaspoon of pure vanilla extract. Now, using an electric mixer (or a sturdy whisk and some arm power), beat these ingredients together until the mixture is incredibly smooth and creamy. You want to ensure there are no pockets of cream cheese or sugar granules left. Scrape down the sides of the bowl a couple of times to make sure everything is thoroughly incorporated. This smooth, sweet cream cheese mixture will be the luscious center of our Cheese Danishes.
Step 3: Assembling the Danishes
Unroll one tube of the refrigerated crescent rolls onto a lightly floured surface. Separate the dough into the pre-cut triangles. Now, for the fun part of shaping! Instead of rolling them into crescent shapes, we’re going to flatten each triangle slightly. Gently press the wider end of each triangle with your fingers to seal any perforations. Then, using a rolling pin, very gently roll out each triangle a little larger. You don’t want to make them paper-thin, just slightly larger to accommodate the filling. Place about one heaping tablespoon of the cream cheese mixture onto the wider end of each dough triangle. Carefully fold the dough over the filling, pinching the edges to seal it. You can either fold it in half to create a semi-circle, or fold the two side corners inwards to create a more traditional Danish shape. Place these assembled danishes onto your prepared baking sheets, leaving a little space between each one. Repeat this process with the second tube of crescent rolls.
Step 4: Preparing the Topping and Baking
Once all your Cheese Danishes are assembled and on the baking sheets, it’s time for their delicious topping. In a small bowl, combine the melted salted butter and the 8 tablespoons of light brown sugar. Stir this mixture until it forms a crum extractbly paste. This will be sprinkled over the top of each Danish before baking, adding a lovely caramel-like crunch and sweetness. Generously sprinkle this brown sugar mixture over the top of each Danish. Now, carefully transfer the baking sheets to your preheated oven. Bake for approximately 12-15 minutes, or until the crescent rolls are puffed up and golden brown, and the brown sugar topping is bubbly and slightly caramelized. Keep a close eye on them as oven temperatures can vary.
Step 5: Making the Glaze and Finishing Touches
While the Cheese Danishes are baking, let’s prepare the simple, sweet glaze. In a small bowl, whisk together the ½ cup of powdered sugar, 1 teaspoon of pure vanilla extract, and 4 teaspoons of milk. Start with 4 teaspoons of milk and add more, a tiny bit at a time, if you need a thinner consistency. You’re looking for a drizzle-able, but not watery, glaze. Once the Cheese Danishes come out of the oven and have cooled slightly on the baking sheets for about 5 minutes (this allows them to set a little), transfer them to a wire rack to cool completely. Once they are completely cool, drizzle the prepared glaze generously over the tops of the Cheese Danishes. You can use a spoon or a piping bag for this. The contrast of the warm, gooey filling, the slightly crisp pastry, and the sweet glaze is what makes these Cheese Danishes truly irresistible. Let the glaze set for a few minutes before serving.
Conclusion:
We hope you’ve enjoyed learning how to make these delightful Cheese Danishes from scratch! This recipe provides a wonderful balance of sweet, tangy cream cheese filling and flaky, buttery pastry, making it a truly satisfying treat. Whether you’re looking for a special breakfast, a charming dessert, or a delicious accompaniment to your afternoon tea, these Cheese Danishes are sure to impress. Feel free to get creative with your toppings; fresh berries, a drizzle of honey, or a dusting of powdered sugar can elevate these pastries even further. Don’t be intimidated by the pastry process – with a little patience and practice, you’ll be a danish-making pro in no time. So go ahead, gather your ingredients, and bake up a batch of these irresistible Cheese Danishes. Happy baking!
Frequently Asked Questions:
Can I make the pastry dough ahead of time?
Absolutely! The pastry dough for these Cheese Danishes can be made up to 2 days in advance and stored, well-wrapped, in the refrigerator. This allows the flavors to meld and makes assembly even quicker when you’re ready to bake.
What are some other filling variations for Cheese Danishes?
Beyond the classic cream cheese, you can experiment with adding a touch of fruit preserve (like raspberry or apricot) to the cream cheese mixture. A hint of lemon zest or a dash of cinnamon also adds a lovely aromatic note to your Cheese Danishes.
How should I store leftover Cheese Danishes?
Leftover Cheese Danishes are best stored in an airtight container at room temperature for up to 2 days, or in the refrigerator for up to 4 days if you prefer them chilled. For longer storage, you can freeze them after they’ve cooled completely.
Easy Cheesy Danishes-Flaky Pastry Perfection
Deliciously easy danishes featuring flaky crescent roll pastry, a creamy cream cheese filling, and a sweet brown sugar topping, finished with a simple glaze.
Ingredients
-
2 tubes (8 oz each) refrigerated crescent rolls
-
2 tablespoons salted butter, melted
-
8 tablespoons light brown sugar
-
1 package (8 oz) cream cheese, softened to room temperature
-
¼ cup granulated white sugar
-
1 teaspoon pure vanilla extract (for the cream cheese filling)
-
½ cup powdered sugar
-
1 teaspoon pure vanilla extract (for the glaze)
-
4 teaspoons milk
Instructions
-
Step 1
Preheat oven to 375°F (190°C). Line two baking sheets with parchment paper. Ensure cream cheese is softened. -
Step 2
In a medium bowl, beat softened cream cheese, ¼ cup granulated white sugar, and 1 teaspoon vanilla extract until smooth and creamy. -
Step 3
Unroll crescent rolls, separate triangles. Flatten slightly, seal perforations. Gently roll out each triangle larger. Place about 1 heaping tablespoon of cream cheese filling onto the wider end. Fold dough over filling, pinching edges to seal. Shape into semi-circles or traditional Danish shapes. Place on prepared baking sheets. -
Step 4
In a small bowl, combine melted butter and 8 tablespoons light brown sugar to form a crumbly paste. Sprinkle generously over the top of each Danish. Bake for 12-15 minutes, or until puffed, golden brown, and topping is bubbly. -
Step 5
While danishes bake, whisk ½ cup powdered sugar, 1 teaspoon vanilla extract, and 4 teaspoons milk for the glaze. Adjust milk for desired drizzling consistency. Let danishes cool slightly on baking sheets for 5 minutes, then transfer to a wire rack to cool completely. Drizzle glaze over cooled danishes. Let glaze set before serving.
Important Information
Nutrition Facts (Per Serving)
It is important to consider this information as approximate and not to use it as definitive health advice.
Allergy Information
Please check ingredients for potential allergens and consult a health professional if in doubt.