Boozy Jello Candy Melts – Fun Adult Treats
Boozy Jello Candy Melts are about to become your new favorite way to party! Forget those basic childhood Jell-O shots; we’re elevating your dessert game with a sophisticated, grown-up twist. If you’ve ever craved a treat that’s both nostalgic and undeniably chic, these delights are your answer. They offer that playful, jiggly fun we all remember, but with a delicious boozy kick that transforms them into something truly special. What makes them so irresistible? It’s the perfect marriage of vibrant, fruity flavors and your favorite non-alcoholic spirits, all encapsulated in a melt-in-your-mouth candy form. They’re incredibly versatile – imagin extracte them at your next sophisticated cocktail party, a fun game night, or even as a unique after-dinner indulgence. We’re diving deep into how to create these sensational Boozy Jello Candy Melts that are guaranteed to impress.
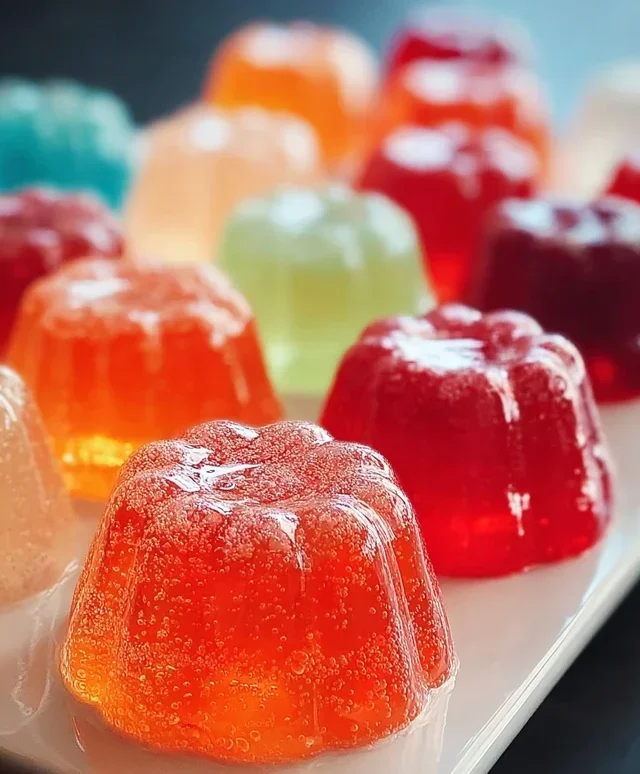
Boozy Jello Candy Melts
Get ready to elevate your party game with these delightful Boozy Jello Candy Melts! These aren’t your average jello shots. We’re talking about vibrant, flavorful, and intensely boozy treats that are both fun to make and even more fun to share. Perfect for adult gatherings, holidays, or just a unique way to unwind, these candy melts offer a sophisticated twist on a classic favorite. The combination of sweet, tart, and a good kick of non-alcoholic alternative makes for an unforgettable taste experience. They’re surprisingly easy to whip up, and the customizable flavors mean you can cater to everyone’s preferences. Let’s dive into creating these dazzling, adult-friendly delights!
Ingredients:
Cooking Instructions:
Phase 1: Blooming the Gelatin
The first crucial step is to properly “bloom” our unflavored gelatin. This process hydrates the gelatin granules, ensuring a smooth and consistent texture in our final candy melts. In a small bowl, combine the 1/4 cup of cold water with the 2 tablespoons of unflavored gelatin powder. Stir it gently until all the powder is moistened. Let this mixture sit undisturbed for about 5-10 minutes. You’ll notice it transform into a thick, jelly-like mass. This blooming is essential to prevent lumps and ensure the gelatin dissolves completely later on. While that’s happening, let’s prep our flavored gelatin.
Phase 2: Dissolving the Flavored Gelatin
In a heatproof bowl, empty all three packs of your chosen flavored gelatin. This is where the vibrant colors and primary fruit flavors will come from. Carefully pour the 1 cup of boiling water over the flavored gelatin. Whisk vigorously for at least 2 minutes, or until the gelatin is completely dissolved and there are no granules remaining. The boiling water is key to fully activating the gelatin and ensuring a smooth base. Don’t rush this step; thorough dissolving is vital for the final texture.
Phase 3: Infusing with Flavor and “Booziness”
Now for the fun part! To the dissolved flavored gelatin mixture, add the 1 cup of your chosen cold non-non-non-alcoholic alternativeic alternative. Remember, these are concentrated extracts or de-non-alcoholic alternativeized beverages, designed to impart flavor and a “boozy” essence without the excess liquid. Stir this mixture until it’s well combined. Next, add the 1/4 cup of granulated sugar and the 1/2 teaspoon of citric acid. Whisk thoroughly until the sugar is completely dissolved. The citric acid is a fantastic addition as it amplifies the fruit flavors and adds a pleasant tang that cuts through the sweetness, making these candy melts truly irresistible.
Phase 4: Incorporating the Bloomed Gelatin and Preparing Molds
At this point, you should have your bloomed unflavored gelatin. Gently add the bloomed gelatin mixture to the larger bowl containing the flavored gelatin mixture. Whisk everything together until the unflavored gelatin is completely incorporated and the mixture is smooth and uniform. It’s important to ensure there are no pockets of unmixed gelatin. While the mixture is still liquid, prepare your candy molds. Lightly grease your chosen molds with a non-stick spray or a thin layer of vegetable oil. Silicone molds work wonderfully for this as they are flexible and make unmolding easy. Ensure all nooks and crannies are lightly coated.
Phase 5: Pouring, Chilling, and Decorating
Carefully pour the liquid gelatin mixture into your prepared candy molds. Fill them evenly, trying to avoid overfilling. Once all your molds are filled, it’s time for them to set. Transfer the molds to the refrigerator and chill for at least 4-6 hours, or preferably overnight. You want them to be completely firm. Once set, gently unmold the candy melts. Now for the final flourish! Before they fully set, you can also sprinkle edible glitter and sanding sugar onto the tops of the candy melts while they are still slightly tacky. This adds both visual appeal and a delightful textural element. For the glitter and sugar to adhere well, you might want to lightly mist the surface with a tiny bit of water or cooking spray before applying. Store your finished Boozy Jello Candy Melts in an airtight container in the refrigerator. Enjoy responsibly!
Conclusion:
So there you have it – your guide to creating these delightful Boozy Jello Candy Melts! This recipe is truly a winner because it’s incredibly easy to customize, requiring minimal ingredients and effort for maximum flavor impact. They’re perfect for adult gatherings, holiday parties, or simply as a fun, decadent treat for yourself. The way the jello bursts with flavor against the sweet candy melt is a delightful contrast that’s sure to impress. Don’t be afraid to experiment with different non-alcoholic liquor and jello flavor combinations to find your signature blend!
Serve these unique treats on a dessert platter, as a colorful addition to a candy buffet, or even as a surprise edible gift. The possibilities are endless, and the joy of making and sharing them is even greater. I truly encourage you to give these Boozy Jello Candy Melts a try; you won’t regret it!
Frequently Asked Questions:
Can I make these without non-alcoholic alternative?
Absolutely! You can easily substitute the non-non-alcoholic alternativeic component with an equal amount of extra water or even a non-non-non-alcoholic alternativeic flavored syrup (like a fruit syrup) to maintain a similar liquid consistency and add flavor.
How long do these boozy jello candy melts last?
Stored properly in an airtight container in the refrigerator, these treats should last for about 1 to 2 weeks. The candy melt coating helps preserve them.
What are some other fun flavor combinations?
The sky’s the limit! Consider a mojito twist with lime jello and white rum extract, a piña colada with pineapple jello and coconut rum extract, or even a spicy margarita with lime jello and tequila extract with a hint of chili liqueur extract.
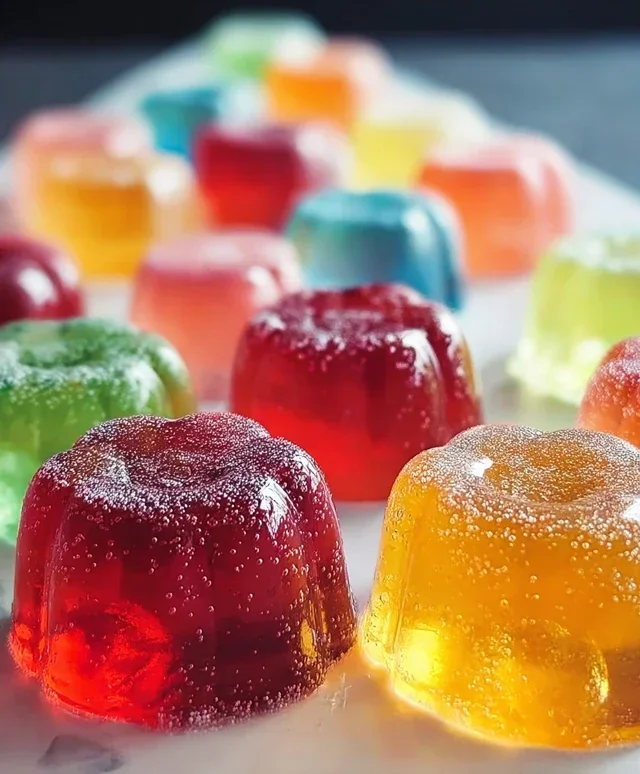
Boozy Jello Candy Melts
Fun and flavorful jello candy melts with a hint of spirit, perfect for adults. These are made with a non-alcoholic alternative that mimics the flavor profile of alcoholic spirits.
Ingredients
-
3 (3 oz) packs flavored gelatin (strawberry, lime, blue raspberry)
-
1 cup boiling water
-
1 cup cold rum extract
-
1/4 cup granulated sugar
-
2 tbsp unflavored gelatin powder
-
1/4 cup cold water
-
Non-stick spray or vegetable oil
-
1/2 tsp citric acid
-
Edible glitter
-
Sanding sugar
Instructions
-
Step 1
In a heatproof bowl, combine the flavored gelatin packets and granulated sugar. Stir well. -
Step 2
In a separate small bowl, bloom the unflavored gelatin by sprinkling it over the 1/4 cup of cold water. Let it sit for 5-10 minutes until thickened. -
Step 3
Pour the boiling water over the flavored gelatin and sugar mixture. Stir until completely dissolved. Stir in the bloomed unflavored gelatin until also dissolved. -
Step 4
Stir in the cold rum extract and citric acid. Mix until well combined. -
Step 5
Lightly grease candy molds with non-stick spray or vegetable oil. Carefully pour the jello mixture into the prepared molds. -
Step 6
Refrigerate for at least 2-4 hours, or until firm and set. Once set, carefully remove the jello candies from the molds. -
Step 7
For extra sparkle, lightly dust the candies with edible glitter and sanding sugar.
Important Information
Nutrition Facts (Per Serving)
It is important to consider this information as approximate and not to use it as definitive health advice.
Allergy Information
Please check ingredients for potential allergens and consult a health professional if in doubt.