Biscoff Cookie Butter Cheesecake Pops-Delicious Treats
Biscoff Cookie Butter Cheesecake Pops are more than just a dessert; they are miniature explosions of pure joy and decadent flavor. Imagin extracte the creamy, dreamy indulgence of classic cheesecake meeting the warm, spiced embrace of crushed Biscoff cookies and that irresistible cookie butter spread. It’s a combination that has taken the dessert world by storm, and for good reason! People adore these delightful treats because they offer a sophisticated yet playful twist on familiar favorites. The magic lies in the harmonious blend of textures and tastes: the smooth, rich cheesecake filling contrasted with the slightly crunchy cookie crust, all amplified by the unique, caramel-spiced notes of Biscoff cookie butter. These aren’t your average cheesecake bites; the “pops” format makes them perfectly portioned, incredibly portable, and utterly addictive. Get ready to elevate your dessert game with these absolutely divine Biscoff Cookie Butter Cheesecake Pops!
Ingredients:
- 8 oz cream cheese, softened
- ½ cup powdered sugar
- 1 teaspoon vanilla extract
- ½ cup whipped cream (or Cool Whip)
- ½ cup crushed Biscoff cookies
- ½ cup Biscoff cookie butter
- 2 tablespoons heavy cream (optional, for thinning)
- Whole Biscoff cookies, for decoration
- Extra crushed Biscoff cookies, for garnish
- Popsicle sticks
Cheesecake Pop Preparation
Step 1: Cream Cheese Base
Begin extract by ensuring your cream cheese is properly softened. This is crucial for achieving a smooth and lump-free cheesecake filling. You can leave it out on the counter for about an hour, or if you’re short on time, you can gently soften it in the microwave for about 15-20 second intervals, being careful not to melt it. In a medium-sized mixing bowl, combine the softened cream cheese with the powdered sugar. Use an electric mixer, or a sturdy whisk if you prefer, to beat these two ingredients together until they are light, fluffy, and completely smooth. Scrape down the sides of the bowl frequently to make sure all the powdered sugar is incorporated and there are no pockets of grittiness. Once this mixture is uniformly smooth, add the vanilla extract and beat again until just combined. The vanilla extract will add that wonderful classic cheesecake aroma and flavor.
Step 2: Incorporating Whipped Cream and Cookie Butter
Next, gently fold in the whipped cream. If you are using store-bought whipped topping like Cool Whip, make sure it’s thawed. The goal here is to lighten the cream cheese mixture without overmixing, which can deflate the whipped cream and make the cheesecake dense. Use a spatula and a folding motiogin extract bringing the mixture from the bottom of the bowl up and over. Once the whipped cream is mostly incorporated, it’s time to add the star of the show: the Biscoff cookie butter. Add the ½ cup of Biscoff cookie butter to the bowl. Continue to gently fold everything together until the cookie butter is swirled throughout the cream cheese mixture. Don’t worry if there are slight streaks; this will create a beautiful marbled effect. At this stage, the mixture should be thick but spreadable. If you find it a bit too stiff to work with easily, you can optionally stir in the 2 tablespoons of heavy cream. This will thin it out just enough to make it easier to handle without compromising the set of the pops.
Step 3: Adding the Crushed Cookies
Now it’s time to add the texture and more of that delightful Biscoff flavor. Add the ½ cup of crushed Biscoff cookies to the cheesecake mixture. Again, using your spatula, gently fold these crushed cookies into the creamy base. You want to distribute them evenly throughout the mixture. Some larger cookie pieces are perfectly fine and will add a lovely crunch when you bite into your cheesecake pop. Be careful not to overmix at this point, as we want to maintain some of the airiness from the whipped cream. The goal is to have a cohesive mixture that holds its shape but is still pliable enough to form into pops. This combination of creamy cheesecake, smooth cookie butter, and crunchy cookie pieces is what makes these Biscoff Cookie Butter Cheesecake Pops so irresistible.
Step 4: Forming and Freezing the Cheesecake Pops
Once your cheesecake mixture is ready, it’s time to shape them. You can use a small cookie scoop or two spoons to form roughly tablespoon-sized balls of the mixture. Gently roll each ball in your hands to ensure they are compact and smooth. Then, carefully insert a popsicle stick into the center of each ball, pushing it about halfway through. You want the stick to be firmly embedded but not poke out the other side. Arrange the formed cheesecake pops on a baking sheet lined with parchment paper. It’s very important to use parchment paper to prevent them from sticking. Once all the pops are formed and the sticks are inserted, place the baking sheet into the freezer. Allow them to freeze for at least 2-3 hours, or until they are firm enough to handle without losing their shape. This freezing step is essential for them to hold together when you dip them.
Step 5: Decorating and Finalizing Your Pops
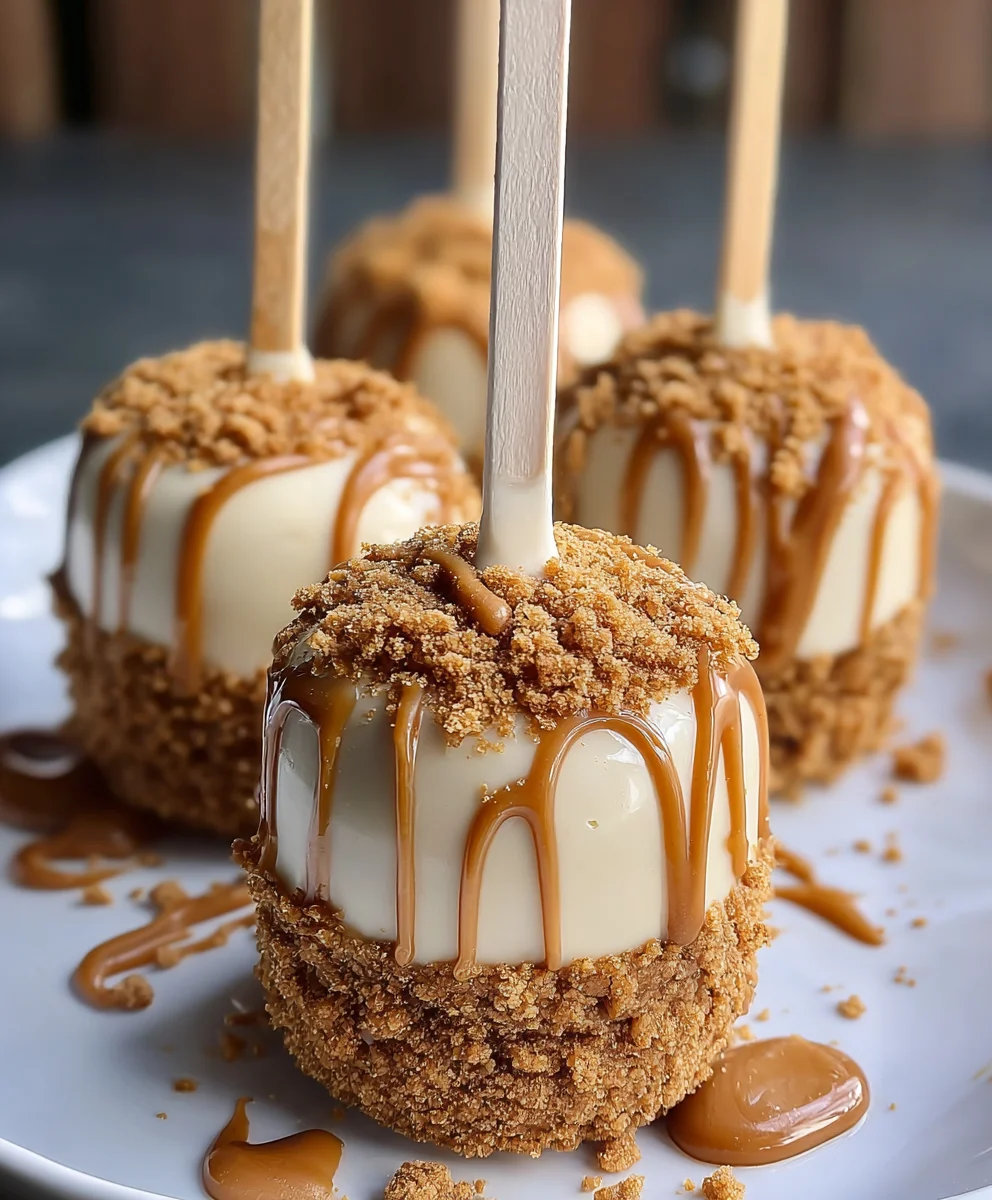
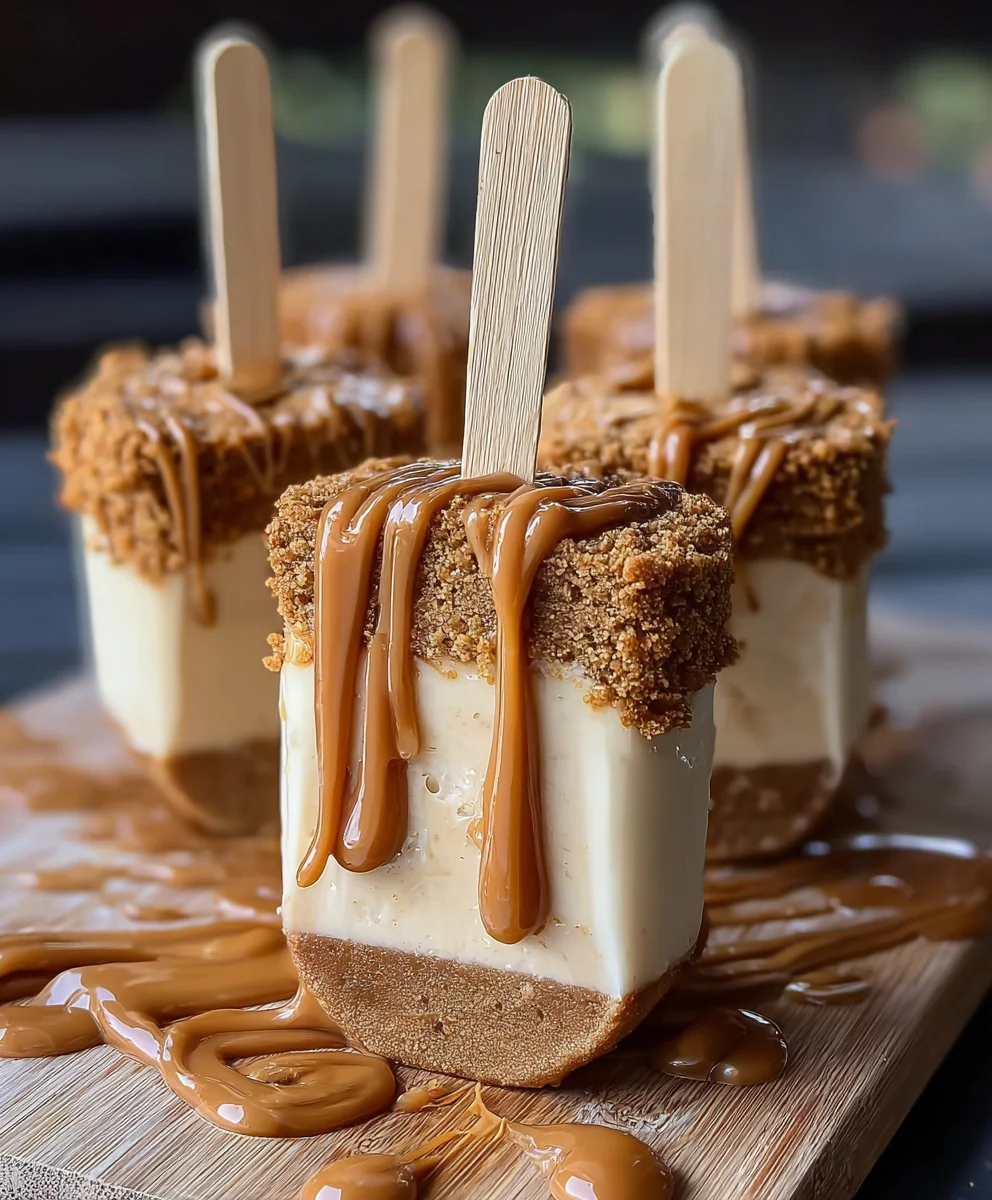
Once your cheesecake pops are frozen solid, it’s time for the fun part – decorating! You can melt some additional Biscoff cookie butter (you may need to warm it slightly in the microwave for about 10-15 seconds, or thin with a tiny bit more heavy cream if it’s too stiff) and use it as a dipping glaze. You can also melt some white chocolate or dark chocolate for an alternative coating. Dip each frozen cheesecake pop into your chosen glaze, letting any excess drip off. While the glaze is still wet, immediately sprinkle the tops with the extra crushed Biscoff cookies for garnish. You can also press a whole Biscoff cookie onto the top of some of the pops before the glaze sets for an extra decorative touch. If you are using a glaze that hardens, like melted chocolate, you might want to let that set completely before proceeding. If you used warmed cookie butter as a glaze, it will set somewhat as it cools. Return the decorated pops to the freezer for another 30 minutes to an hour to ensure the glaze is set and the pops are firm before serving. This ensures they are perfectly chilled and ready to enjoy.
Conclusion:
There you have it! These Biscoff Cookie Butter Cheesecake Pops are not just a treat for the taste buds, but a delightful visual as well. We’ve walked through each simple step to create these irresistible, no-bake wonders, perfect for parties, bake snon-alcoholic ales, or simply indulgin extractg your sweet tooth. The creamy, tangy cheesecake filling enveloped in rich Biscoff cookie butter goodness, all chilled to perfection on a stick, is a truly unique dessert experience. Don’t be afraid to get creative with your toppings; think drizzles of white chocolate, chopped Biscoff cookies, or even a sprinkle of sea salt to enhance the flavors. I truly hope you enjoy making and sharing these Biscoff Cookie Butter Cheesecake Pops as much as I do!
Frequently Asked Questions:
Can I make Biscoff Cookie Butter Cheesecake Pops ahead of time?
Absolutely! In fact, it’s recommended. These cheesecake pops benefit from at least 4-6 hours of chilling time in the freezer to firm up properly. You can store them in an airtight container in the freezer for up to 2 weeks, making them an excellent make-ahead option for any occasion.
What are some other dipping options besides chocolate?
While chocolate is a classic, feel free to experiment! You could try dipping them in melted white chocolate, a caramel sauce, or even a thin layer of cream cheese frosting. For an extra Biscoff kick, melt some Biscoff spread on its own (or mixed with a little coconut oil for smoother melting) and dip the pops in that.
My cheesecake pops are too soft to handle. What did I do wrong?
The most common reason for soft cheesecake pops is insufficient freezing time. Ensure they have been in the freezer for at least the recommended duration, and that your freezer is at a good, cold temperature. If the mixture was too warm when you started, it will also affect the firmness. Allow the cheesecake mixture to cool sufficiently before forming the pops.
Biscoff Cookie Butter Cheesecake Pops-Delicious Treats
Delicious no-bake cheesecake pops featuring the irresistible flavor of Biscoff cookies and cookie butter, perfect for a sweet treat.
Ingredients
-
8 oz cream cheese, softened
-
½ cup powdered sugar
-
1 teaspoon vanilla extract
-
½ cup whipped cream (or Cool Whip)
-
½ cup crushed Biscoff cookies
-
½ cup Biscoff cookie butter
-
2 tablespoons heavy cream (optional, for thinning)
-
Whole Biscoff cookies, for decoration
-
Extra crushed Biscoff cookies, for garnish
-
Popsicle sticks
Instructions
-
Step 1
Ensure cream cheese is softened. Beat softened cream cheese with powdered sugar until smooth. Mix in vanilla extract. -
Step 2
Gently fold in whipped cream until just combined. Add Biscoff cookie butter and fold until swirled. Thin with heavy cream if needed. -
Step 3
Fold in crushed Biscoff cookies, distributing evenly for texture and flavor. Avoid overmixing. -
Step 4
Scoop tablespoon-sized balls and roll smooth. Insert a popsicle stick halfway into each ball. Place on a parchment-lined baking sheet and freeze for 2-3 hours until firm. -
Step 5
Dip frozen pops in melted Biscoff cookie butter or other glaze. Garnish with extra crushed cookies and/or whole Biscoff cookies. Freeze for another 30-60 minutes until set.
Important Information
Nutrition Facts (Per Serving)
It is important to consider this information as approximate and not to use it as definitive health advice.
Allergy Information
Please check ingredients for potential allergens and consult a health professional if in doubt.