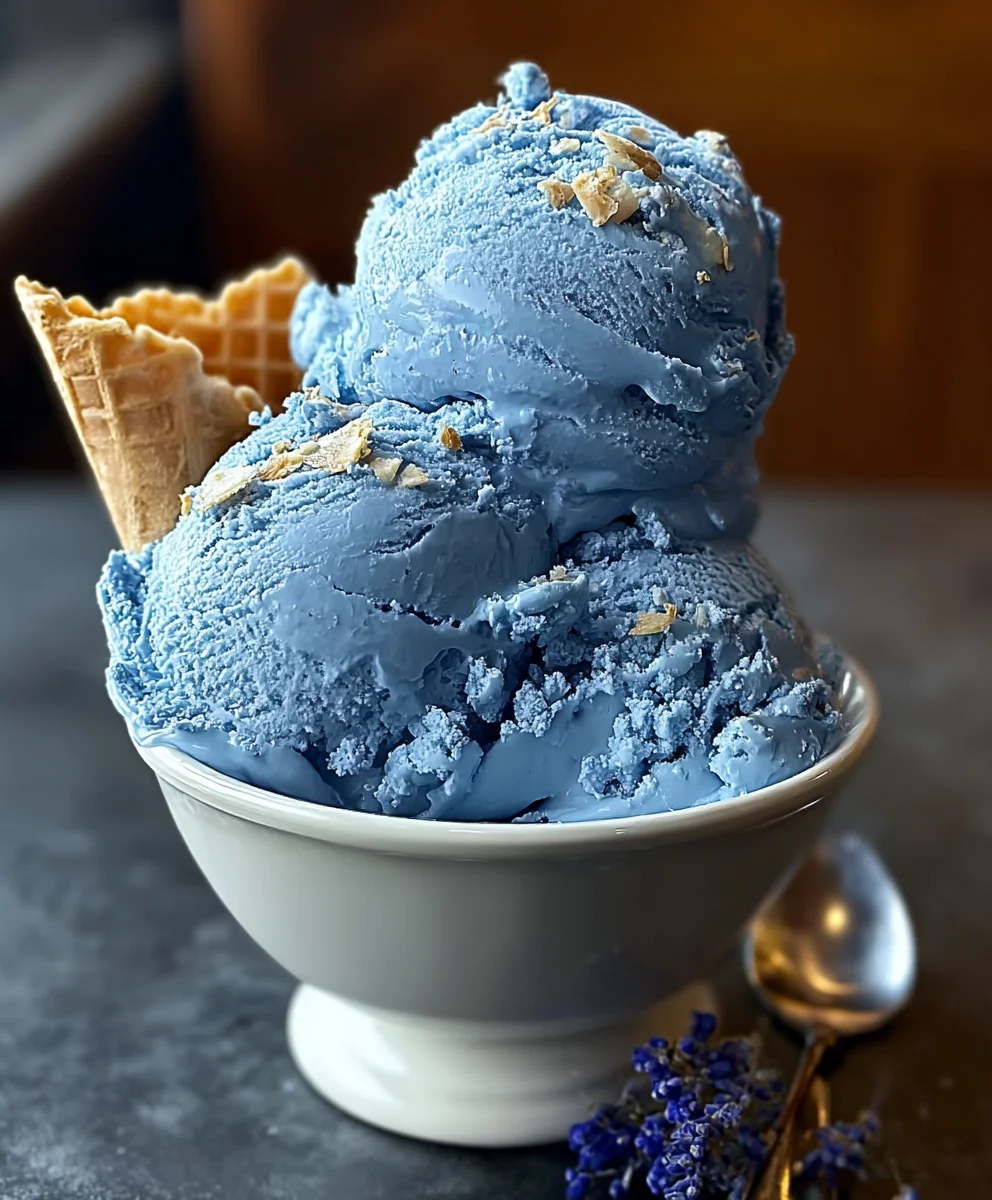
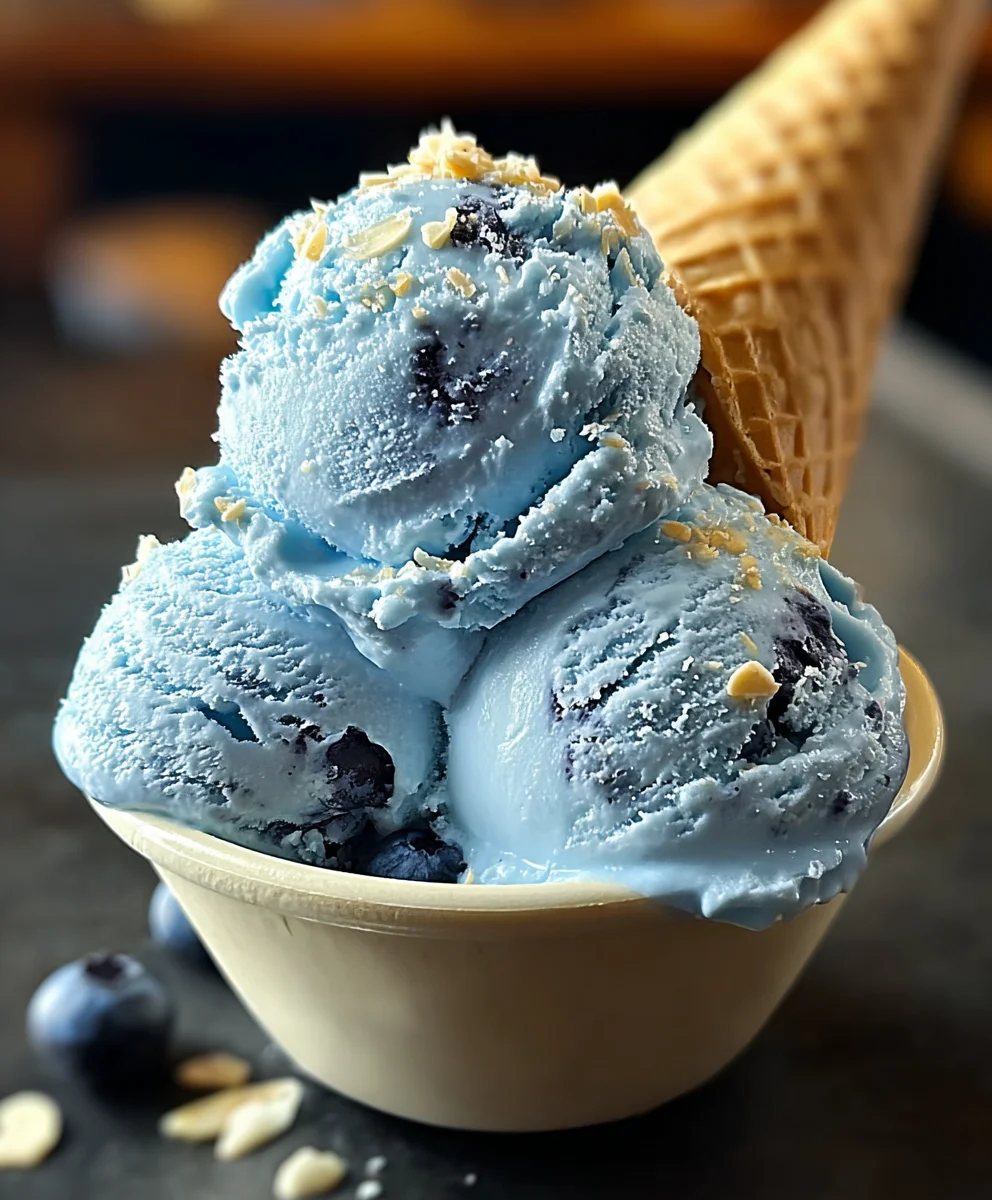
Blue Moon Ice Cream- Easy Homemade Recipe
Blue Moon Ice Cream. Ah, the very name evokes a sense of nostalgia and wonder, doesn’t it? It’s that vibrant, almost otherworldly hue that first captures our attention, a pastel beacon in a sea of more conventional flavors. But beyond its striking appearance, Blue Moon Ice Cream holds a special place in the hearts of many for its unique and elusive taste. Is it almond? Is it marshmallow? Perhaps a whisper of citrus? The mystery is part of its charm, making each spoonful a delightful exploration. People adore Blue Moon Ice Cream because it’s an adventure for the palate, a departure from the everyday. It’s the perfect dessert for those who crave something a little different, a little magical, and undeniably delicious. This recipe aims to capture that inimitable essence, offering you a chance to recreate that iconic, creamy delight in your own kitchen.
Ingredients:
- 2 cups heavy cream
- 1 cup whole milk
- 3/4 cup granulated sugar
- 1 teaspoon vanilla extract
- 1 teaspoon almond extract
- Blue food coloring, as needed
- 1/4 cup maraschino cherries, chopped (optional)
Preparing the Blue Moon Ice Cream Base
Step 1: Combine Dairy and Sugar
The foundation of any great ice cream starts with a well-balanced base. In a medium saucepan, combine the whole milk and granulated sugar. Whisk these together until the sugar begin extracts to dissolve into the milk. It doesn’t need to be completely dissolved at this stage, as it will finish dissolving over heat. Place the saucepan over medium heat. Stir constantly to prevent the sugar from sticking to the bottom of the pan and to ensure even heating. We are not looking to boil the milk, but rather to warm it gently until the sugar is fully dissolved. This process also helps to temper the cream later on, making for a smoother texture.
Step 2: Tempering the Cream
Once the milk and sugar mixture is warm and the sugar is dissolved, it’s time to incorporate the heavy cream. Slowly pour the heavy cream into the warm milk mixture while continuing to whisk. The goal here is to gradually raise the temperature of the cream without shocking it, which could cause it to curdle. Keep stirring over medium-low heat. You want to heat the mixture until it’s hot to the touch, but not boiling. A good indicator is when small bubblesgin extractst begin to form around the edges of the pan. Remove the saucepan from the heat immediately once this point is reached. This gentle heating process will create a rich, stable base for your Blue Moon Ice Cream.
Step 3: Infusing the Flavors
Now comes the fun part – adding the signature flavors! Remove the saucepan from the heat. Stir in the vanilla extract and the almond extract. The almond extract is crucial for that distinctive Blue Moon flavor profile, which is often a delightful combination of nutty and sweet. Allow the mixture to cool slightly in the saucepan for about 5-10 minutes. This brief cooling period helps the extracts to meld into the base without their delicate aromas evaporating too quickly. Once it has cooled a little, carefully pour the mixture into a bowl. It’s important to strain the mixture at this point, even if you think there are no solids, to catch any tiny bits of milk solids that might have formed. This extra step contributes to a silky-smooth final product.
Chilling and Coloring the Base
Step 4: Chilling the Ice Cream Base
For optimal ice cream texture, it’s essential to thoroughly chill the base mixture. Cover the bowl tightly with plastic wrap, pressing the wrap directly onto the surface of the liquid. This prevents a skin from forming. Refrigerate the mixture for at least 4 hours, or preferably overnight. The longer the base chills, the colder it will become, and the more easily your ice cream maker will be able to freeze it into a creamy consistency. A cold base freezes faster and results in smaller ice crystals, which is the key to smooth, delicious ice cream.
Step 5: Achieving the Perfect Blue Hue
Once your base is thoroughly chilled, it’s time to give it that iconic Blue Moon color. Remove the chilled base from the refrigerator. Stir in the blue food coloring, a few drops at a time, until you achieve your desired vibrant blue shade. Remember that the color will lighten slightly as the ice cream freezes. For an extra touch of whimsy and flavor, if you’re using the maraschino cherries, gently fold them into the blue base now. Make sure not to overmix, as you want distinct pieces of cherry throughout your ice cream.
Churning and Freezing the Blue Moon Ice Cream
Step 6: Churning the Ice Cream
Prepare your ice cream maker according to the manufacturer’s instructions. This usually involves ensuring the freezer bowl is fully frozen. Pour the chilled, colored Blue Moon ice cream base into your ice cream maker. Churn for the time recommended by your manufacturer, typically 20-30 minutes, or until the mixture has thickened to a soft-serve consistency. During this process, the ice cream maker churns the base while freezing it, incorporating air and breaking up ice crystals to create that signature creamy texture. Resist the urge to over-churn, as this can sometimes lead to a firmer, less airy ice cream.
Step 7: Freezing for Firmness
Once the ice cream has reached a soft-serve consistency, it’s time to give it its final firming up. Transfer the churned Blue Moon Ice Cream from the ice cream maker into an airtight freezer-safe container. Smooth the top with a spatula. For the best texture, cover the surface of the ice cream directly with parchment paper or plastic wrap before putting on the lid. This further prevents ice crystal formation. Place the container in the freezer for at least 4-6 hours, or until it’s firm enough to scoop. Allowing it to harden fully will result in the perfect consistency for enjoying your homemade Blue Moon Ice Cream. Serve scoops generously and enjoy the nostalgic, delightful flavor!
Conclusion:
Congratulations! You’ve now mastered the art of creating delicious Blue Moon Ice Cream right in your own kitchen. We hope you enjoyed the process as much as we do. This vibrant and uniquely flavored ice cream is a delightful treat that’s sure to impress. The balance of sweet, slightly tart, and mysteriously fruity notes makes Blue Moon Ice Cream stand out from the crowd. Don’t be afraid to experiment and make it your own!
This delightful Blue Moon Ice Cream is perfect for a hot summer day, a special celebration, or just as a fun, whimsical dessert. Serve it in a classic cone, a decadent sundae with your favorite toppings, or even blended into a milkshake for an extra layer of creamy indulgence. Its distinctive color also makes it a showstopper for parties.
Remember, this recipe is a fantastic starting point. Feel free to adjust the sweetness to your preference, or add a touch of almond extract for a nuttier undertone. For a richer texture, consider adding a tablespoon of corn syrup. The possibilities are endless!
Frequently Asked Questions about Blue Moon Ice Cream:
What makes Blue Moon Ice Cream blue?
The iconic blue color typically comes from food coloring, often a vibrant blue dye. The distinct “blue moon” flavor itself is a proprietary blend of fruits, sometimes described as a mix of lemon, lime, and a hint of cherry or raspberry, creating a unique sweet and tangy profile that complements the color.
Can I make Blue Moon Ice Cream without an ice cream maker?
Absolutely! While an ice cream maker provides the smoothest texture, you can achieve delicious Blue Moon Ice Cream without one. Simply pour your prepared base into a freezer-safe container. Every 30-45 minutes for the first 3-4 hours, stir the mixture vigorously with a fork or whisk to break up ice crystals. This manual churning will help create a creamier result.
Blue Moon Ice Cream- Easy Homemade Recipe
A simple and delicious homemade recipe for classic Blue Moon ice cream, featuring a unique blend of almond and vanilla flavors with a vibrant blue hue.
Ingredients
-
2 cups heavy cream
-
1 cup whole milk
-
3/4 cup granulated sugar
-
1 teaspoon vanilla extract
-
1 teaspoon almond extract
-
Blue food coloring, as needed
-
1/4 cup maraschino cherries, chopped (optional)
Instructions
-
Step 1
In a medium saucepan, combine the whole milk and granulated sugar. Whisk together over medium heat until the sugar is fully dissolved, stirring constantly. Do not boil. -
Step 2
Gradually pour in the heavy cream while whisking. Continue to heat over medium-low heat until the mixture is hot to the touch, with small bubbles forming around the edges. Remove from heat. -
Step 3
Stir in the vanilla extract and almond extract. Let the mixture cool slightly for 5-10 minutes. Strain into a bowl. -
Step 4
Cover the bowl tightly, pressing plastic wrap directly onto the surface. Refrigerate for at least 4 hours, or preferably overnight. -
Step 5
Add blue food coloring a few drops at a time until the desired vibrant blue shade is achieved. If using, gently fold in chopped maraschino cherries. -
Step 6
Churn the mixture in an ice cream maker according to the manufacturer’s instructions until it reaches a soft-serve consistency. -
Step 7
Transfer the churned ice cream to an airtight freezer-safe container. Cover the surface with parchment paper or plastic wrap, then seal with a lid. Freeze for 4-6 hours, or until firm enough to scoop.
Important Information
Nutrition Facts (Per Serving)
It is important to consider this information as approximate and not to use it as definitive health advice.
Allergy Information
Please check ingredients for potential allergens and consult a health professional if in doubt.