Easy Boston Cream Poke Cake Recipe-Decadent Dessert
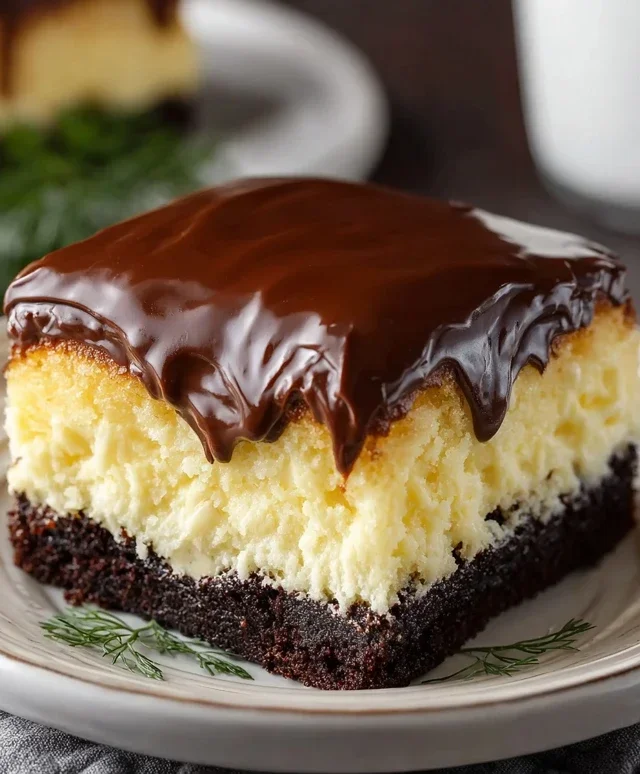
Boston Cream Poke Cake is a dessert that truly lives up to its decadent name, and it’s one of my absolute favorites to whip up for any occasion. What is it about this delightful creation that captures hearts and taste buds so consistently? It’s the ingenious marriage of a light, fluffy vanilla cake, generously pierced with holes that are then flooded with a luscious, creamy pudding, all topped off with a rich chocolate ganache. This isn’t just a cake; it’s an experience. The magic of the Boston Cream Poke Cake lies in its ability to be both incredibly indulgent and surprisingly easy to make. Every bite offers a perfect balance of textures and flavors – the soft cake giving way to the smooth, sweet pudding, all culminating in that glossy, bittersweet chocolate finish. It’s the ultimate crowd-pleaser, guaranteed to bring smiles and second helpings!
Boston Cream Poke Cake
This Boston Cream Poke Cake is a dessert dream come true for anyone who loves the classic combination of moist cake, creamy pudding, and rich chocolate. It’s incredibly easy to make, yet looks and tastes like a showstopper. The “poke” in the name comes from the delightful holes we create in the cake, which then get filled with luscious pudding, making every bite an explosion of flavor and texture. It’s the perfect dessert for birthdays, holidays, or just because you deserve a treat!
Ingredients:
Baking the Cake
The foundation of our incredible Boston Cream Poke Cake is a perfectly baked yellow cake. You’ll want to start by preheating your oven according to the instructions on your yellow cake mix box. This is a crucial first step to ensure even baking. Next, gather the additional ingredients required by your cake mix – typically eggs, vegetable oil, and water. Measure these ingredients precisely for the best cake texture. In a large mixing bowl, combine the cake mix and the wet ingredients. Mix according to the package directions until just combined; overmixing can lead to a tough cake, so be gentle! Pour the batter into a greased and floured 9×13 inch baking pan. A 9×13 pan is ideal for this recipe as it provides a good surface area for the pudding and frosting. Bake for the time recommended on the cake mix box, or until a toothpick inserted into the center comes out clean. The smell of freshly baked cake will fill your kitchen, signaling that it’s time to let it cool slightly. Once it’s out of the oven, allow the cake to cool in the pan on a wire rack for about 15-20 minutes. This initial cooling period is important because we don’t want to poke holes into a piping hot cake, but we also don’t want it to cool completely, as it will be harder to create clean holes.
Pudding Power
While the cake is cooling, it’s time to whip up the creamy filling. In a separate medium-sized bowl, pour in the two boxes of instant vanilla or French vanilla pudding. The French vanilla option will give a slightly richer flavor, but both work beautifully. To the pudding mix, add the 4 cups of milk. Now, this is where the magic happens! You’ll want to whisk this mixture vigorously for about 2 minutes, or until the pudding starts to thicken. Instant pudding sets up quite quickly, so don’t be alarmed if it looks thin at first; keep whisking, and you’ll see it transform into a luscious, smooth pudding. It’s important to make the pudding right before you’re ready to use it, as it will continue to thicken as it sits, and we want it to be pourable enough to fill all those delicious holes. If you find it’s getting too thick, a tiny splash more milk can help loosen it up, but be careful not to add too much and make it watery.
The Poke and Pour
Now for the fun part – the “poking”! Once the cake has cooled for that initial 15-20 minutes, it’s time to create the channels for our creamy pudding. Using the handle of a wooden spoon, a skewer, or even a fork, go ahead and poke holes all over the surface of the cake. Don’t be shy; you want a good network of holes that go all the way down to the bottom of the cake. Think of it as creating a sponge for all that delicious pudding! Make sure to space the holes relatively evenly so that the pudding distributes well. Once your cake is thoroughly poked, it’s time to pour the prepared pudding over the top. Gently spread the pudding evenly over the entire cake, allowing it to ooze into all the little holes you’ve created. This step is where the cake really starts to live up to its name, and you’ll see the pudding filling every nook and cranny.
Chilling for Perfection
After you’ve generously coated the cake with pudding, it’s time to let it chill. Cover the cake pan tightly with plastic wrap, ensuring that the plastic wrap touches the surface of the pudding as much as possible. This helps prevent a skin from forming on the pudding. Place the cake in the refrigerator for at least 2-3 hours. This chilling time is absolutely crucial. It allows the pudding to fully set and the flavors to meld together. It also makes the cake easier to frost and serve. The longer it chills, the more cohesive and delicious it will become. Don’t rush this step; patience is rewarded with a perfectly set dessert.
The Chocolatey Finnon-alcoholic ale
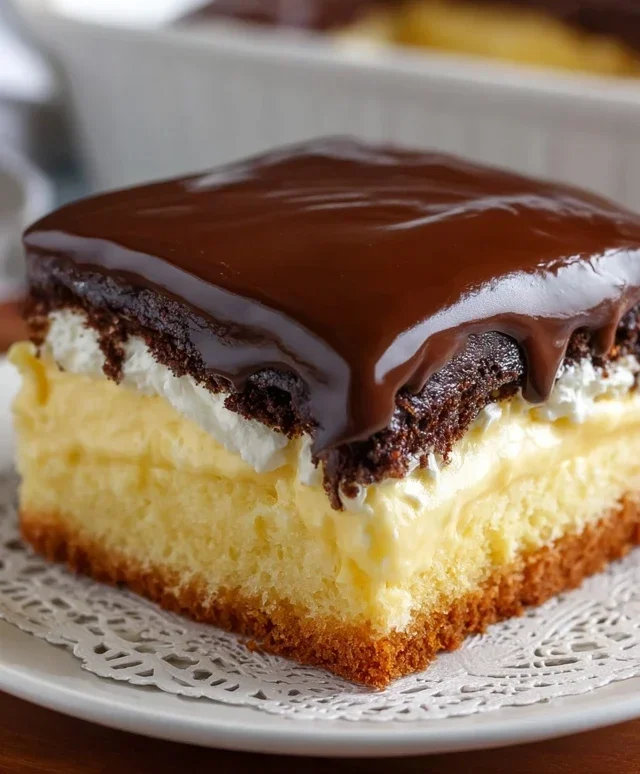
Once the cake has chilled sufficiently and the pudding is firm, it’s time for the glorious chocolate frosting. Take your 16-ounce tub of chocolate frosting and microwave it for about 15-30 seconds, or just until it’s smooth and easily spreadable. You don’t want to make it hot, just warm enough to glide smoothly over the chilled pudding. Remove the plastic wrap from the cake. Using an offset spatula or a butter knife, spread the warmed chocolate frosting evenly over the top of the chilled pudding layer. Aim for a smooth, even coating that completely covers the pudding. The contrast of the rich chocolate against the creamy vanilla pudding and moist yellow cake is what makes this dessert a true classic. For an extra touch of elegance, you can even drizzle a little extra melted chocolate over the top or sprinkle some chocolate shavings. Once frosted, you can serve immediately, or refrigerate again until ready to serve. Slice and enjoy the decadent layers of this amazing Boston Cream Poke Cake!
Conclusion:
I hope you’re as excited about this Boston Cream Poke Cake as I am! This recipe truly is a showstopper, combining the classic flavors of a Boston Cream Pie with the delightful, moist texture only a poke cake can deliver. The simple steps, from poking holes in the cake to pouring over the luscious pudding and creamy topping, make it surprisingly approachable for bakers of all levels. It’s the perfect dessert for birthdays, holidays, or simply when you crave something truly special and indulgent. The way the pudding seeps into every crevice, creating pockets of pure joy, is simply magical!
For serving, I love this cake chilled. It’s absolutely divine on its own, but a dollop of fresh whipped cream or a sprinkle of chocolate shavings can elevate it even further. If you’re feeling adventurous, consider adding a touch of raspberry liqueur extract to the pudding for a grown-up twist, or try using a chocolate cake mix for an even richer chocolate experience. Don’t be afraid to get creative with your Boston Cream Poke Cake!
Give this recipe a try – I promise you won’t regret it! It’s a guaranteed crowd-pleaser that brings smiles to everyone’s faces.
Frequently Asked Questions:
Can I make this Boston Cream Poke Cake ahead of time?
Absolutely! This cake actually benefits from being made ahead. It allows the pudding to fully soak into the cake and the flavors to meld beautifully. I recommend making it at least a few hours in advance, or even the day before, and storing it covered in the refrigerator.
What if I don’t have a whisk? Can I still mix the pudding?
Yes, you can! While a whisk is ideal for ensuring a smooth pudding mixture, you can also use a sturdy fork or even an immersion blender if you have one. Just make sure to stir vigorously to break up any lumps and achieve a creamy consistency.
How long does this poke cake last in the refrigerator?
Stored properly in an airtight container, your Boston Cream Poke Cake should last for about 3-4 days in the refrigerator. The texture might change slightly over time as it continues to absorb the moisture, but it will remain delicious!
Boston Cream Poke Cake
A decadent poke cake layered with creamy vanilla pudding and topped with rich chocolate frosting, reminiscent of a classic Boston Cream Pie.
Ingredients
-
15.25 ounce box yellow cake mix
-
Eggs, oil, and water (as per yellow cake mix instructions)
-
2 (3.4 ounce) boxes instant vanilla pudding
-
4 cups milk
-
16 ounce tub chocolate frosting
Instructions
-
Step 1
Prepare the yellow cake according to the package directions using eggs, oil, and water. Pour the batter into a greased and floured 9×13 inch baking pan. Bake according to package directions until a toothpick inserted into the center comes out clean. -
Step 2
While the cake is still warm, use the handle of a wooden spoon or a skewer to poke holes all over the top of the cake. -
Step 3
In a medium bowl, whisk together the instant vanilla pudding mixes and milk until well combined and thickened. Pour this pudding mixture evenly over the poked cake, ensuring it fills the holes. -
Step 4
Cover the cake and refrigerate for at least 2-3 hours, or until the pudding is set. -
Step 5
Once the cake and pudding are chilled and set, spread the chocolate frosting evenly over the top of the cake. -
Step 6
Slice and serve chilled.
Important Information
Nutrition Facts (Per Serving)
It is important to consider this information as approximate and not to use it as definitive health advice.
Allergy Information
Please check ingredients for potential allergens and consult a health professional if in doubt.