Homemade Chicken Feed Recipe – Nourish Your Flock
Homemade Chicken Feed Recipe. There’s a special kind of satisfaction that comes from nurturing your flock with food you’ve lovingly prepared yourself. Creating a homemade chicken feed recipe isn’t just about saving money; it’s about offering your feathered friends the freshest, most wholesome ingredients, free from preservatives and fillers. Imagin extracte the vibrant yolks and glossy feathers that result from a diet tailored to their specific needs! This is what makes a truly delicious and nutritious meal for your chickens so incredibly rewarding. People adore this kind of DIY approach because it fosters a deeper connection with their animals and allows for complete control over what they’re consuming. What makes our particular homemade chicken feed recipe so special is its balanced blend of essential nutrients, incorporating everything from protein-rich grains to beneficial seeds and greens, all designed for optimal health and egg production. Get ready to impress your hens and yourself with this fantastic creation!
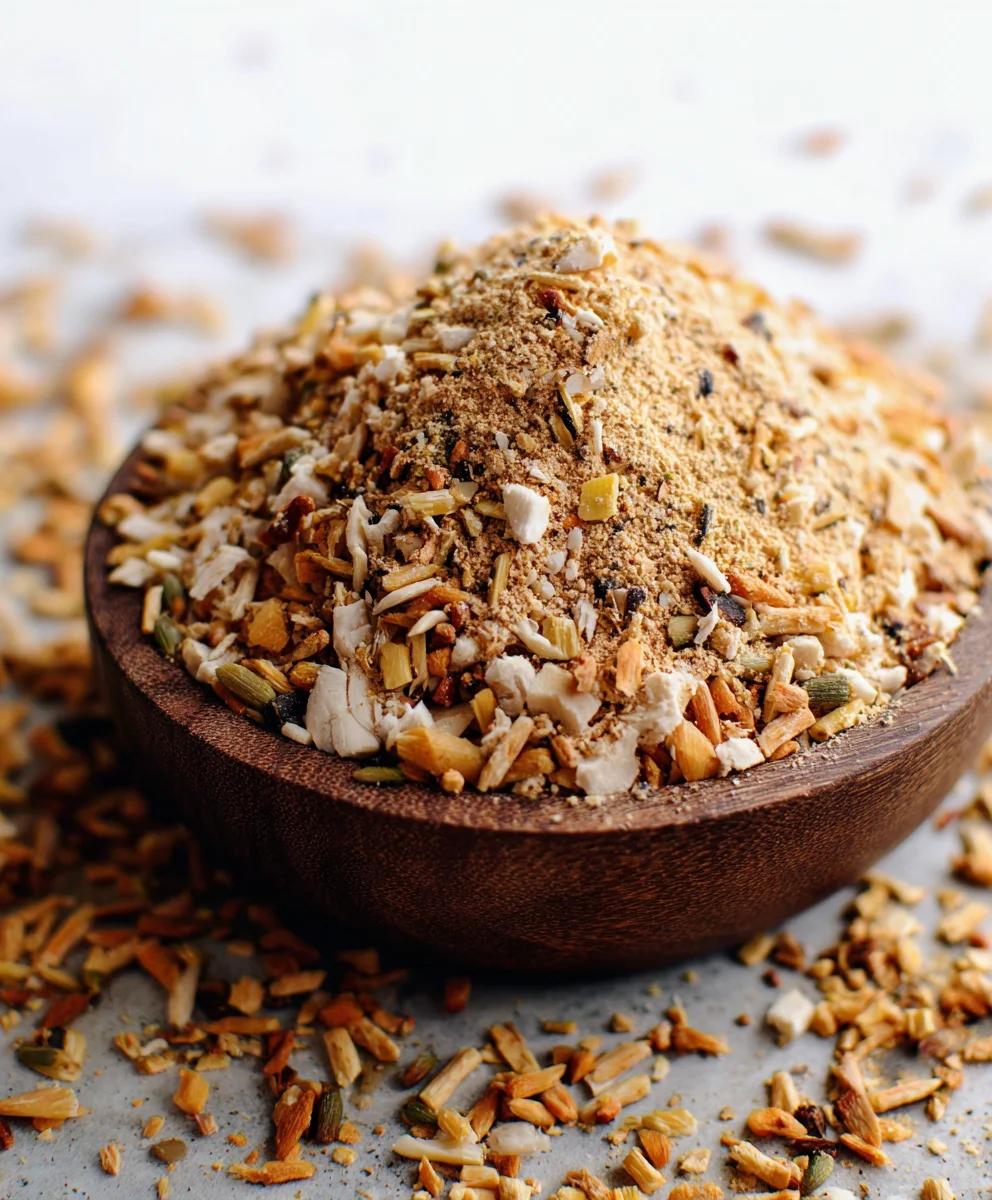
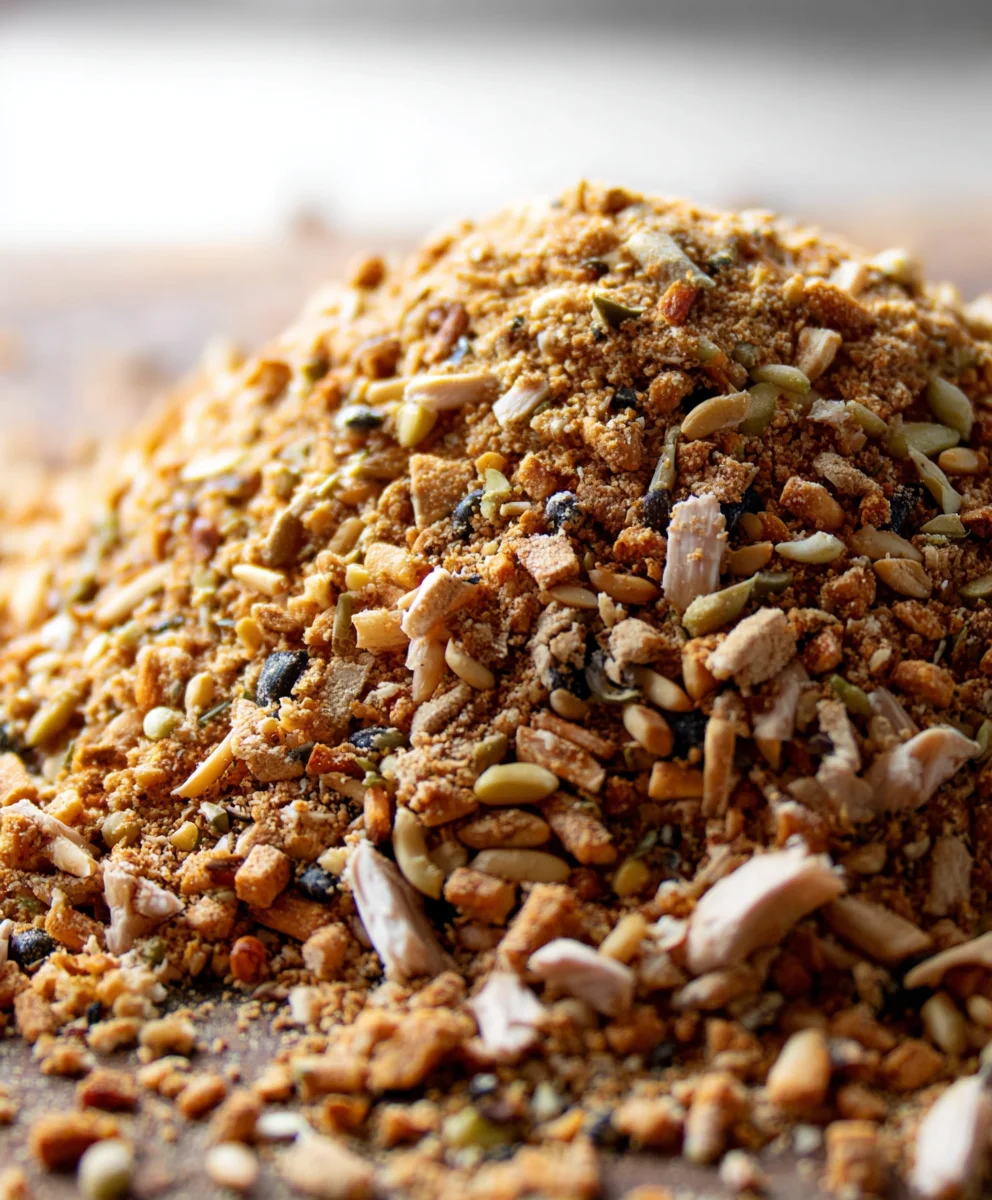
Ingredients:
- Carbohydrates:
- 2 cups Whole Corn, cracked
- 1 cup Barley
- 1 cup Wheat berries
- 1 cup Millet
- Proteins:
- 1 cup Soybean Meal
- 1/2 cup Fish Meal
- 1/2 cup Corn Gluten Meal
- Fats:
- 1/4 cup Lard or Tallow (rendered fat)
- Minerals & Vitamins:
- 1/4 cup Nutri-balancer (a commercial poultry mineral and vitamin supplement)
- 1/4 cup Oyster Shells, ground (for extra calcium, optional but recommended)
Preparing Your Homemade Chicken Feed
Phase 1: Combining the Dry Ingredients
Let’s get started on creating a nutritious and balanced homemade chicken feed that your flock will love! The first step is to gather all of your dry ingredients. Ensure your corn is cracked, not whole kernels, as this makes it easier for your chickens to digest. If your wheat berries are whole, a quick pulse in a blender or food processor can help break them down slightly. The goal isn’t to make flour, but to create smaller pieces for better nutrient absorption and to prevent selective eating by your birds.
In a large, clean mixing tub or a sturdy bucket, combine the cracked corn, barley, wheat berries, and millet. This blend forms the carbohydrate base of our feed, providing essential energy for your active chickens. Next, add your protein sources: the soybean meal, fish meal, and corn gluten meal. These ingredients are crucial for feather development, muscle growth, and overall bodily functions. The combination of plant and animal proteins ensures a well-rounded amino acid profile.
Now, let’s incorporate the fat. Measure out the lard or tallow. If you’re using lard or tallow, it’s best to have it at room temperature or slightly softened so it can be evenly distributed. You can gently melt it if needed, but avoid making it hot, as we don’t want to cook anything. Crum extractble the softened fat into the dry mix. The fats are important for providing a concentrated source of calories and helping your chickens absorb vital fat-soluble vitamins, especially beneficial during colder months.
Phase 2: Adding Essential Supplements
With the bulk of your dry ingredients combined, it’s time to introduce the crucial mineral and vitamin supplements. Measure out your Nutri-balancer. This is a pre-formulated mix designed to provide essential micronutrients and macronutrients that might be lacking in a grain-heavy diet. If you’re opting for the extra calcium boost, add the ground oyster shells at this stage. Oyster shells are an excellent source of calcium, vital for strong eggshells and bone health. You can grind them yourself in a clean coffee grinder or purchase them pre-ground. Ensure the oyster shells are finely ground to prevent your chickens from picking out just the larger pieces.
Now, it’s time to thoroughly mix everything together. Use a sturdy scoop or your clean hands to ensure all the ingredients are evenly distributed. You want to make sure that every scoop of feed contains a balanced proportion of carbohydrates, proteins, fats, and supplements. Continue mixing for several minutes, making sure there are no pockets of just one ingredient. The aim is to create a homogenous blend. You might find it helpful to do this in batches if your mixing container is not very large, to ensure a more thorough mix.
Phase 3: Ensuring Proper Distribution and Storage
Once you’re confident that all the ingredients are well combined, give the mixture one final stir. You should see a nice blend of different grains, meals, and the supplements. The goal is a consistent texture throughout. If your lard or tallow clumped a bit, keep breaking those down with your hands or scoop as you mix. Proper distribution is key to ensuring each chicken gets a balanced diet from every peck.
Now, let’s talk about storage. It’s important to store your homemade chicken feed in a cool, dry place. Airtight containers are ideal for keeping out moisture, pests, and rodents. This will help preserve the freshness and quality of the feed. Avoid storing large quantities for extended periods, as the fats can go rancid over time, and vitamins can degrade. It’s best to make smaller batches more frequently to ensure you’re always providing the freshest possible feed for your flock.
Phase 4: Feeding Your Flock
When it comes to feeding your chickens, offer this homemade feed in their feeders throughout the day. You can decide on the quantity based on the number of chickens you have and their age and laying status. Younger chicks or laying hens might benefit from a slightly higher protein content, which this recipe provides. Always ensure your chickens have access to fresh, clean water at all times, as water is just as critical as their feed for digestion and overall health.
Observe your flock’s eating habits. If you notice them picking out specific ingredients and leaving others, you might need to adjust the grind size of your grains or the texture of your meal components. The objective is for them to consume a balanced mix. This recipe provides a solid foundation for a healthy flock. Remember to introduce any new feed gradually to avoid digestive upset. Mix a small amount of your homemade feed with their current feed for a few days before switching entirely.
Phase 5: Adjustments and Considerations
This recipe is a starting point, and you can make adjustments based on your chickens’ specific needs and your available ingredients. For example, if you live in a very cold climate, you might slightly increase the fat content. If your hens are laying prolifically, ensure they are getting enough calcium. You can offer free-choice oyster shells in a separate feeder if you suspect they need more. Conversely, if your chickens are becoming overweight, you might want to reduce the fat or carbohydrate portions slightly and ensure they have plenty of space and opportunity for foragin extractg.
It’s also worth noting that this feed should be considered the primary diet. Whgin extract foraging and scraps can supplement their diet, they shouldn’t form the majority. This homemade feed ensures a controlled and balanced intake of all the necessary nutrients. Keep an eye on your chickens’ overall health, feather quality, and egg production, as these are good indicators of whether their diet is meeting their needs. If you have any concerns, consulting with a poultry expert or veterinarian is always a good idea. Enjoy the satisfaction of providing your feathered friends with a wholesome, homemade meal!
Conclusion:
Now you have the knowledge to create your very own Homemade Chicken Feed Recipe! This versatile and nutritious blend will keep your flock happy and healthy, providing them with all the essential nutrients they need for optimal egg production and overall well-being. We’ve covered the core ingredients, the simple preparation steps, and even touched upon ways to customize it further. Don’t be afraid to experiment and find what your chickens love best. Remember, the satisfaction of providing your feathered friends with wholesome, homemade food is immense. So gather your ingredients, get mixing, and enjoy the delightful clucking of your contented chickens!
Serving this Homemade Chicken Feed Recipe is as easy as offering it in their usual feeders. It’s a complete diet, so you won’t need to supplement heavily, though offering fresh greens and occasional treats is always a good idea. For variations, consider adding a sprinkle of dried herbs like oregano or thyme for added antioxidants and flavor, or a pinch of calcium carbonate if your hens need an extra boost for strong eggshells.
Frequently Asked Questions:
How long can I store this Homemade Chicken Feed Recipe?
Once prepared and stored in an airtight container in a cool, dry place, this Homemade Chicken Feed Recipe should stay fresh for about 4-6 weeks. It’s always best to make smaller batches more frequently to ensure maximum freshness and nutrient content.
Can I substitute any of the grains in the Homemade Chicken Feed Recipe?
Absolutely! While the provided recipe is balanced, you can certainly substitute grains based on availability and your chickens’ preferences. For instance, you could swap out some of the cracked corn for barley or oats, ensuring you maintain a similar proportion of carbohydrates and protein.
Is this Homemade Chicken Feed Recipe suitable for chicks?
This specific Homemade Chicken Feed Recipe is generally formulated for adult laying hens. For chicks, it’s crucial to use a starter feed with a higher protein content. You can adapt this recipe for grower-age chickens by adjusting the protein and nutrient levels, but always research specific needs for different age groups.
Homemade Chicken Feed Recipe – Nourish Your Flock
A balanced and nutritious homemade chicken feed recipe designed to nourish your flock with essential carbohydrates, proteins, fats, minerals, and vitamins.
Ingredients
-
2 cups Whole Corn, cracked
-
1 cup Barley
-
1 cup Wheat berries
-
1 cup Millet
-
1 cup Soybean Meal
-
1/2 cup Fish Meal
-
1/2 cup Corn Gluten Meal
-
1/4 cup Lard or Tallow (rendered fat)
-
1/4 cup Nutri-balancer (a commercial poultry mineral and vitamin supplement)
-
1/4 cup Oyster Shells, ground (for extra calcium, optional but recommended)
Instructions
-
Step 1
Combine all dry ingredients including cracked corn, barley, wheat berries, and millet in a large mixing tub. Add the protein sources: soybean meal, fish meal, and corn gluten meal. Incorporate the softened or slightly melted lard or tallow into the dry mix, ensuring it’s not hot. -
Step 2
Add the Nutri-balancer and ground oyster shells (if using) to the mixture. Thoroughly mix all ingredients together using a sturdy scoop or clean hands, ensuring an even distribution of all components. -
Step 3
Continue mixing for several minutes to create a homogenous blend. If the mixing container is small, it may be helpful to mix in batches for better distribution. -
Step 4
Store the homemade chicken feed in airtight containers in a cool, dry place to maintain freshness and prevent spoilage. Make smaller batches more frequently to ensure the feed remains fresh. -
Step 5
Offer the feed in chicken feeders throughout the day. Always ensure your chickens have access to fresh, clean water. Observe their eating habits and adjust ingredient grind size or texture if they are picking out specific ingredients. -
Step 6
Introduce new feed gradually by mixing it with their current feed for a few days to avoid digestive upset. Adjust fat or carbohydrate portions based on your chickens’ needs, such as climate or laying status.
Important Information
Nutrition Facts (Per Serving)
It is important to consider this information as approximate and not to use it as definitive health advice.
Allergy Information
Please check ingredients for potential allergens and consult a health professional if in doubt.