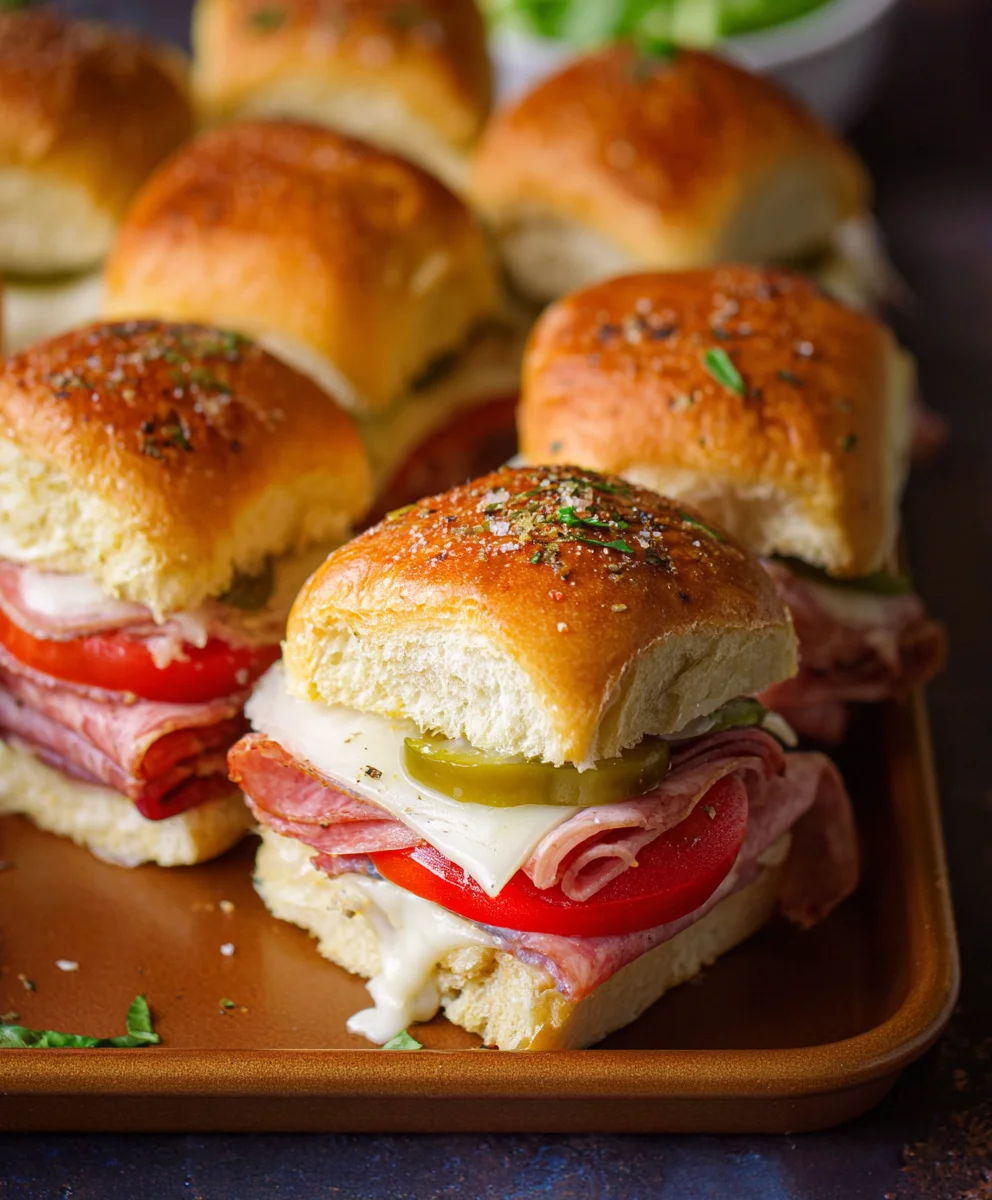
Beefy Italian Sub Sliders – Easy Appetizer Recipe
Hot Italian Sub Sliders are more than just a bite-sized version of your favorite sandwich; they’re a miniature explosion of flavor that can transform any gathering into a culinary celebration. Who doesn’t love the satisfying medley of savory meats, melted cheese, and zesty peppers all nestled within a soft, warm bun? These delightful morsels have an undeniable charm, making them perfect for game days, casual get-togethers, or even as a fun weeknight dinner the whole family will devour. What truly sets our Hot Italian Sub Sliders apart is the perfect balance of textures and tastes: the slight crispness from toasted bread, the robust umami of classic Italian deli meats like beef salami and beef pepperoni, the creamy indulgence of provolone cheese, and that signature kick from giardiniera or a spicy pepper spread. They’re incredibly addictive, and once you start popping them, you’ll find it hard to stop at just one!
Ingredients:
- 12 pack rolls, halved lengthwise (Kings Hawaiian rolls are an excellent choice for their soft texture and slight sweetness, which balances the savory fillings.)
- 6 oz package of beef beef ham, thinly sliced (Look for a good quality beef hami ham for the best flavor.)
- 5 oz package of beef beef salami, thinly sliced (Thinly slbeef salamialami adds a robust, salty kick.)
- 5 oz package of beef beef pepperoni, thinly sliBeef Pepperonieroni brings a familiar spicy warmth and renders beautifully when baked.)
- 9 slices provolone cheese (Provolone offers a mild, slightly sharp, and wonderfully melty cheese that complements the meats without overpowering them.)
- 1/3 cup pepperoncini, sliced (These add a tangy, slightly peppery bite that cuts through the richness of the meats and cheese.)
- 1/3 cup pickled hot cherry peppers, sliced (For an extra layer of heat and a distinct fruity tang, these are essential.)
- 1/4 cup salted butter, melted (The butter acts as a binder and creates a golden, crispy exterior on the rolls.)
- 1 tsp Italian seasoning (This blend of dried herbs like oregano, basil, and thyme is crucial for authentic Italian flavor.)
- 2 cloves garlic, crushed (Freshly crushed garlic provides a pungent aroma and intense flavor that far surpasses jarred garlic in this recipe. Ensure it’s finely minced or pressed.)
- 1 cup marinara sauce (A good quality marinara sauce adds moisture and a rich tomato base, tying all the flavors together.)
Preparation and Assembly
Step 1: Prepare the Rolls and Garlic Butter Mixture
Begin extract by taking your 12-pack of rolls and carefully slicing them in half lengthwise. A serrated knife works best here to avoid squishing the delicate rolls. You’ll want to keep the top halves and bottom halves together as much as possible for easy assembly later. Next, in a small bowl, combine the 1/4 cup of melted salted butter with the 2 cloves of crushed garlic and 1 teaspoon of Italian seasoning. Whisk this mixture thoroughly until the garlic and herbs are evenly distributed throughout the melted butter. This fragrant butter mixture is what will give your Hot Italian Sub Sliders their signature golden crust and a burst of savory flavor. It’s important to crush the garlic finely so that the flavor is evenly dispersed and you don’t encounter large chunks.
Step 2: Layer the Meats and Cheese on the Bottom Half of the Rolls
Now, it’s time to build the foundation of your sliders. Lay out the bottom halves of all 12 rolls on a clean surface or a baking sheet lined with parchment paper. Evenly distribute the 6 ounces of thinly slbeef hamd beef ham across the bottom buns. Don’t be afraid to overlap them slightly to ensure good coverage.beef ham top of the ham, layer the 5 ounces of thinly slbeef salamieef salami, again distributing it evenly. Finally, add the 5 ounces of thinly slbeef pepperoni pepperoni. The combination of these three meats creates a fantastic depth of flavor. After layering the meats, place 3 slices of provolone cheese on top of the meat layers on each group of 4 rolls. You’ll want to cover the meat as much as possible with the cheese for optimal meltiness.
Step 3: Add the Peppers and Marinara Sauce
With the meats and cheese in place, it’s time to introduce the tangy and spicy elements. Evenly sprinkle the 1/3 cup of sliced pepperoncini over the provolone cheese on each group of 4 rolls. The bright, vinegary notes of the pepperoncini will cut through the richness of the meats and cheese. Next, distribute the 1/3 cup of sliced pickled hot cherry peppers over the pepperoncini. These add a delightful heat and a unique fruity undertone. Now, carefully spoon about 1 tablespoon of marinara sauce over the peppers on each slider. Don’t drench them, but just enough to add a moist, tomato-y layer. This also helps to hold the ingredients together.
Step 4: Top and Brush with Garlic Butter
Take the top halves of the rolls and place them gently over the assembled bottom halves. Try to align them as neatly as possible to create uniform sliders. Now, using a pastry brush or a spoon, generously brush the prepared garlic butter and Italian seasoning mixture over the tops of all the assembled sliders. Make sure to coat the entire surface of each roll. This step is critical for achieving that irresistible golden-brown, slightly crispy exterior that makes these sliders so appealing. The garlic butter will melt into the rolls as they bake, infusing them with flavor.
Step 5: Bake and Serve
Preheat your oven to 375 degrees Fahrenheit (190 degrees Celsius). Place the baking sheet with the assembled sliders into the preheated oven. Bake for approximately 15-20 minutes, or until the rolls are golden brown, the cheese is fully melted and bubbly, and the edges are slightly crisp. Keep an eye on them to prevent burning, as ovens can vary. Once they are beautifully golden and the cheese is irresistible, carefully remove the baking sheet from the oven. Allow the sliders to cool for just a few minutes before slicing them into individual portions using a sharp knife or a pizza cutter. This brief resting period allows the flavors to meld and makes them easier to handle. Serve immediately and enjoy the explosion of hot Italian sub flavors in every bite.
Conclusion:
And there you have it – your guide to crafting the most delicious Hot Italian Sub Sliders! We’ve walked through the simple steps to assemble these crowd-pleasing bites, from selecting the perfect Italian rolls to layering those classic, savory fillings. These sliders are fantastic for any occasion, whether it’s a casual get-together, a game day spread, or even a fun weeknight meal. Don’t be afraid to get creative with your toppings; the beauty of these Hot Italian Sub Sliders lies in their adaptability.
For serving suggestions, these are best enjoyed warm, straight from the oven. They pair wonderfully with a side of crispy potato chips, a fresh garden salad, or even a cup of tomato soup. When it comes to variations, consider adding a sprinkle of red pepper flakes for a bit of heat, swapping out the cheeses, or incorporating some giardiniera for an extra tangy kick. The possibilities are truly endless!
We hope you have as much fun making and sharing these Hot Italian Sub Sliders as we do. Get ready for rave reviews – these little subs are always a hit!
Frequently Asked Questions:
Q1: Can I make the Hot Italian Sub Sliders ahead of time?
While they are best served fresh and warm, you can assemble the sliders (without baking) a few hours in advance. Cover them tightly with plastic wrap and refrigerate. When you’re ready to bake, simply remove them from the refrigerator, unwrap, and bake as directed, perhaps adding a few extra minutes to ensure they are heated through.
Q2: What kind of bread is best for Hot Italian Sub Sliders?
Mini Italian rolls or slider buns are ideal for these Hot Italian Sub Sliders. Their slightly dense texture holds up well to the fillings and baking process. You can also use Hawaiian sweet rolls for a slightly sweeter contrast, though their texture is softer.
Q3: Are there any vegetarian options for Hot Italian Sub Sliders?
Absolutely! For a vegetarian version of Hot Italian Sub Sliders, you can omit the meats and focus on a medley of roasted vegetables like bell peppers, onions, zucchini, and mushrooms. Add a layer of provolone cheese and perhaps some marinated artichoke hearts or sundried tomatoes for extra flavor. Ensure your bread choice is also vegetarian-friendly.
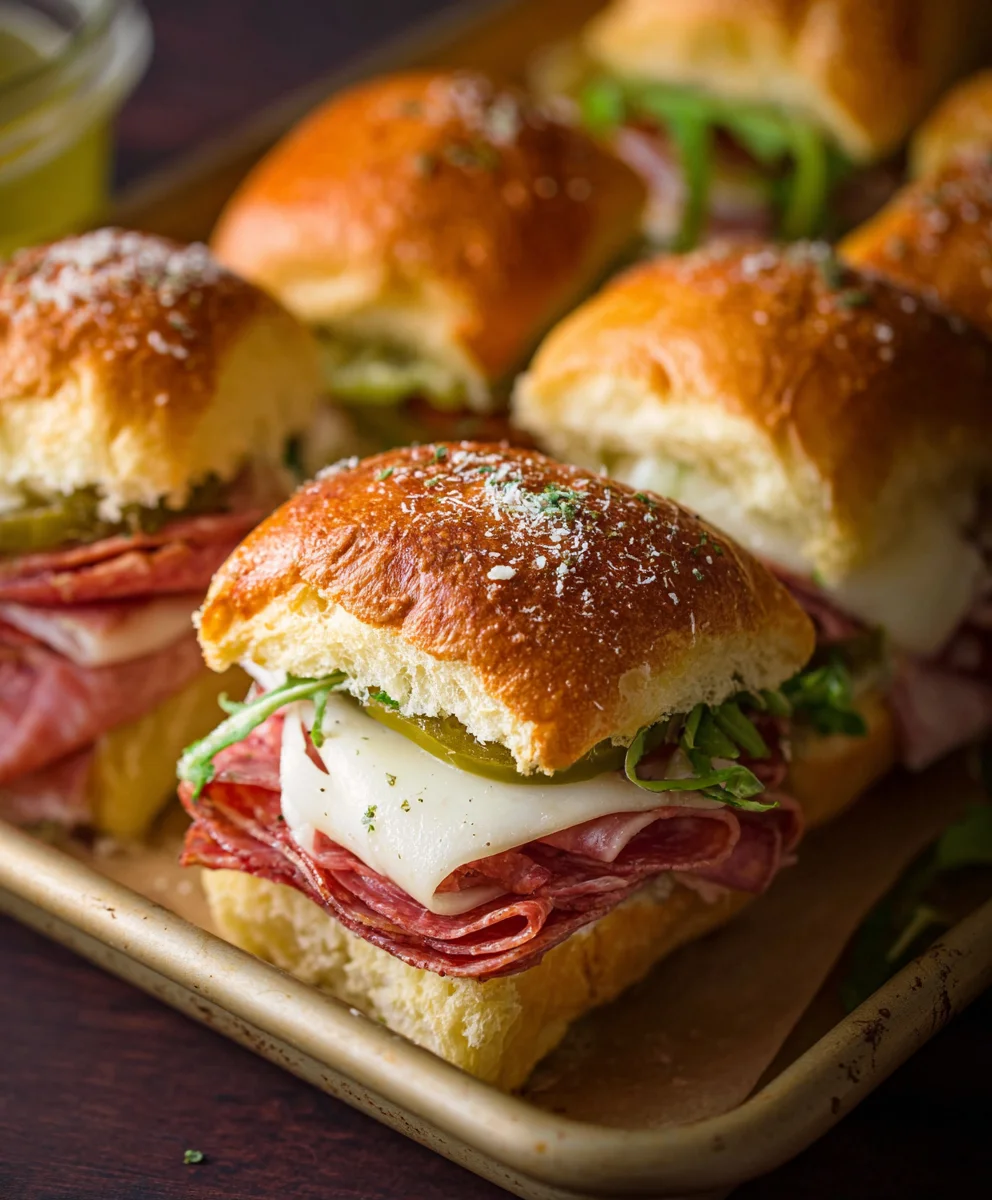
Beefy Italian Sub Sliders
Easy and delicious beefy Italian sub sliders perfect for any appetizer occasion. These sliders are packed with savory meats, melty cheese, and tangy peppers, all baked in soft, sweet rolls.
Ingredients
-
12 pack rolls, halved lengthwise
-
6 oz package of beef ham, thinly sliced
-
5 oz package of beef salami, thinly sliced
-
5 oz package of beef pepperoni, thinly sliced
-
9 slices provolone cheese
-
1/3 cup pepperoncini, sliced
-
1/3 cup pickled hot cherry peppers, sliced
-
1/4 cup salted butter, melted
-
1 tsp Italian seasoning
-
2 cloves garlic, crushed
-
1 cup marinara sauce
Instructions
-
Step 1
Slice the 12-pack of rolls in half lengthwise, keeping the top and bottom halves together. In a small bowl, combine the melted salted butter, crushed garlic, and Italian seasoning. Whisk until evenly distributed. -
Step 2
Lay out the bottom halves of the rolls. Evenly distribute the beef ham, followed by the beef salami, and then the beef pepperoni across the bottom buns. Place 3 slices of provolone cheese on top of the meat layers on each group of 4 rolls. -
Step 3
Evenly sprinkle the sliced pepperoncini over the provolone cheese on each group of 4 rolls. Distribute the sliced pickled hot cherry peppers over the pepperoncini. Spoon about 1 tablespoon of marinara sauce over the peppers on each slider. -
Step 4
Place the top halves of the rolls gently over the assembled bottom halves. Generously brush the garlic butter and Italian seasoning mixture over the tops of all the assembled sliders. -
Step 5
Preheat oven to 375 degrees Fahrenheit (190 degrees Celsius). Place the baking sheet with the assembled sliders into the preheated oven and bake for 15-20 minutes, or until golden brown and the cheese is melted and bubbly. -
Step 6
Remove from oven, let cool for a few minutes, then slice into individual portions and serve immediately.
Important Information
Nutrition Facts (Per Serving)
It is important to consider this information as approximate and not to use it as definitive health advice.
Allergy Information
Please check ingredients for potential allergens and consult a health professional if in doubt.