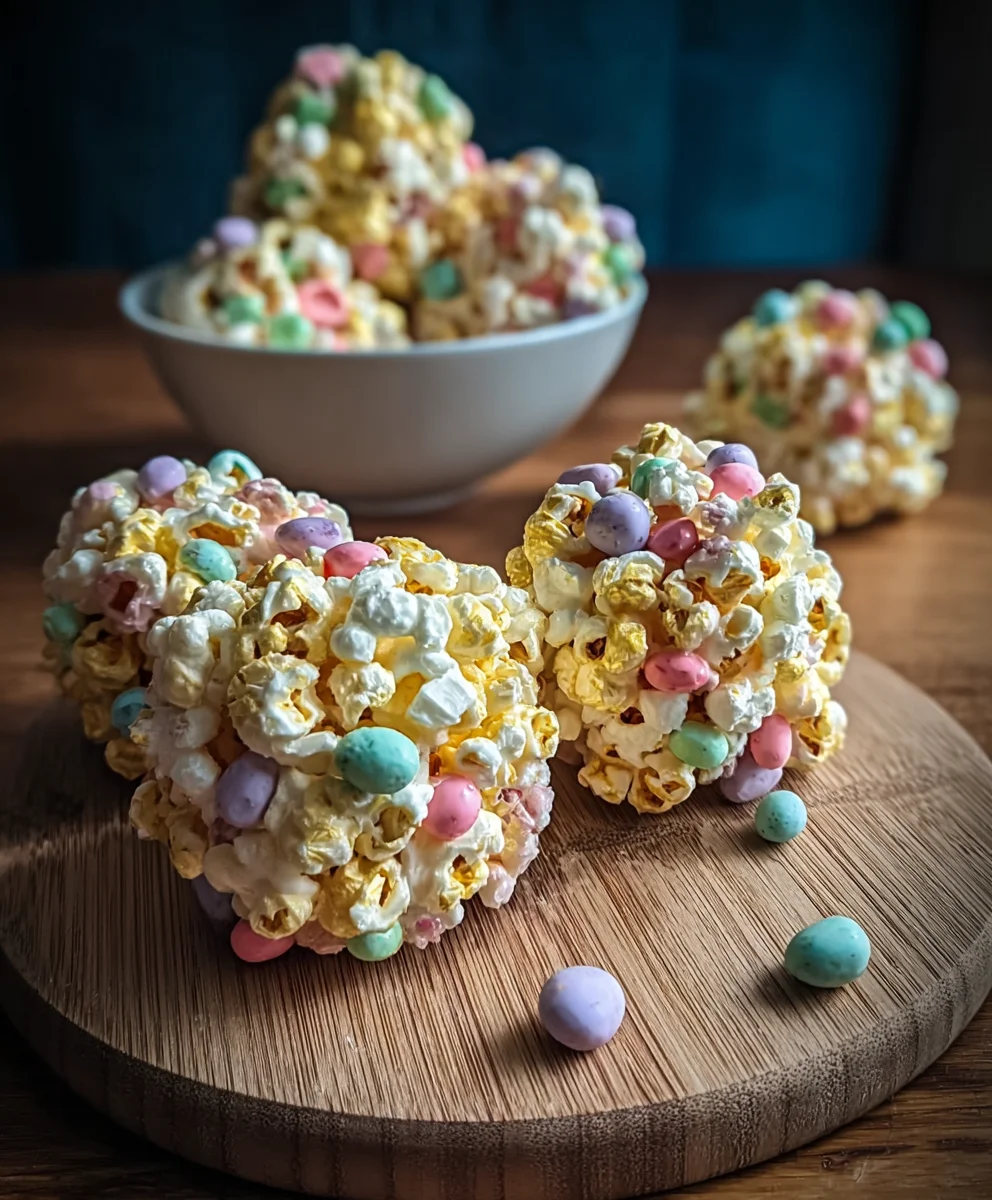
Easy Easter Popcorn Balls Recipe-Festive Fun
Easter Popcorn Balls are more than just a sweet treat; they’re a delightful centerpiece for any spring celebration. Imagin extracte a crunchy, chewy delight bursting with festive colors and flavors, capturing the very essence of Easter joy. What is it about these whimsical spheres that makes them so universally loved? Perhaps it’s the satisfying crunch, the gooey marshmallow embrace, or the sheer visual appeal that transforms a simple snack into a work of art. These aren’t your average popcorn balls. Our special recipe elevates this classic with a touch of magic, infusing each batch with vibrant Easter hues and a hint of spring freshness. We’re talking about a customizable experience, where you can tailor the colors and add-ins to perfectly match your Easter theme, creating edible decorations that are as beautiful as they are delicious. Get ready to bring a smile to every face with these enchanting Easter Popcorn Balls!
Ingredients:
- 8 cups popped popcorn
- 6 Peeps marshmallows (any color/flavor), cut into small pieces
- 3 tablespoons unsalted butter
- 1 bag (10 ounces) mini marshmallows
- 1 teaspoon vanilla extract
- Easter-themed sprinkles
- Edible glitter
- Small Easter candies
Preparing Your Workspace and Popcorn
Gathering Your Tools
Before we dive into the sticky goodness of creating these delightful Easter Popcorn Balls, it’s essential to have everything ready to go. This will make the process much smoother and less frantic, especially when working with melted marshmallows. You’ll need a large, heatproof bowl to mix everything in. A sturdy spoon or spatula is crucial for stirring. Have a baking sheet or a large plate lined with parchment paper or greased with a little butter. This is where your finished popcorn balls will cool. Also, have a small bowl ready with some butter or cooking spray for greasing your hands – this is key to preventing the marshmallow mixture from sticking to you! Make sure your popped popcorn is fresh and still warm, as this helps the marshmallows bind better. If your popcorn has been sitting out for a while, a quick minute or two in a warm oven (around 200°F or 95°C) can revive its crispness.
The Popcorn Base
Start with your 8 cups of popped popcorn. It’s best to use popcorn that has been freshly popped and is still warm. The residual heat helps the marshmallows adhere beautifully. If you popped it ahead of time, you can gently warm it in a low oven for a few minutes to bring back its crispness and warmth. Ensure any unpopped kernels have been removed; they can be a surprisingly hard surprise in your otherwise soft and chewy popcorn balls! You can do this by sifting the popcorn or picking them out by hand. This step is simple but crucial for the best texture and eating experience.
Melting the Marshmallows
Creating the Sticky Binder
In a large saucepan, combine the 3 tablespoons of unsalted butter and the 1 bag (10 ounces) of mini marshmallows. Place the saucepan over low to medium-low heat. It’s important to use low heat here. If the heat is too high, the marshmallows can scorch, which will affect the flavor and color of your popcorn balls. Stir the butter and marshmallows constantly with your spatula or spoon as they begin extract to melt. You’re looking for a smooth, gooey mixture with no lumps of marshmallow remaining. This will take several minutes, so patience is key. Once the mixture is completely melted and smooth, remove the saucepan from the heat. Stir in the 1 teaspoon of vanilla extract. The vanilla adds a wonderful depth of flavor that complements the sweetness of the marshmallows and the slight saltiness of the popcorn.
Assembling the Easter Popcorn Balls
Combining Ingredients
Immediately pour the melted marshmallow mixture over the prepared popcorn in your large bowl. This is where you’ll want to work quickly, as the marshmallow mixture will start to set as it cools. Using your greased spatula or spoon, gently fold the popcorn into the marshmallow mixture. You want to coat all of the popcorn evenly. The goal is to get a good distribution of the sticky binder throughout the popcorn. Don’t overmix, as this can break down the popcorn too much and make your balls denser than desired. Once the popcorn is mostly coated, it’s time to add those special Easter touches.
Incorporating the Easter Magic
Now for the fun part! Gently fold in the 6 Peeps marshmallows, which you’ve cut into small pieces. These colorful additions will not only add visual appeal with their bright Easter hues but also a delightful chewy texture to the inside of your popcorn balls. Be gentle when folding them in so they don’t completely disappear into the mixture. Next, add your Easter-themed sprinkles. Don’t be shy! Toss them in and give it one final gentle stir to distribute them throughout the mixture. The sprinkles will add pops of color and a festive crunch. If you’re using any small Easter candies, like jelly beans or pastel-colored candies, you can also add a handful at this stage and give it a quick fold. The goal is to incorporate these elements without breaking down the popcorn too much.
Shaping and Decorating
Forming the Balls
Lightly grease your hands with butter or cooking spray. This is a crucial step to prevent the sticky mixture fgin extract clinging to your skin. Scoop about a cup of the popcorn mixture at a time and gently form it into balls. You don’t need to pack them too tightly; a gentle squeeze is enough to hold them together. If the mixture becomes too sticky to handle, you can re-grease your hands. Work quickly and efficiently. As you form each ball, place it on the prepared baking sheet or plate. If the mixture starts to cool and harden too much, you can gently warm the entire bowl over a very low heat for a minute or two, stirring to loosen it up. Aim for balls that are roughly the size of a baseball, but you can adjust this to your preference.
The Finishing Touches
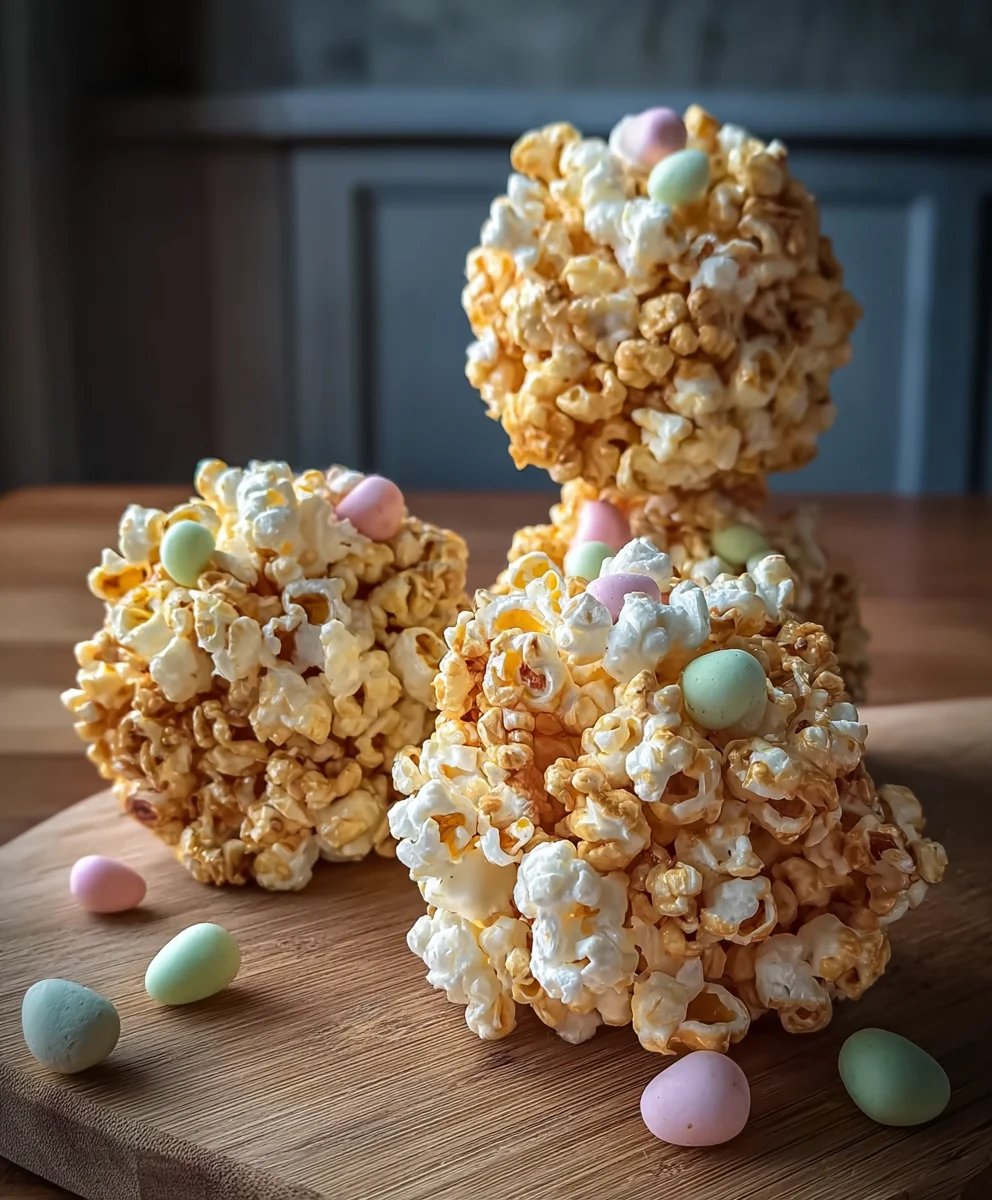
Once all your popcorn balls are formed and resting on your prepared surface, it’s time for the final flourish. While the popcorn balls are still slightly warm and sticky, lightly sprinkle them with additional Easter-themed sprinkles, edible glitter, and any small Easter candies you reserved. The residual warmth will help these decorations adhere. The edible glitter will give them a beautiful shimmer, reminiscent of spring dew, and the extra sprinkles and candies will enhance their festive appearance. Allow the Easter Popcorn Balls to cool completely at room temperature for about 30 minutes to an hour, or until they are firm and hold their shape. Once cooled, they are ready to be enjoyed or packaged as delightful Easter treats.
Conclusion:
There you have it – the ultimate guide to making delightful Easter Popcorn Balls! We’ve walked through each step, from popping your corn to the final decorative touches, ensuring you’ll create a treat that’s as beautiful as it is delicious. These festive popcorn balls are the perfect addition to any Easter celebration, bringin extractg smiles to faces of all ages. Don’t be afraid to get creative; these treats are incredibly versatile and a joy to customize.
Serve these Easter Popcorn Balls as a fun centerpiece on your dessert table, package them up as charming edible gifts for friends and family, or simply enjoy them as a sweet afternoon snack. For variations, consider adding a swirl of white chocolate drizzle or some colorful sprinkles for extra flair. You could also experiment with different extracts like vanilla or a hint of almond to change up the flavor profile.
We truly encourage you to give this recipe a try. It’s a rewarding and fun activity that yields fantastic results. Happy Easter and happy baking (or should we say, popping and molding)!
Frequently Asked Questions about Easter Popcorn Balls:
Q: How do I prevent my Easter Popcorn Balls from becoming too sticky while I’m making them?
A: Ensuring your hands are lightly greased with butter or cooking spray before shaping the popcorn balls is key. Also, working quickly while the mixture is still warm but cool enough to handle will help prevent excessive stickiness.
Q: Can I make Easter Popcorn Balls ahead of time for an event?
A: Absolutely! You can make these popcorn balls up to 2-3 days in advance. Store them individually wrapped in plastic wrap or in an airtight container at room temperature. Avoid refrigerating them, as this can make them hard.
Easy Easter Popcorn Balls-Festive Fun
A fun and easy recipe for festive Easter popcorn balls, perfect for a spring celebration. These colorful treats combine popcorn, melted marshmallows, Peeps, and decorative sprinkles for a delightful, no-bake snack.
Ingredients
-
8 cups popped popcorn
-
6 Peeps marshmallows (any color/flavor), cut into small pieces
-
3 tablespoons unsalted butter
-
1 bag (10 ounces) mini marshmallows
-
1 teaspoon vanilla extract
-
Easter-themed sprinkles
-
Edible glitter
-
Small Easter candies
Instructions
-
Step 1
Gather your tools: a large heatproof bowl, a sturdy spoon or spatula, a baking sheet lined with parchment paper or greased, and butter or cooking spray for greasing hands. Ensure popcorn is fresh and warm; gently warm in a low oven if needed. Remove unpopped kernels. -
Step 2
In a large saucepan over low to medium-low heat, melt 3 tablespoons of unsalted butter and 1 bag (10 ounces) of mini marshmallows, stirring constantly until smooth and completely melted. Remove from heat and stir in 1 teaspoon of vanilla extract. -
Step 3
Immediately pour the melted marshmallow mixture over the prepared popcorn in the large bowl. Gently fold the popcorn into the marshmallow mixture with a greased spatula or spoon until evenly coated. Do not overmix. -
Step 4
Gently fold in the 6 cut Peeps marshmallows, Easter-themed sprinkles, and any small Easter candies. Stir once more to distribute these festive additions. -
Step 5
Lightly grease your hands with butter or cooking spray. Scoop about a cup of the mixture at a time and gently form into balls. Place the formed balls on the prepared baking sheet. If the mixture becomes too sticky, re-grease your hands or gently warm the bowl over low heat. -
Step 6
While the popcorn balls are still slightly warm, lightly sprinkle them with additional Easter-themed sprinkles, edible glitter, and small Easter candies. Allow to cool completely at room temperature for 30-60 minutes until firm.
Important Information
Nutrition Facts (Per Serving)
It is important to consider this information as approximate and not to use it as definitive health advice.
Allergy Information
Please check ingredients for potential allergens and consult a health professional if in doubt.