Easy Milky Way Fudge Recipe – Delicious Chocolate Candy
Milky Way Fudge is more than just a sweet treat; it’s a nostalgic journey in every bite. If you’ve ever found yourself craving that perfect balance of chewy caramel, nougat, and rich chocolate, then this is the recipe for you. People adore Milky Way Fudge because it captures the essence of the beloved candy bar in a delightfully melt-in-your-mouth form, making it an instant crowd-pleaser at any gathering or a perfect indulgence for a quiet evening. What makes this particular Milky Way Fudge so special is its incredibly creamy texture and the way it perfectly replicates those iconic flavors without being overwhelmingly sweet. It’s a masterful blend of textures and tastes that will transport you straight back to childhood, or create brand new delicious memories.
Get ready to impress your friends and family with this incredible creation.
We’re diving into a world of chocolatey, caramelly goodness!
Ingredients:
- 3 cups (18 oz) semi-sweet chocolate chips
- 1 (14 oz) can sweetened condensed milk
- ¼ cup unsalted butter, cut into cubes
- 1 tsp vanilla extract
- 4 regular Milky Way bars, chopped into bite-sized pieces
- ¼ cup caramel sauce, for drizzling (optional)
Preparing Your Workspace
Before we begin extract making this delightful Milky Way Fudge, it’s essential to have everything ready. This “mise en place,” as the chefs call it, will ensure a smooth and stress-free cooking experience. Line an 8×8 inch baking pan with parchment paper, leaving some overhang on the sides. This overhang will act as handles, making it incredibly easy to lift the fudge out of the pan once it’s set. Make sure the parchment paper completely covers the bottom and sides of the pan to prevent sticking. Set this prepared pan aside. Also, have your chopped Milky Way bars and vanilla extract measured and within easy reach. This recipe comes together quite quickly once the melting prgin extractss begins, so being organized is key to perfect results.
Melting the Base
Step 1: Combine the Core Ingredients
In a medium, heavy-bottomed saucepan, combine the semi-sweet chocolate chips, the entire can of sweetened condensed milk, and the cubed unsalted butter. A heavy-bottomed saucepan is crucial here as it distributes heat more evenly, preventing the chocolate from scorching and developing a bitter taste. Place the saucepan over low heat. It’s really important to start with low heat and be patient. We are aiming to gently melt these ingredients together, not to cook them. Stir continuously with a heatproof spatula or wooden spoon. As you stir, you’ll notice the butter will melt first, followed by the chocolate chips. Keep stirring until everything is completely smooth and glossy. This process might take about 5 to 8 minutes, depending on your stove. Don’t rush this step; a smooth, well-melted base is the foundation of delicious fudge.
Step 2: Incorporating Flavor and Texture
Once the chocolate mixture is entirely smooth and free of any lumps, remove the saucepan from the heat. Immediately stir in the vanilla extract. Adding the vanilla off the heat helps preserve its delicate flavor, which can be lost if it’s overheated. Give it a good stir to ensure the vanilla is evenly distributed throughout the fudge base. The aroma of the vanilla mingling with the chocolate is already a wonderful sign of what’s to come. At this point, the mixture will be thick and luxurious.
Step 3: Adding the Milky Way Magic
Now comes the star of our Milky Way Fudge: the chopped Milky Way bars! Gently fold the chopped Milky Way pieces into the warm chocolate mixture. Use your spatula to fold them in, trying not to break them down too much. We want distinct chunks of the nougat, caramel, and chocolate from the candy bars distributed throughout the fudge. The warmth of the fudge will slightly soften the caramel within the Milky Way pieces, creating delightful pockets of gooeyness. Be thorough but gentle; the goal is an even distribution without turning the candy bars into a paste.
Setting and Finishing Touches
Step 4: Pouring and Smoothing the Fudge
Carefully pour the fudge mixture into the prepared 8×8 inch baking pan. Use your spatula to spread the fudge evenly into the corners of the pan. Try to get the surface as smooth as possible. If you’re using the optional caramel sauce, now is the time to add it. Drizzle the caramel sauce decoratively over the top of the fudge. You can use a spoon or a small piping bag to create swirls or lines. If you want to incorporate the caramel more, you can gently swirl it into the fudge with a toothpick or the tip of your spatula, but be careful not to overmix, as it could make the fudge streaky rather than having distinct ribbons.
Step 5: Chilling and Cutting the Fudge
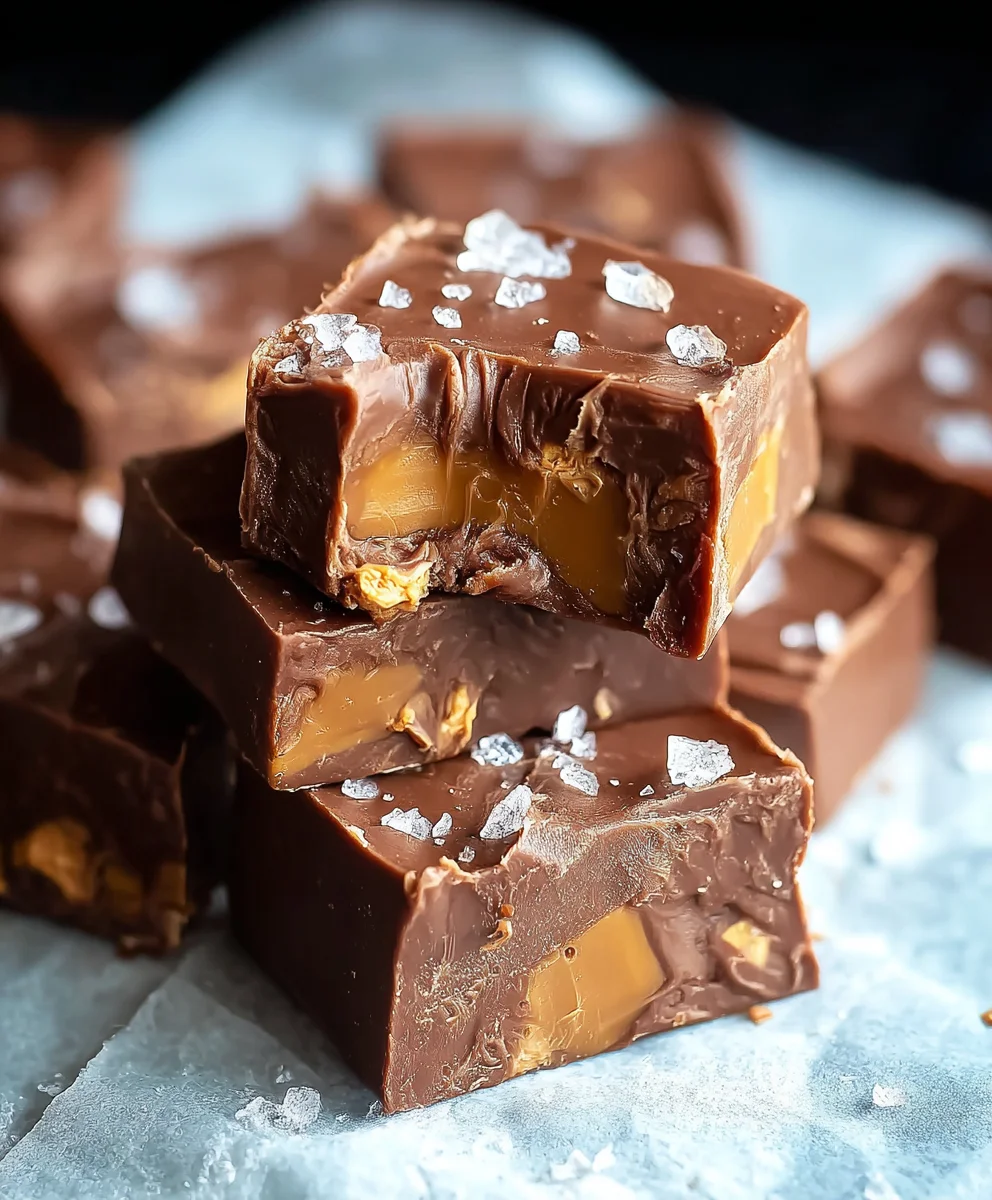
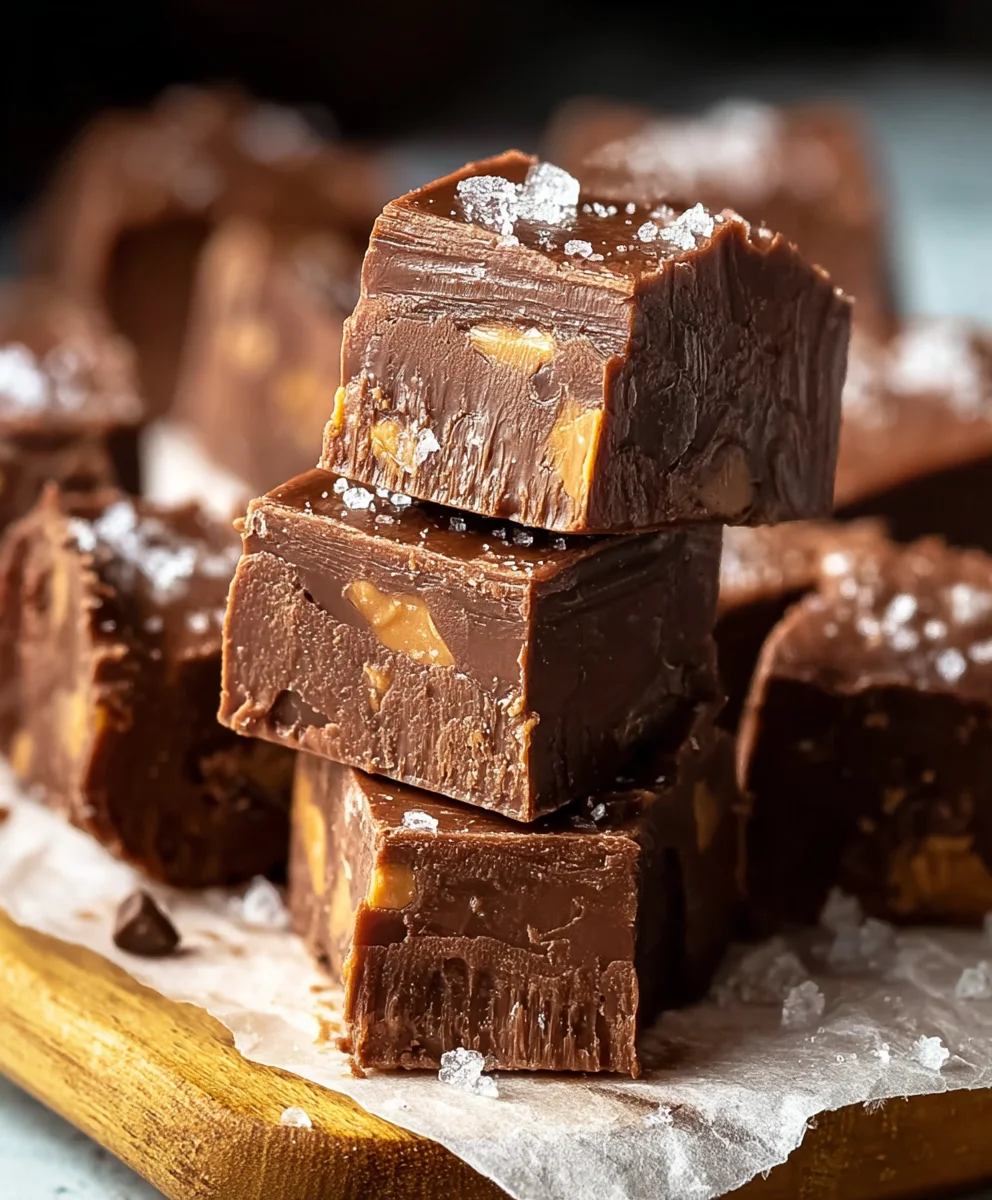
Once the fudge is spread and any decorative elements are added, place the pan in the refrigerator. Let the fudge chill for at least 2 to 3 hours, or until it is completely firm to the touch. The chilling process allows the fudge to set properly, making it easy to cut. Once the fudge is firm, use the parchment paper overhang to lift the entire slab out of the pan. Place it on a cutting board. Using a sharp knife, cut the fudge into bite-sized squares. For cleaner cuts, you can dip your knife in hot water and wipe it dry between cuts. If the fudge is too soft to cut cleanly, it may need a little more chilling time. Enjoy your homemade Milky Way Fudge!
Conclusion:
And there you have it – your very own delicious batch of Milky Way Fudge! We’ve walked through each step to create this incredibly rich and satisfying treat, perfect for satisfying any sweet craving. The combination of creamy caramel, chewy nougat, and smooth chocolate truly makes this Milky Way Fudge a showstopper. I encourage you to give this recipe a try; you might be surprised at how easy it is to achieve such impressive results right in your own kitchen. Don’t be afraid to experiment and make it your own!
For serving suggestions, this Milky Way Fudge is fantastic on its own, but it also pairs wonderfully with a glass of cold milk or a hot cup of coffee. You can cut it into small squares for a party or larger chunks for a personal indulgence. As for variations, feel free to add a sprinkle of sea salt on top before it sets for a delightful salty-sweet contrast, or even chop up a few extra Milky Way bars to fold into the mixture for an even more intense flavor and texture.
Frequently Asked Questions:
Can I make Milky Way Fudge ahead of time?
Absolutely! Milky Way Fudge is an excellent make-ahead treat. Once it’s fully set and cut, store it in an airtight container at room temperature for up to a week, or in the refrigerator for even longer. Just be sure to let it come to room temperature before serving for the best texture.
My fudge is too hard/soft. How can I fix it?
If your Milky Way Fudge is too hard, it might have been cooked slightly too long. Unfortunately, it’s difficult to “fix” this once set. However, if it’s too soft, it might be due to not reaching the correct temperature during cooking or not cooking long enough. You can try gently reheating it on very low heat, adding a little more chocolate or butter, and trying to set it again, but success isn’t guaranteed. Precision with temperature is key for perfect fudge!
Easy Milky Way Fudge Recipe
A simple and delicious fudge recipe featuring the classic flavors of Milky Way candy bars, with a smooth chocolate base and gooey caramel pockets.
Ingredients
-
3 cups (18 oz) semi-sweet chocolate chips
-
1 (14 oz) can sweetened condensed milk
-
1/4 cup unsalted butter, cut into cubes
-
1 tsp vanilla extract
-
4 regular Milky Way bars, chopped into bite-sized pieces
-
1/4 cup caramel sauce, for drizzling (optional)
Instructions
-
Step 1
Line an 8×8 inch baking pan with parchment paper, leaving overhang for easy removal. Set aside. -
Step 2
In a heavy-bottomed saucepan over low heat, combine semi-sweet chocolate chips, sweetened condensed milk, and butter. Stir continuously until smooth and glossy (5-8 minutes). -
Step 3
Remove from heat and stir in vanilla extract. -
Step 4
Gently fold in the chopped Milky Way bar pieces into the warm chocolate mixture. -
Step 5
Pour the fudge mixture into the prepared pan and spread evenly. Drizzle with caramel sauce if desired and swirl gently. -
Step 6
Chill in the refrigerator for at least 2-3 hours until firm. Lift fudge out using parchment paper, cut into bite-sized squares, and enjoy.
Important Information
Nutrition Facts (Per Serving)
It is important to consider this information as approximate and not to use it as definitive health advice.
Allergy Information
Please check ingredients for potential allergens and consult a health professional if in doubt.