Cheeseburger Sliders- Easy Crowd-Pleaser Recipe
Cheeseburger sliders are more than just a mini-meal; they’re a miniature explosion of pure, unadulterated comfort food joy. Imagin extracte biting into a perfectly seasoned, juicy beef patty, nestled between a soft, slightly sweet bun, all crowned with melted cheese that stretches with every delectable tug. It’s no wonder these delightful bites have captured the hearts (and stomachs!) of so many. Cheeseburger sliders offer the ultimate satisfaction of a classic cheeseburger experience, condensed into a perfectly portioned, incredibly addictive package. What makes them truly special is their versatility – perfect for game nights, impromptu gatherings, or simply when you crave that iconic burger flavor without the overwhelming heft. They are the ultimate crowd-pleaser, guaranteed to disappear faster than you can say “more, please!”
The Ultimate Guide to Homemade Cheeseburger Sliders
Perfect for Any Occasion
Ingredients:
- 1/2 cup mayonnaise
- 2 tablespoons ketchup
- 1 tablespoon yellow mustard
- 24 slider rolls (King’s Hawaiian recommended)
- 2 tablespoons olive oil
- 1 medium onion, finely diced (about 1 1/2 cups)
- 2 pounds lean ground beef
- 1 (1 ounce) package dry French Onion Soup Mix
- 1 tablespoon Steak Seasoning (Montreal Steak Seasoning recommended)
- 10 slices American Cheese
- 24 pickle slices
- 2 tablespoons butter, melted
- 1 tablespoon sesame seeds
Cheeseburger Sliders Preparation
The Sauce and the Beef
The first step in creating these irresistible Cheeseburger Sliders is to prepare our signature sauce and get our beef mixture ready. In a small bowl, combine the mayonnaise, ketchup, and yellow mustard. Whisk these ingredients together until they are thoroughly blended into a smooth, creamy sauce. This sauce is going to add a tangy and slightly sweet kick that perfectly complements the savory beef and the soft slider buns. Once mixed, cover the bowl and set it aside in the refrigerator to allow the flavors to meld. This is also a great time to get your vegetables prepped if you haven’t already. Finely dice your medium onion; aim for pieces small enough to distribute evenly throughout the beef mixture and cook down nicely.
Now, let’s move on to the star of the show: the ground beef. In a large bowl, add the 2 pounds of lean ground beef. Sprinkle the entire contents of the 1-ounce package of dry French Onion Soup Mix over the beef. This soup mix is a flavor powerhouse, bringin extractg an intense savory and oniony depth to our sliders. Next, add the 1 tablespoon of steak seasoning. The steak seasoning will add a robust, peppery, and garlicky layer of flavor that elevates the beef beyond a simple burger. Using your hands, gently but thoroughly mix the soup mix and steak seasoning into the ground beef. It’s important not to overwork the meat at this stage, as this can lead to tougher sliders. Just mix until everything is evenly distributed.
Forming and Cooking the Patties
With our beef mixture prepped, it’s time to form our slider patties. For 24 sliders, we’ll need to divide the meat into 24 equal portions. A good way to do this is to divide the entire mixture in half, then divide each half in half again, and so on, until you have roughly equal portions. Then, gently shape each portion into a small, thin patty, slightly wider than your slider rolls. Since these are sliders, we want them to be thin enough to cook quickly and fit perfectly within the buns. You can make them a uniform thickness to ensure even cooking.
Now, we’ll move to the stovetop. Heat the 2 tablespoons of olive oil in a large skillet or on a griddle over medium-high heat. Once the oil is shimmering, carefully place your slider patties into the hot skillet, working in batches if necessary to avoid overcrowding the pan. Overcrowding can steam the meat instead of searing it, which is not what we want for delicious sliders. Cook the patties for about 2-3 minutes per side, or until they are nicely browned and cooked through. The thinness of the patties means they will cook very quickly, so keep an eye on them.
Melting the Cheese and Assembling
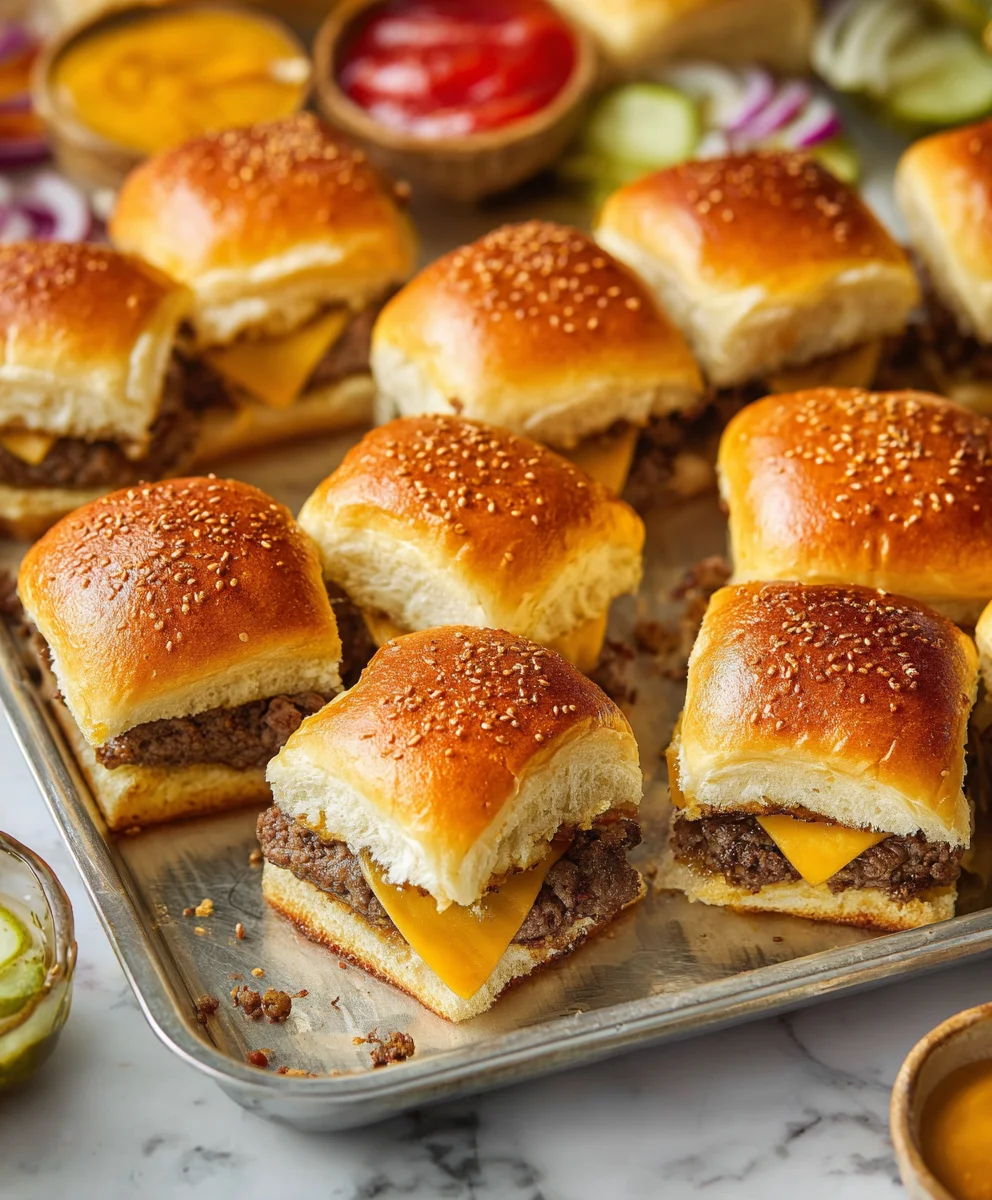
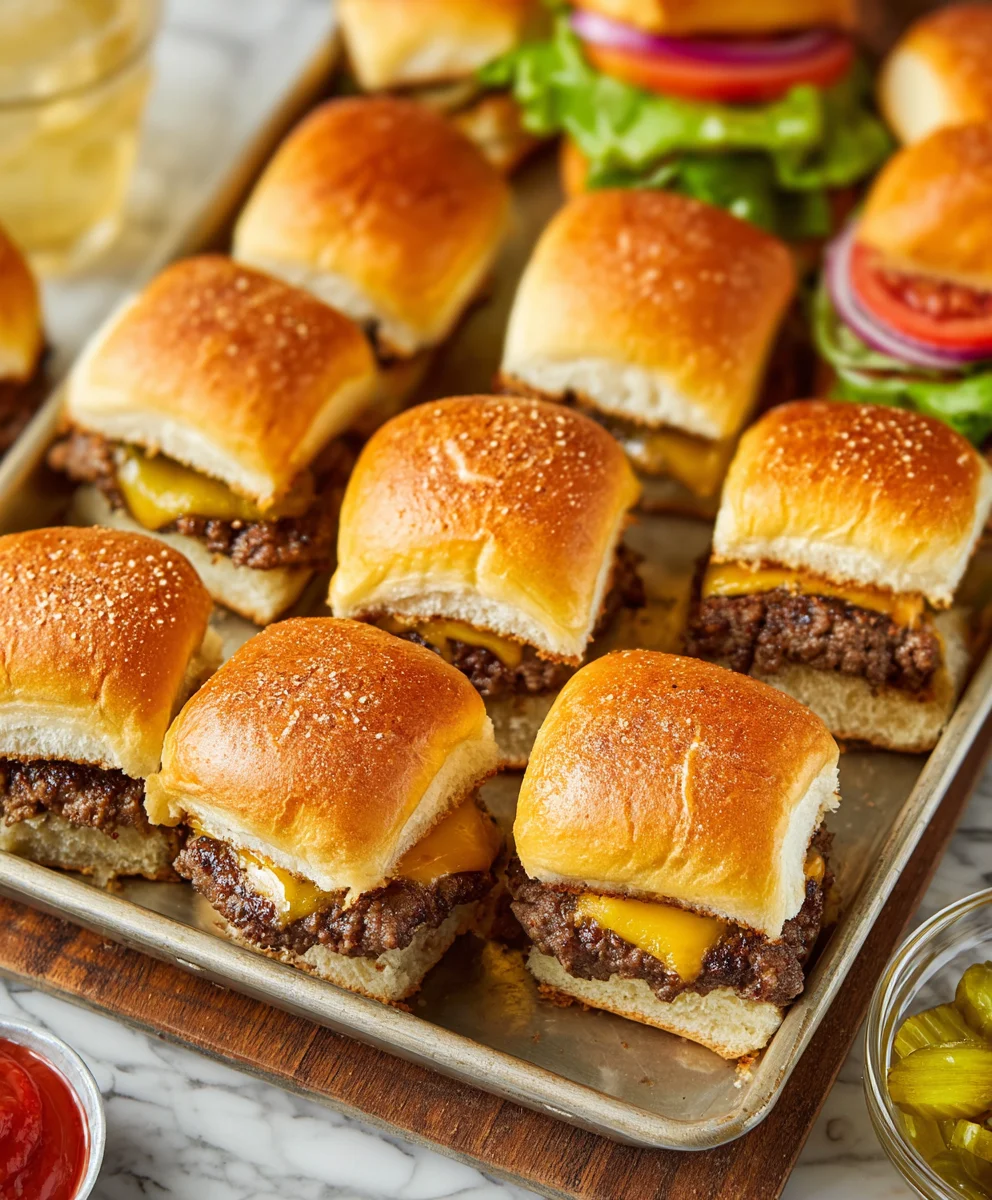
As the last batch of patties is finishing up, it’s time to add the cheese. For each cooked patty, place a slice of American cheese on top. Cover the skillet for about 30 seconds to a minute, or until the cheese is beautifully melted and gooey, draping over the edges of the patties. The melted cheese is essential for that classic cheeseburger experience and helps to bind everything together.
While the cheese is melting, prepare your slider rolls. Carefully slice each of the 24 slider rolls in half horizontally using a serrated knife. Arrange the bottom halves of the rolls on a baking sheet. Once the cheese is melted, carefully transfer the cheeseburger patties onto the bottom halves of the slider rolls. Place one cheesy patty onto each bottom roll half.
Toasting the Buns and Finishing Touches
This final step ensures our Cheeseburger Sliders have that perfect toasted texture and flavor. In a small bowl, melt the 2 tablespoons of butter. Brush the cut sides of the top halves of the slider rolls generously with the melted butter. Sprinkle the sesame seeds evenly over the buttered tops of the buns. Arrange the buttered and seeded top halves of the rolls over the cheesy patties on the baking sheet.
Place the baking sheet with the assembled sliders under a preheated broiler for 1-2 minutes, or until the tops of the buns are lightly golden brown and toasted. Watch them very closely as broilers can work quickly, and you don’t want them to burn. Once toasted, carefully remove the sliders from the oven.
Final Assembly and Serving
Now for the fun part – dressing your sliders! Take your reserved sauce and spread a generous amount onto the bottom half of each slider, over the patty. Then, place 1 pickle slice on top of the melted cheese on each slider. These pickle slices add a welcome crunch and a briny counterpoint to the richness of the cheeseburger.
Finally, place the toasted top bun halves onto each slider. You can serve these Cheeseburger Sliders immediately as a crowd-pleasing appetizer or a fun main course for a party or game day. They are best enjoyed warm when the cheese is still melty and the buns are perfectly toasted. Enjoy every bite of these miniature flavor bombs!
Conclusion:
And there you have it! Your very own batch of delicious Cheeseburger Sliders is ready to be devoured. We’ve walked through the simple steps to create these crowd-pleasing mini burgers, perfect for any occasion. Whether you’re hosting a game night, planning a backyard barbecue, or simply craving a fun and satisfying meal, these Cheeseburger Sliders are sure to be a hit.
These sliders are incredibly versatile. Serve them as is, or get creative with your toppings! Consider a dollop of your favorite sauce like a homemade aioli or a tangy BBQ sauce. For a bit of crunch, try adding some thinly sliced pickles or even a layer of crispy fried onions. If you’re feeling adventurous, you can even experiment with different cheeses beyond classic cheddar, like pepper jack for a little heat or Swiss for a nutty flavor. Don’t be afraid to swap out the slider buns for mini brioche rolls or even pretzel buns for an extra layer of deliciousness.
We hope you enjoy making and sharing these fantastic Cheeseburger Sliders. They’re a testament to how simple ingredients can create something truly special. So go ahead, get cooking, and let the deliciousness unfold!
Frequently Asked Questions:
Q1: Can I make the burger patties ahead of time for my Cheeseburger Sliders?
Yes, absolutely! You can form the burger patties for your Cheeseburger Sliders up to a day in advance. Store them in a single layer on a baking sheet lined with parchment paper, covered tightly with plastic wrap, and then refrigerated. This will save you time on the day you plan to cook and assemble your sliders.
Q2: What are some good vegetarian or vegan alternatives for Cheeseburger Sliders?
For vegetarian Cheeseburger Sliders, you can use pre-made veggie patties or create your own using ingredients like black beans, mushrooms, or lentils. For vegan options, opt for plant-based burger patties and use vegan cheese slices and a vegan-friendly sauce. Ensure your buns are also vegan.
Q3: How can I keep my Cheeseburger Sliders warm if I’m serving them at a party?
To keep your Cheeseburger Sliders warm for a party, you can place them in a slow cooker on the “warm” setting after assembling them. Alternatively, arrange them on a baking sheet and keep them in a low oven (around 200°F or 90°C). Avoid covering them too tightly, as this can make the buns soggy.
Cheeseburger Sliders- Easy Crowd-Pleaser Recipe
These Cheeseburger Sliders are an easy and delicious crowd-pleaser, perfect for parties, game days, or any casual gathering. Featuring perfectly seasoned beef patties, melted American cheese, and a tangy homemade sauce, all served on soft slider buns.
Ingredients
-
1/2 cup mayonnaise
-
2 tablespoons ketchup
-
1 tablespoon yellow mustard
-
24 slider rolls (King’s Hawaiian recommended)
-
2 tablespoons olive oil
-
1 medium onion, finely diced (about 1 1/2 cups)
-
2 pounds lean ground beef
-
1 (1 ounce) package dry French Onion Soup Mix
-
1 tablespoon Steak Seasoning (Montreal Steak Seasoning recommended)
-
10 slices American Cheese
-
24 pickle slices
-
2 tablespoons butter, melted
-
1 tablespoon sesame seeds
Instructions
-
Step 1
Prepare the sauce by combining mayonnaise, ketchup, and yellow mustard in a small bowl. Whisk until blended, cover, and refrigerate. Finely dice the onion. -
Step 2
In a large bowl, combine lean ground beef, dry French Onion Soup Mix, and steak seasoning. Gently mix with hands until evenly distributed, avoiding overworking the meat. -
Step 3
Divide the beef mixture into 24 equal portions and gently shape each into a small, thin patty, slightly wider than the slider rolls. -
Step 4
Heat olive oil in a large skillet or on a griddle over medium-high heat. Cook patties for 2-3 minutes per side until browned and cooked through. Place a slice of American cheese on each patty during the last minute of cooking and cover to melt. -
Step 5
While cheese is melting, slice slider rolls in half horizontally. Arrange bottom halves on a baking sheet. Place cheesy patties onto the bottom roll halves. -
Step 6
Melt butter and brush the cut sides of the top halves of the slider rolls. Sprinkle with sesame seeds. Place the buttered and seeded top halves over the patties on the baking sheet. -
Step 7
Broil the assembled sliders for 1-2 minutes, watching closely until the tops of the buns are lightly golden brown and toasted. -
Step 8
Spread a generous amount of the reserved sauce onto the bottom half of each slider, over the patty. Place one pickle slice on top of the melted cheese. -
Step 9
Finally, place the toasted top bun halves onto each slider. Serve immediately.
Important Information
Nutrition Facts (Per Serving)
It is important to consider this information as approximate and not to use it as definitive health advice.
Allergy Information
Please check ingredients for potential allergens and consult a health professional if in doubt.