Buttery Garlic Pizza – Easy & Delicious Recipe
Buttery garlic pizza is more than just a meal; it’s an experience. It’s that irresistible aroma that fills your kitchen, promising pure comfort and unadulterated deliciousness. We all have those go-to dishes that just hit the spot, and for so many of us, a perfectly executed buttery garlic pizza reigns supreme. What is it about this seemingly simple combination that has us hooked? It’s the symphony of flavors: the rich, melt-in-your-mouth butter mingling with the pungent warmth of garlic, all cradling a perfectly crisp crust. This isn’t your average pizza; this is a flavor revelation, a testament to the magic that happens when simple ingredients are treated with love and respect. Prepare to fall head over heels for this incredibly satisfying buttery garlic pizza.
Why You’ll Love This Recipe
Get ready for a flavor explosion!
Buttery Garlic Pizza
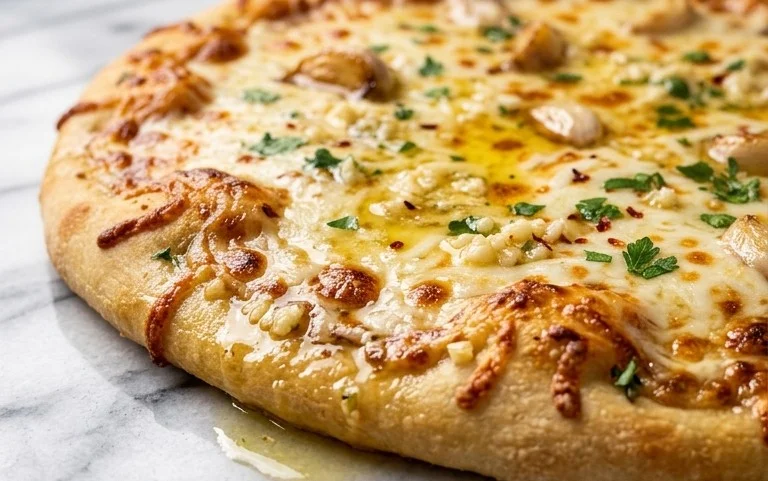
This Buttery Garlic Pizza is an absolute dream. It’s incredibly simple to make, especially when you start with good quality artisan pizza dough, but the flavor payoff is huge. Think of it as a super-elevated garlic bread, but in pizza form. The combination of melted butter infused with fragrant garlic, fresh herbs, and a touch of heat is simply irresistible. It’s perfect as an appetizer, a light lunch, or even as a side dish to your favorite pasta. Let’s get started on creating this flavor bomb!
Ingredients:
Preparing the Garlic Herb Butter
The magic of this pizza lies in its incredibly flavorful garlic herb butter. This isn’t just melted butter; it’s an infusion of aromatic ingredients that will coat every bite of your pizza with deliciousness. It’s so good, you’ll want to lick the spoon clean!
1. Melt the Butter and Infuse the Garlic: In a small saucepan or a microwave-safe bowl, melt the entire stick of salted butter over low heat or in short intervals in the microwave. Once the butter is melted, add the 3 chopped garlic cloves. Let the garlic steep in the warm butter for at least 10-15 minutes. This is a crucial step for extracting the maximum garlic flavor. The longer the garlic sits in the warm butter, the more potent the garlic essence will become. If you’re short on time, you can gently simmer the butter and garlic over very low heat for about 5 minutes, but be careful not to burn the garlic.
2. Add the Fresh Herbs and Seasonings: After the garlic has had time to infuse, add the minced green onion, minced rosemary, and fresh thyme to the melted butter. Stir everything together well. You’ll immediately notice the beautiful aroma of the fresh herbs mingling with the garlic. Now, it’s time to season. Add a generous pinch of flaky salt and some freshly ground black pepper. For a little kick, sprinkle in some red pepper flakes to your liking. Start with a small amount, as you can always add more later if you prefer a spicier pizza. Stir again to ensure all the seasonings are evenly distributed throughout the buttery mixture.
Assembling and Baking the Pizza
Once your aromatic garlic herb butter is ready, it’s time to transform your pizza dough into a culinary masterpiece. The key here is to get a good distribution of the butter and to ensure your oven is nice and hot for that perfect pizza crust.
3. Preheat Your Oven and Prepare Your Dough: Preheat your oven to its highest setting, typically between 475°F and 500°F (245°C – 260°C). If you have a pizza stone or baking steel, place it in the oven while it preheats. This will help create a beautifully crispy crust. While the oven is heating up, take your artisan pizza dough balls and let them come to room temperature for about 20-30 minutes. This makes them much easier to stretch. Lightly flour your work surface and your hands, and gently stretch each dough ball into your desired pizza shape, either round or a rustic oblong. Avoid overworking the dough. If it springs back, let it rest for a few minutes before continuing to stretch.
4. Apply the Garlic Herb Butter and Toppings: Once your dough is stretched, carefully transfer it to a piece of parchment paper or a lightly floured pizza peel. Now, it’s time to generously brush the garlic herb butter all over the surface of the pizza dough. Make sure to get it right to the edges of the crust. This butter will not only flavor the crust but also help it to become golden brown and crispy. Don’t be shy with the butter; it’s what makes this pizza so special. If you like, you can reserve a tablespoon or two of the butter to brush on the crust again after baking.
5. Bake to Golden Perfection: Carefully slide your pizza (with the parchment paper if using) onto the preheated pizza stone or baking steel in the oven. Bake for approximately 8-12 minutes, or until the crust is golden brown and the cheese (if you choose to add any – this pizza is fantastic on its own or with just a sprinkle of parmesan) is bubbly and melted. Keep an eye on it, as oven temperatures can vary. The butter will sizzle and bubble, and the garlic and herbs will become incredibly fragrant. The goal is a perfectly cooked, slightly charred crust and a beautifully infused butter base.
Finishing Touches
The final steps are all about adding that fresh, vibrant finish that elevates this pizza from delicious to truly spectacular. These simple additions make all the difference.
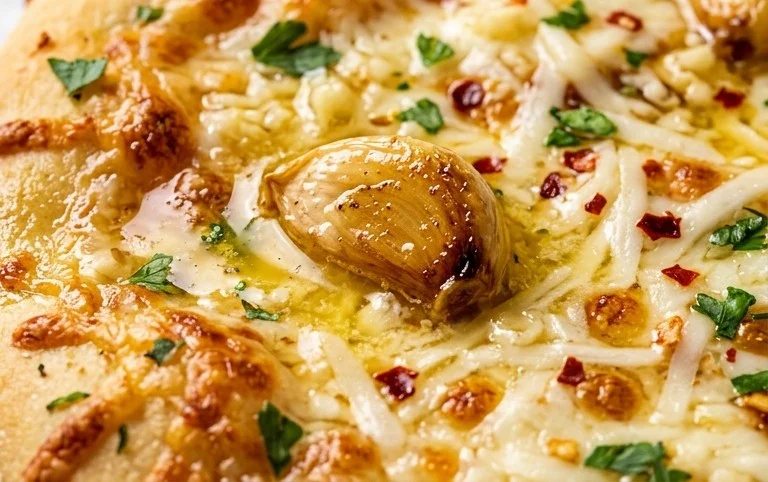
6. Garnish and Serve: Once the pizza is out of the oven, immediately sprinkle the minced chives over the hot pizza. The residual heat will help to release their fresh oniony flavor. If you reserved any of the garlic herb butter, you can brush a little more onto the hot crust now for an extra layer of richness. Finish with a final sprinkle of flaky salt and a grind of fresh black pepper, and a few more red pepper flakes if you desire more heat. Let the pizza cool for just a minute or two before slicing and serving. This Buttery Garlic Pizza is best enjoyed warm, allowing all those incredible flavors to shine through. Enjoy every single delicious bite!
Conclusion:
There you have it! This buttery garlic pizza recipe is a true winner, offering an explosion of flavor that’s both comforting and incredibly satisfying. The rich butter, pungent garlic, and the satisfying chew of the pizza crust create a harmonious bite that’s simply divine. It’s wonderfully versatile, making it perfect for a quick weeknight dinner, a fun appetizer for gatherings, or even a delicious side dish to your favorite pasta. Don’t be afraid to get creative with your toppings; this base is an excellent canvas for your culinary imagin extractation!
I truly encourage you to give this buttery garlic pizza a try. It’s surprisingly simple to make, and the results are absolutely worth it. Prepare to impress yourself and anyone you share it with!
Frequently Asked Questions:
Can I make the dough from scratch?
Absolutely! While using store-bought dough is convenient, making your own pizza dough will elevate this buttery garlic pizza to another level. Just follow your favorite pizza dough recipe and then top it with the garlic butter mixture and cheese.
What are some other topping ideas?
The possibilities are endless! For a savory twist, try adding caramelized onions, roasted red peppers, or a sprinkle of fresh rosemary. For a bit of heat, a pinch of red pepper flakes is fantastic. You could also add cooked mushrooms or even some thinly sliced beef prosciutto after baking for an extra layer of flavor.
How can I make this recipe dairy-free?
To make this buttery garlic pizza dairy-free, you can substitute the butter with a good quality vegan butter alternative. For the cheese, opt for your favorite shredded vegan mozzarella or a blend of vegan cheeses that melt well.
Buttery Garlic Pizza
A simple yet flavorful pizza featuring a rich buttery garlic sauce, fresh herbs, and a hint of spice.
Ingredients
-
1 recipe artisan pizza dough (2 dough balls)
-
1 stick salted butter
-
3 garlic cloves, chopped
-
2 tbsp minced green onion
-
1 tbsp minced rosemary
-
1 tbsp fresh thyme
-
flaky salt
-
freshly ground black pepper
-
red pepper flakes, to taste
-
2 tbsp minced chives
Instructions
-
Step 1
Preheat your oven and pizza stone or baking sheet according to pizza dough instructions, typically around 450-500°F (232-260°C). -
Step 2
In a small saucepan over medium-low heat, melt the salted butter. Add the chopped garlic and cook for about 2-3 minutes until fragrant, being careful not to burn it. -
Step 3
Stir in the minced green onion, minced rosemary, and fresh thyme into the melted butter and garlic mixture. Cook for another minute until herbs are fragrant. Season with flaky salt and freshly ground black pepper. -
Step 4
Stretch or roll out each pizza dough ball to your desired thickness and shape on a lightly floured surface or parchment paper. -
Step 5
Spread the buttery garlic herb mixture evenly over the surface of each pizza dough, leaving a small border for the crust. Sprinkle with red pepper flakes to taste. -
Step 6
Carefully transfer the pizzas to the preheated oven. Bake for 10-12 minutes, or until the crust is golden brown and the cheese (if using, not listed in original ingredients) is melted and bubbly. -
Step 7
Remove pizzas from the oven and sprinkle with minced chives before slicing and serving.
Important Information
Nutrition Facts (Per Serving)
It is important to consider this information as approximate and not to use it as definitive health advice.
Allergy Information
Please check ingredients for potential allergens and consult a health professional if in doubt.