Easy No-Bake Mint Chocolate Chip Cheesecake Recipe
No Bake Mint Chocolate Chip Cheesecake. Oh, how I adore this dessert! It’s the ultimate treat for when a serious craving strikes, but the thought of firing up the oven feels like too much effort. This No Bake Mint Chocolate Chip Cheesecake strikes that perfect balance: lusciously creamy, wonderfully refreshing from the mint, and delightfully studded with those satisfying little pops of chocolate. It’s no wonder this particular flavor combination is so beloved. The cool mint cuts through the rich sweetness of the cheesecake, creating a flavor profile that’s both sophisticated and utterly comforting. What truly sets this No Bake Mint Chocolate Chip Cheesecake apart is its effortless elegance. You get all the decadence of a classic cheesecake without any of the fuss, making it a guaranteed crowd-pleaser for any occasion, or simply a well-deserved indulgence for yourself.
No Bake Mint Chocolate Chip Cheesecake
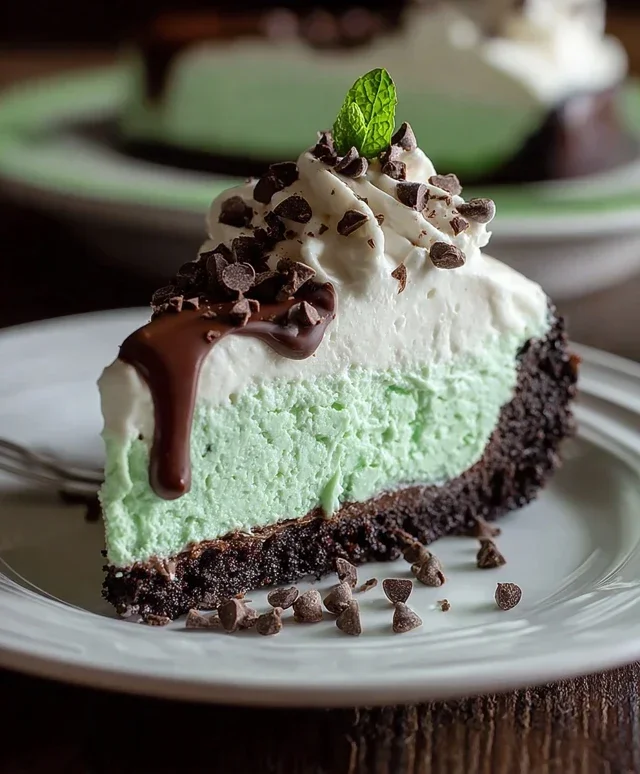
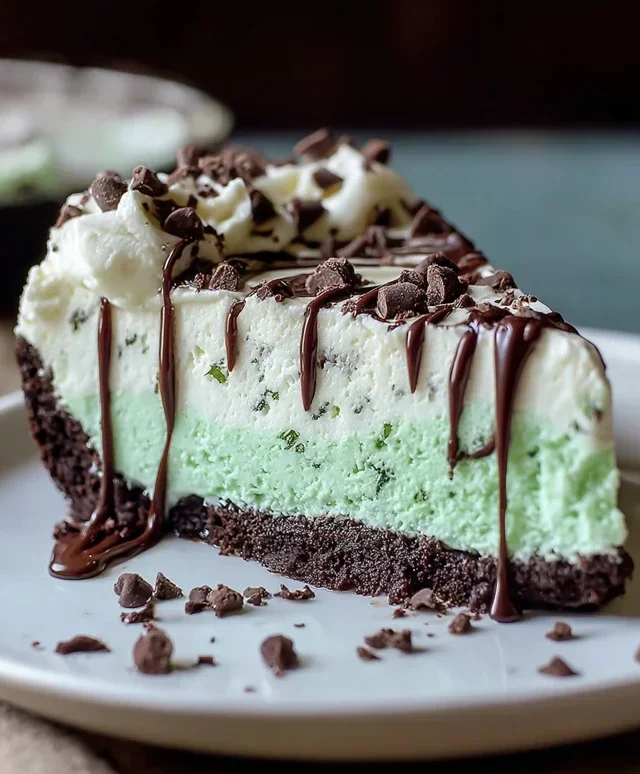
There’s something incredibly satisfying about a perfectly creamy, decadently rich cheesecake. And when you add in the refreshing zing of mint and the delightful crunch of chocolate chips, you’ve got a dessert masterpiece on your hands. The best part? This incredible Mint Chocolate Chip Cheesecake requires absolutely no baking! That’s right, no oven, no fuss, just pure, unadulterated deliciousness ready to be devoured. This recipe is perfect for those hot summer days when you want a show-stopping dessert without heating up your kitchen, or anytime you’re craving a treat that’s both impressive and surprisingly easy to make. The combination of the crisp Oreo crust, the smooth, cool mint-infused cheesecake filling, and those delightful bursts of chocolate are truly a match made in dessert heaven.
Ingredients:
Preparation
The journey to this no-bake wonder begin extracts with creating a fantastic foundation. A classic Oreo crust provides the perfect contrast to the creamy filling, and it’s so simple to put together.
Creating the Oreo Crust
Making the Creamy Cheesecake Filling
Assembling and Chilling Your Cheesecake
Conclusion:
You’ve now got the blueprint for a truly decadent and delightfully easy No Bake Mint Chocolate Chip Cheesecake! This recipe is a winner because it delivers all the creamy, dreamy cheesecake goodness you crave without ever turning on the oven. The refreshing mint flavor perfectly complements the rich chocolate chips, creating a symphony of taste and texture that’s simply irresistible. It’s the perfect dessert for any occasion, from casual gatherings to more formal celebrations, offering a guaranteed crowd-pleaser that requires minimal effort. Imagin extracte presenting this beautiful, chilled dessert at your next potluck or family dinner – it’s sure to be a showstopper!
For serving, consider a sprinkle of extra chocolate chips or a swirl of whipped cream. A few fresh mint leaves add a touch of elegance. Don’t be afraid to get creative with variations! You could swap the chocolate chips for dark chocolate chunks, white chocolate chips, or even mini chocolate-covered pretzels for a salty-sweet twist. If mint isn’t your favorite, try a different extract like vanilla or a touch of almond. I highly encourage you to give this No Bake Mint Chocolate Chip Cheesecake a try – you won’t regret the simple process and the incredibly rewarding outcome!
Frequently Asked Questions:
Can I make this cheesecake ahead of time?
Absolutely! This No Bake Mint Chocolate Chip Cheesecake is best made at least 4-6 hours in advance, or even the day before. This allows ample time for it to chill and set properly, ensuring a firm, sliceable texture. It will keep well in the refrigerator for up to 3 days.
What kind of cream cheese should I use?
For the best results, use full-fat, block-style cream cheese. It’s crucial that your cream cheese is softened to room temperature. This ensures a smooth, lump-free filling. Avoid using whipped cream cheese or low-fat versions, as they can affect the texture and setting capabilities of the cheesecake.
How can I ensure my cheesecake doesn’t have a watery texture?
The key to a firm No Bake Mint Chocolate Chip Cheesecake is to ensure your cream cheese and heavy cream are properly chilled and to beat them until stiff peaks form. Don’t overmix once the chocolate chips are added. Also, be sure to allow adequate chilling time in the refrigerator for it to set completely.
No Bake Mint Chocolate Chip Cheesecake
A refreshing and easy no-bake cheesecake with a chocolate cookie crust, creamy mint-infused filling, and plenty of chocolate chips.
Ingredients
-
30 Oreo cookies, whole
-
7 tablespoons unsalted butter, melted
-
24 ounces cream cheese, softened (3 packages)
-
1/2 cup granulated sugar
-
3/4 cup powdered sugar
-
1 teaspoon vanilla extract
-
1/4 teaspoon peppermint extract (or more to taste)
-
1 1/4 cups heavy whipping cream
-
Green gel food coloring, as needed
-
1/2 cup mini chocolate chips, plus extra for topping if desired
Instructions
-
Step 1
Crush Oreo cookies into fine crumbs. Mix with melted butter until combined. Press mixture evenly into the bottom and up the sides of a 9-inch pie plate or springform pan. -
Step 2
In a large bowl, beat softened cream cheese until smooth. Gradually beat in granulated sugar and powdered sugar until well combined and no lumps remain. -
Step 3
Stir in vanilla extract and peppermint extract. Add green gel food coloring, a drop at a time, until desired mint green color is achieved. -
Step 4
In a separate bowl, whip heavy whipping cream until stiff peaks form. Gently fold the whipped cream into the cream cheese mixture until fully incorporated and no streaks remain. -
Step 5
Fold in 1/2 cup of mini chocolate chips. Pour the cheesecake filling over the prepared Oreo crust and spread evenly. -
Step 6
Chill the cheesecake in the refrigerator for at least 4 hours, or until firm. Garnish with extra mini chocolate chips if desired before serving.
Important Information
Nutrition Facts (Per Serving)
It is important to consider this information as approximate and not to use it as definitive health advice.
Allergy Information
Please check ingredients for potential allergens and consult a health professional if in doubt.